블렌더 애드온 Ucupaint를 이용해서 컬러 텍스쳐 레이어를 만들어서 표현합니다.
기본 Ucupaint Material Node를 설정하고,

Metalic의 값을 올려봅니다. 표면이 거친, 메탈 느낌입니다.
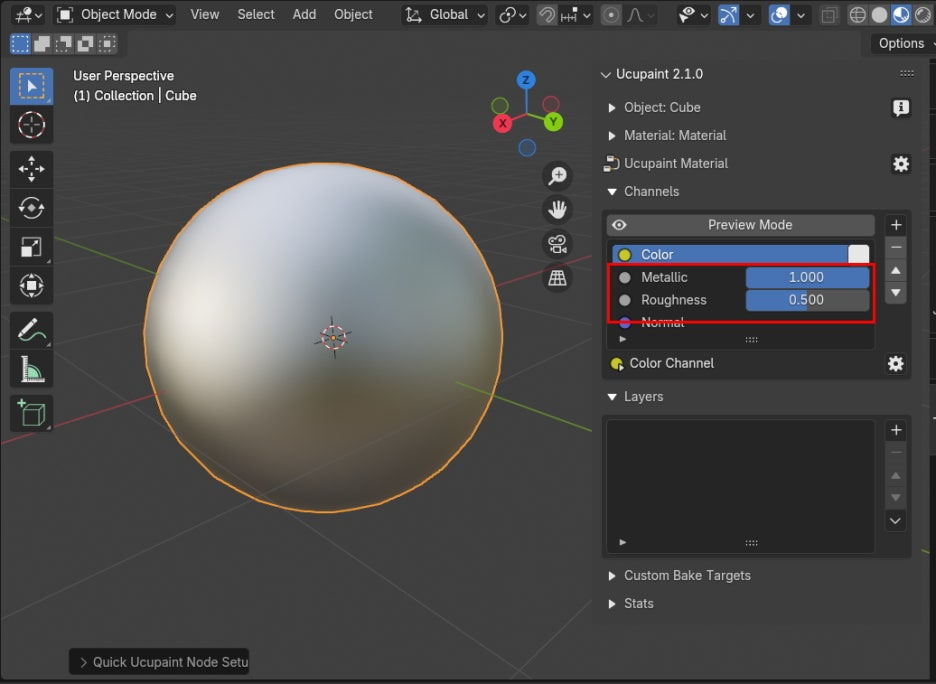
Metalic 1, Roughness값을 0으로 하면, 표면이 매우 매끈한 상태가 됩니다. 주위가 반사되는 표면이 매끈한 메탈재질.

Metalic 과 Roughness가 0 상태로 하면, 당구공 같은 느낌입니다.

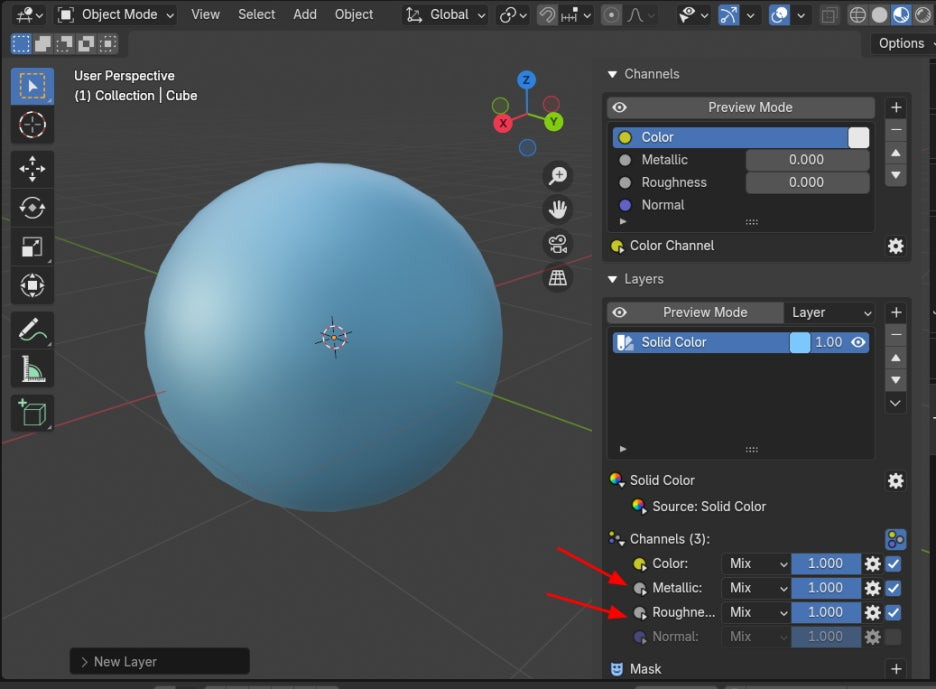
이제 Layers를 추가해 봅니다. 기본으로 Solid Color를 선택합니다.
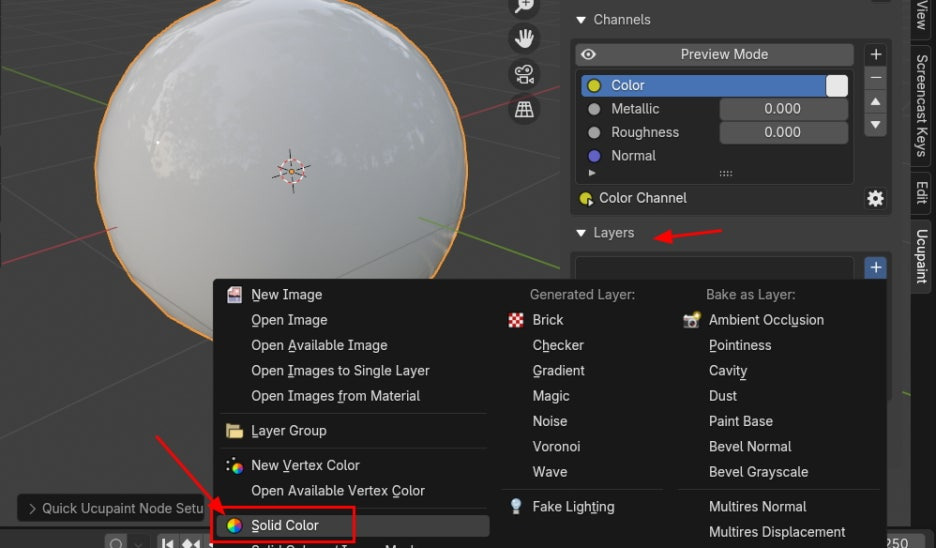
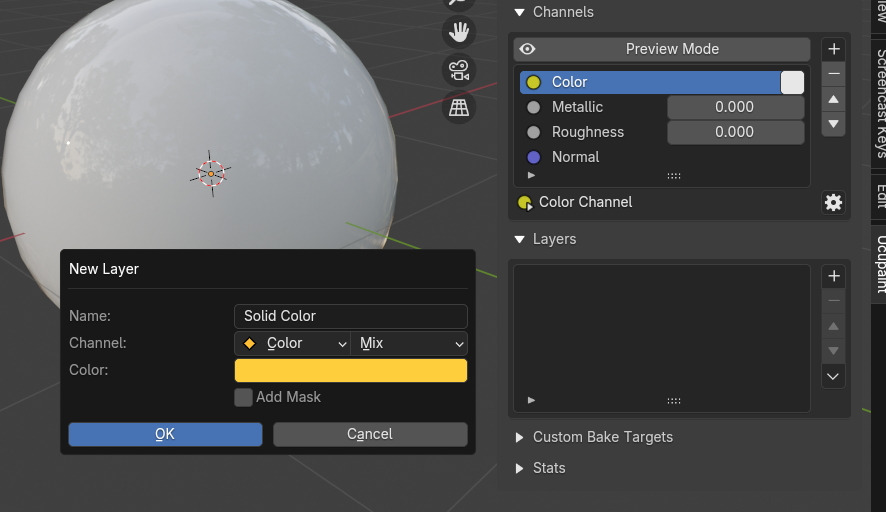
컬러를 Yellow로 해보고요,(나중에 바꿀 수 있습니다.) 생성!
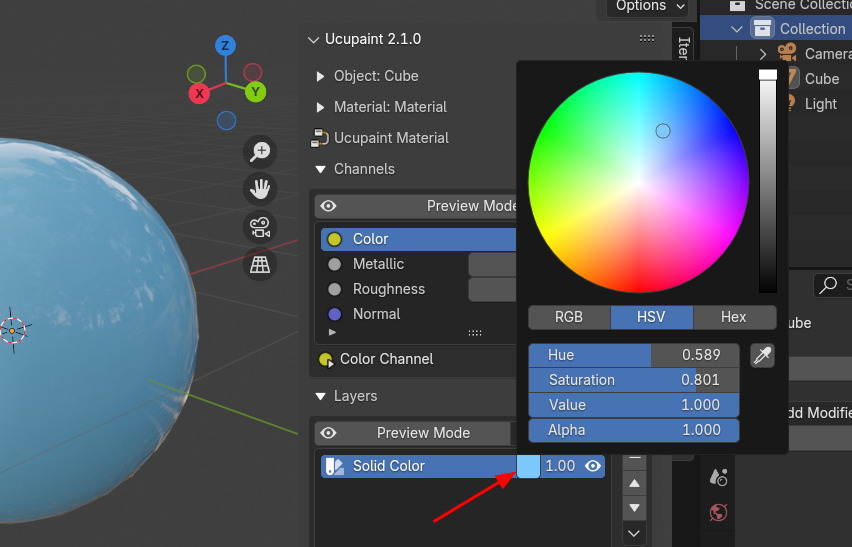
Layers에 Solid Color 옆에 컬러 사각을 클릭해서 바꿀수 있습니다.
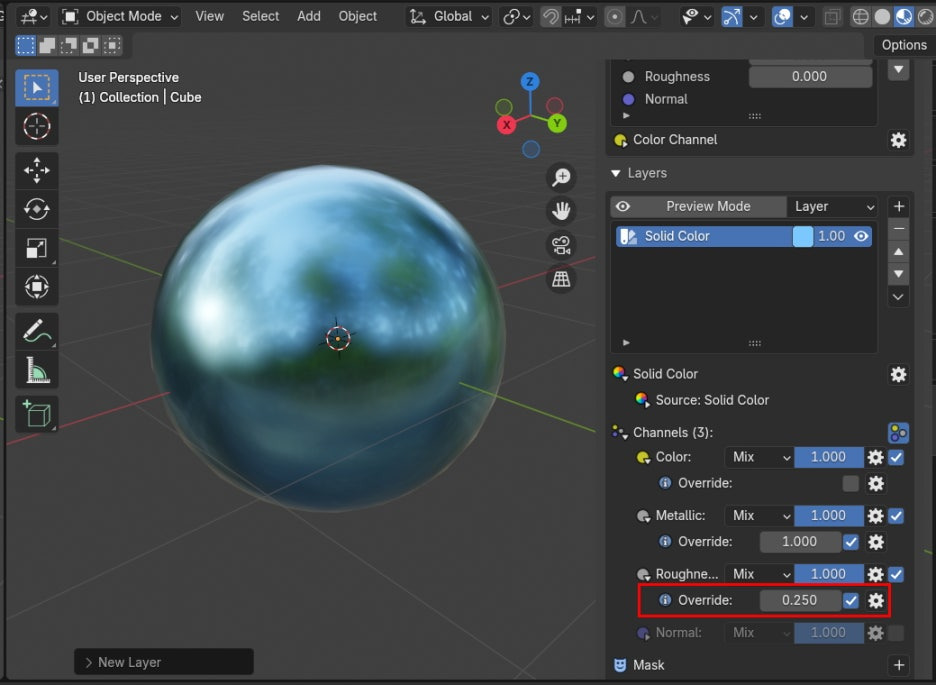
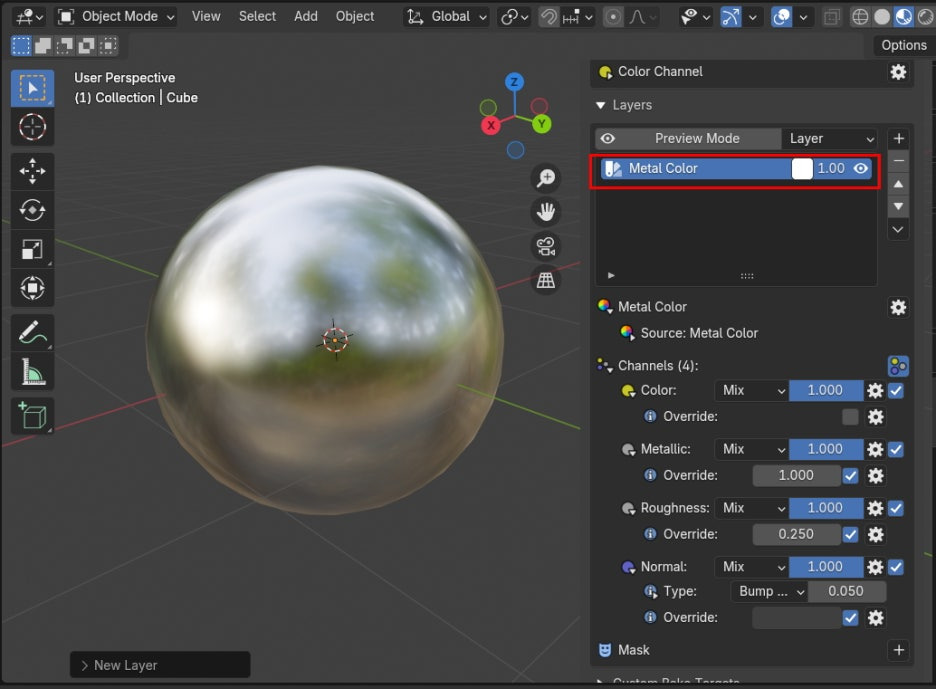
아래, Channels 에, 기본은 Color만 켜져 있었는데, Metalic 과 Roughness 를 다 켜줍니다.
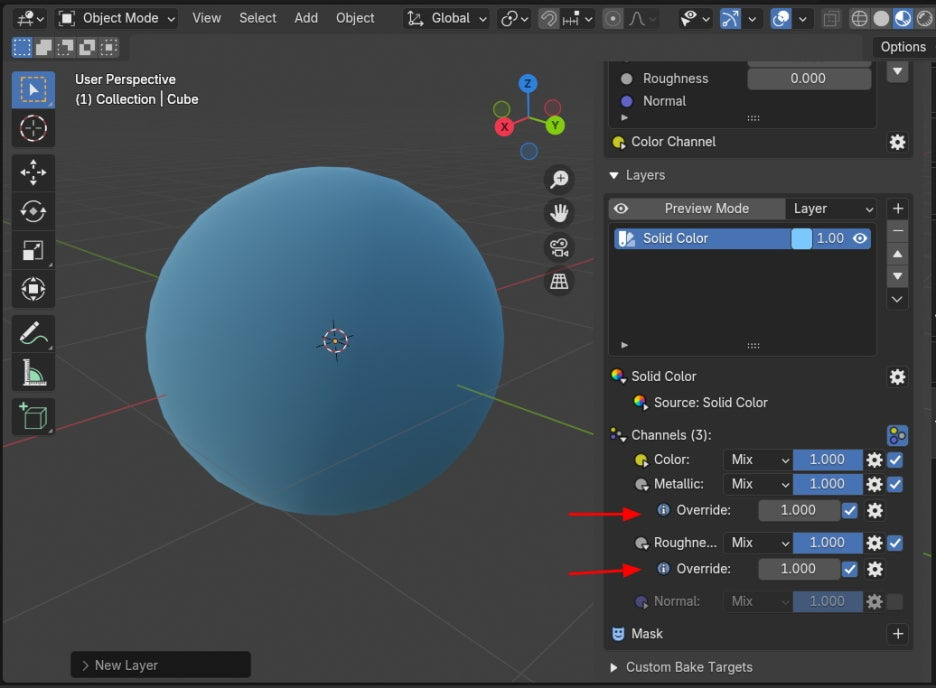
비어 있는 Override도 활성화 해줍니다. Metalic과 Roughness 를 활성화 하면 숫자 1이 등장합니다.
특히 Roughness 가 1이면, 최고의 거친 표면이겠지요. 광택 1도 없는....
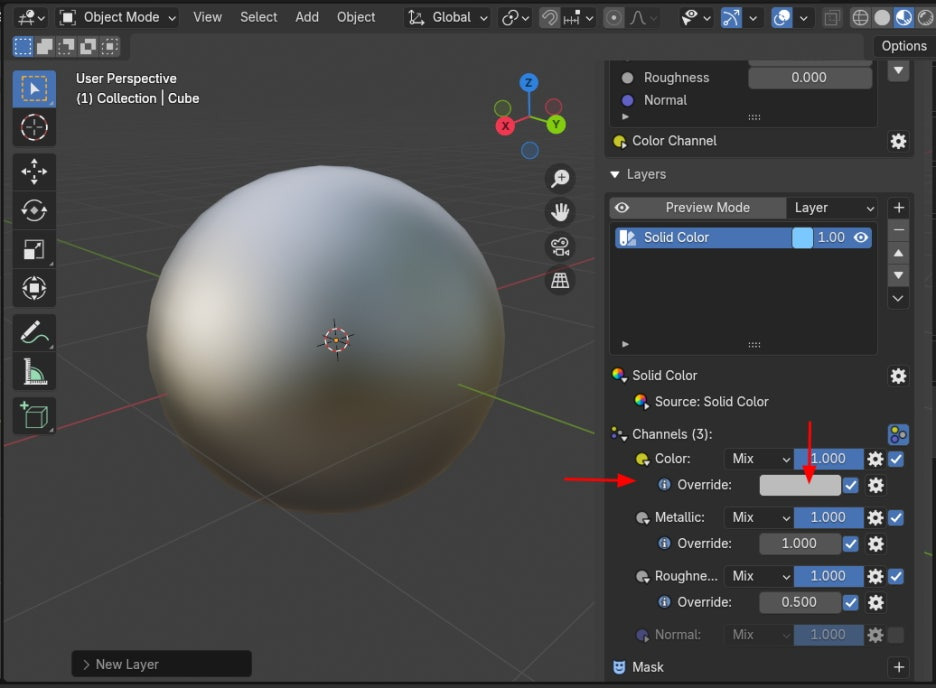
값을 0.5로 반팅하면, 약간 광택이 반쯤 있는 메탈입니다. (크리스마스 공 같은..)

Color에도 Override를 켜주면, Color를 재 설정해줄수 있습니다.
그러나...그냥 기본 컬러를 바꿔주는 것으로.. Override를 꺼줍니다.
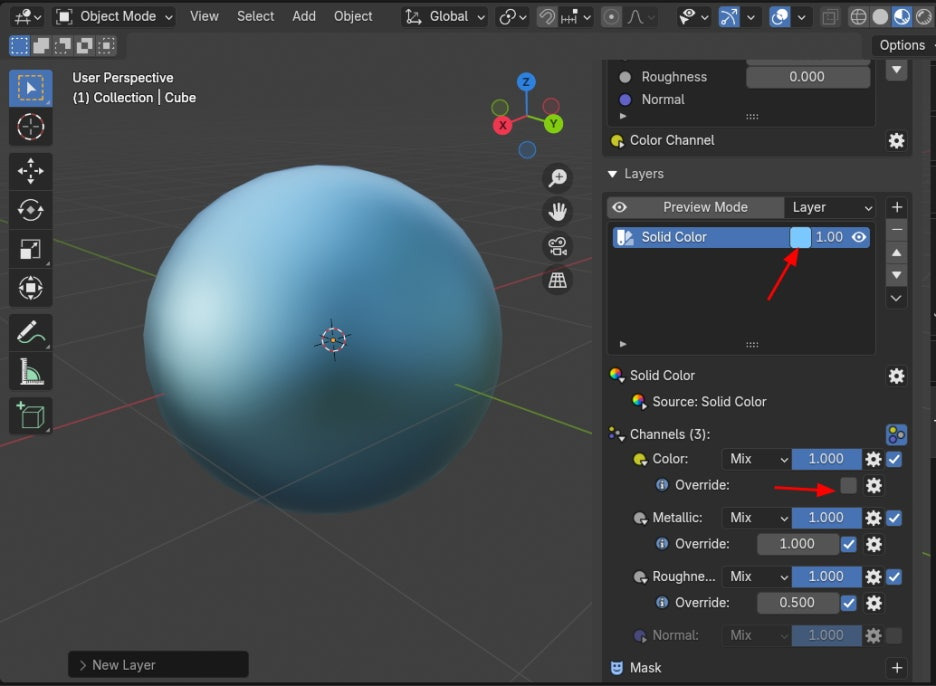
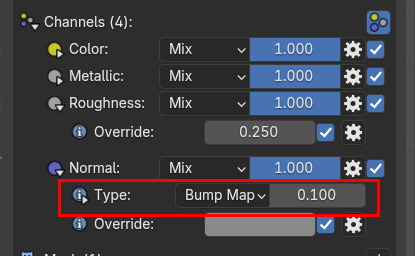
Roughness 값을 더 내려주고, 0.25
그리고 Normal도 켜줍니다.

Value가 0.5 이면... Normal에서는 반값이 아닙니다. 즉 표면의 높이가 0가 아닙니다.
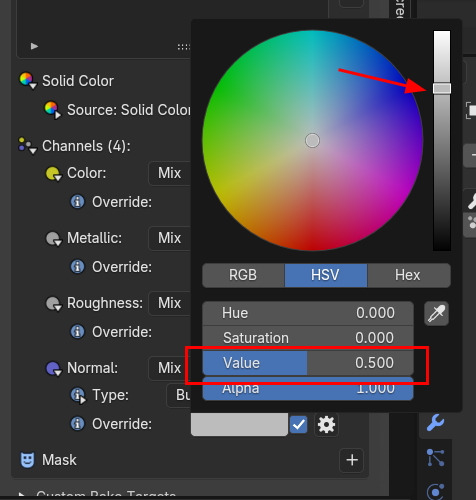
표면의 높이가 0 이 되려면 0.25 가 되어야 합니다. (Type 의 값을 설정에 따라 조금 달라짐.)
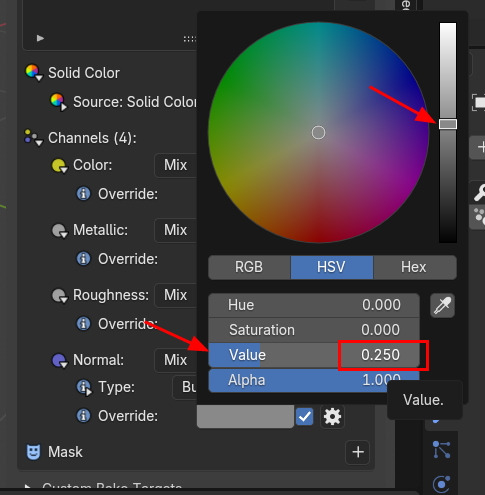
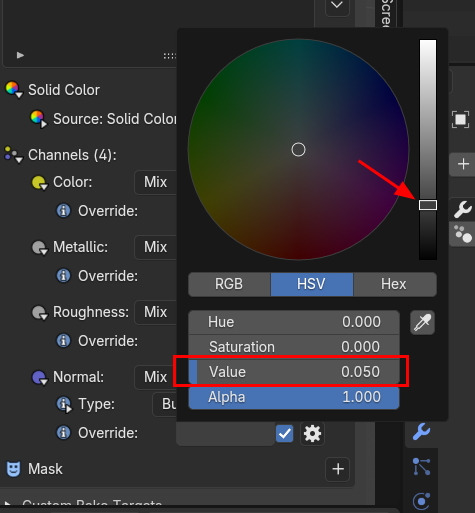
더 아래로 내려가면, 튀어 나오게 됩니다.
자 이렇게 해서, Metal Color라고 이름을 줍니다. 컬러는 화이트로 했습니다.
새로운 레이어를 또 추가합니다. 이번에도 역시 노란색... 이름은 Yellow Color로,

아래에 있는 메탈 컬러가 살짝 비춰져서 노란 메탈 공입니다.

역시 Channels에 Metalic, Roughness를 활성화 합니다.

Roughness를 0.25 로...노란 당구공...
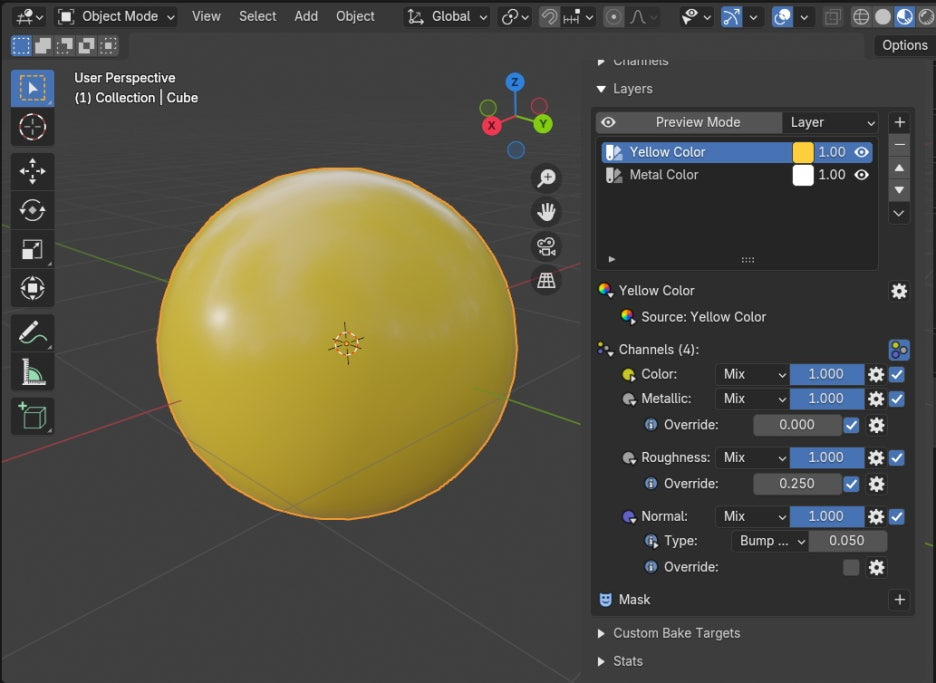
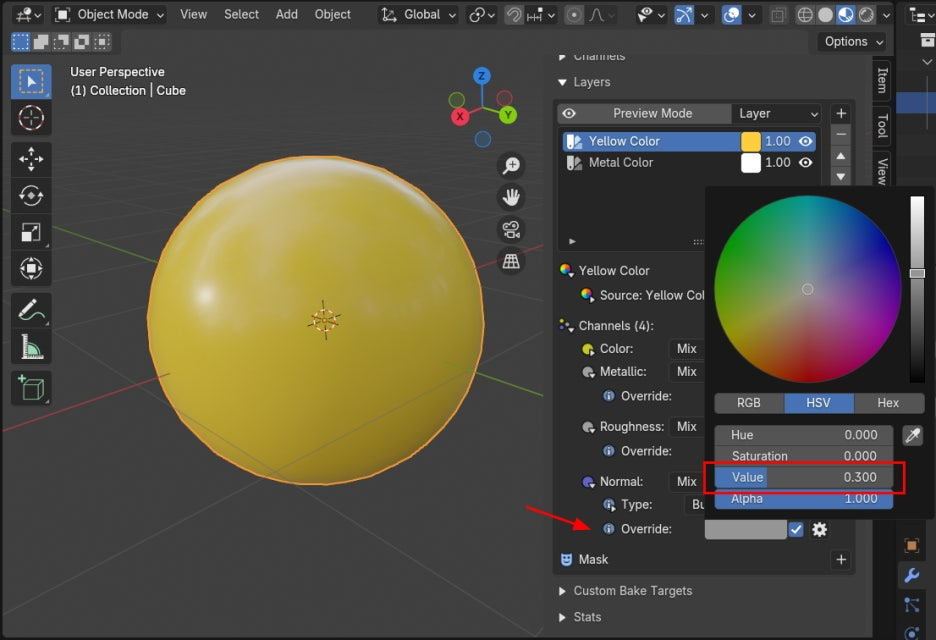
그리고, Normal 을 활성화 하고, Override 를 0.3으로 합니다.
자 이렇게 2층의 Layer가 준비되었습니다.
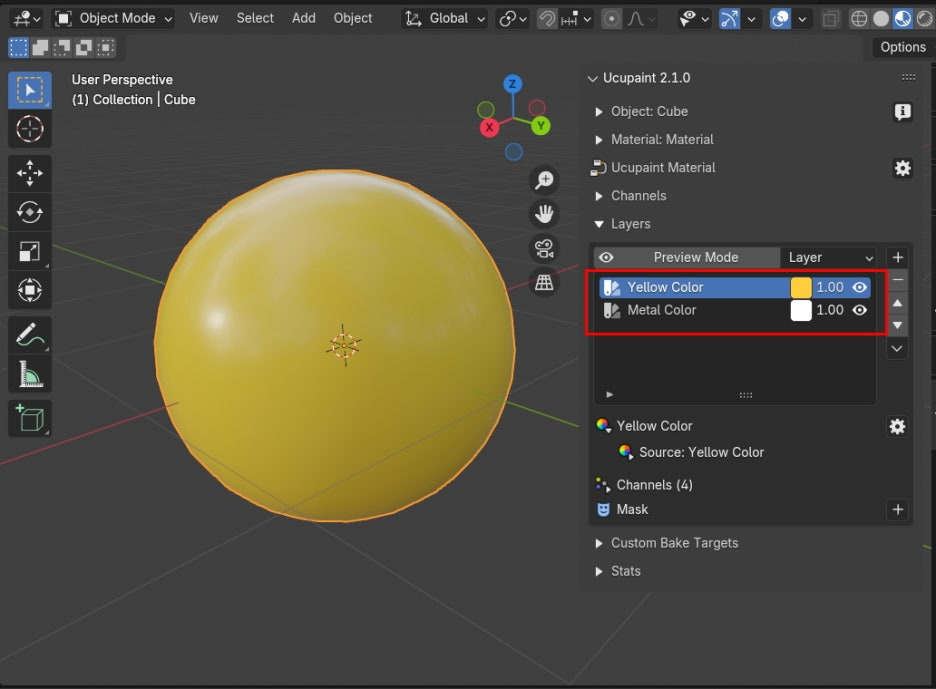
위의 Yellow Color의 눈 아이콘을 끄면, 아래의 Metal Color가 보입니다.

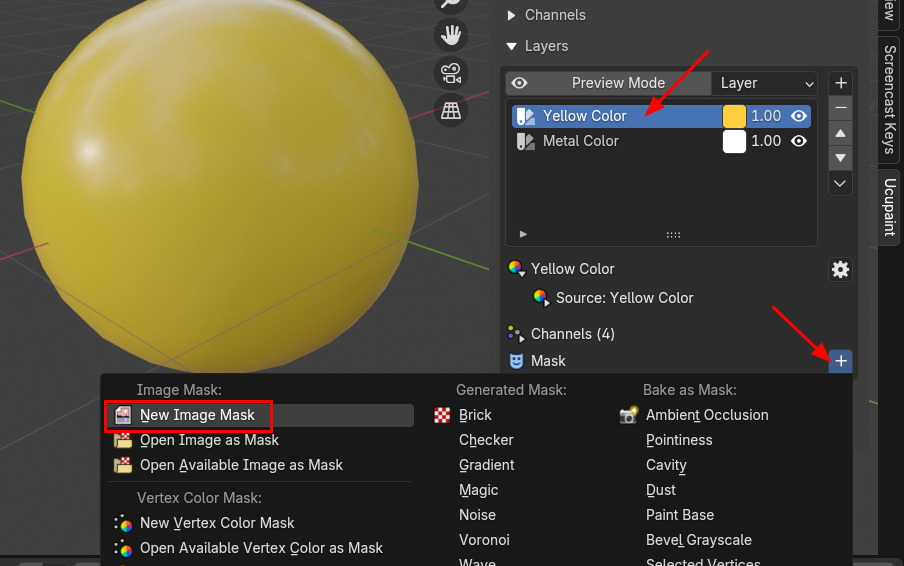
자, 이제 Yellow Color를 (반드시)선택하고, Channels아래의 Mask를 추가, New Image Mask 를 선택 생성 하고,
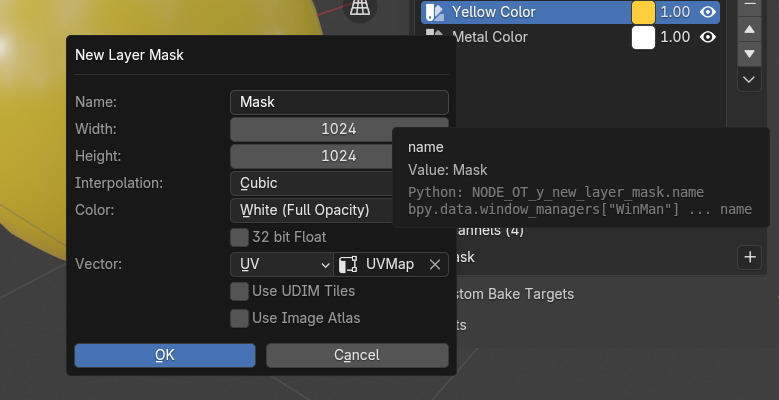
이름은 Mask라고 하고, 기본 값을 사용합니다.
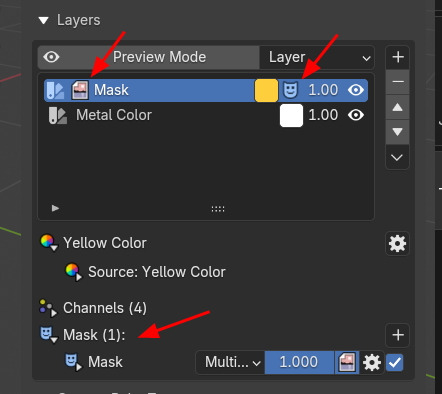
그러면, Layer에 Mask 이미지 아이콘이 등장하고, 이름이 'Mask', 그리고, 그 옆, 컬러 옆에 마스크 아이콘이 표시됩니다. 그리고 아래에 Mask 에 (1) 표시가 되어있고, Mask 이름이 표시되어 있습니다.
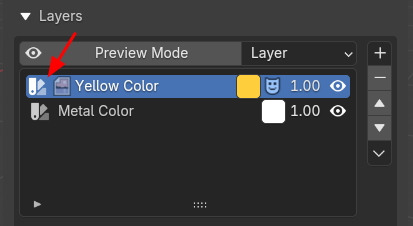
왼쪽의 카드를 클릭하면, 이름이 Yellow Color로 표시됩니다.
이 마스크의 이미지를 확인해 보면, White, 값 1 입니다.

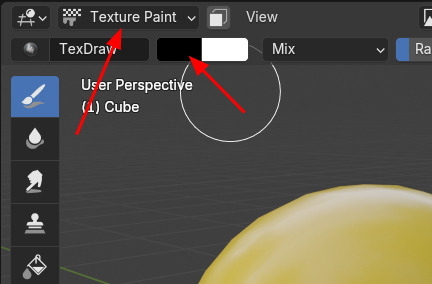
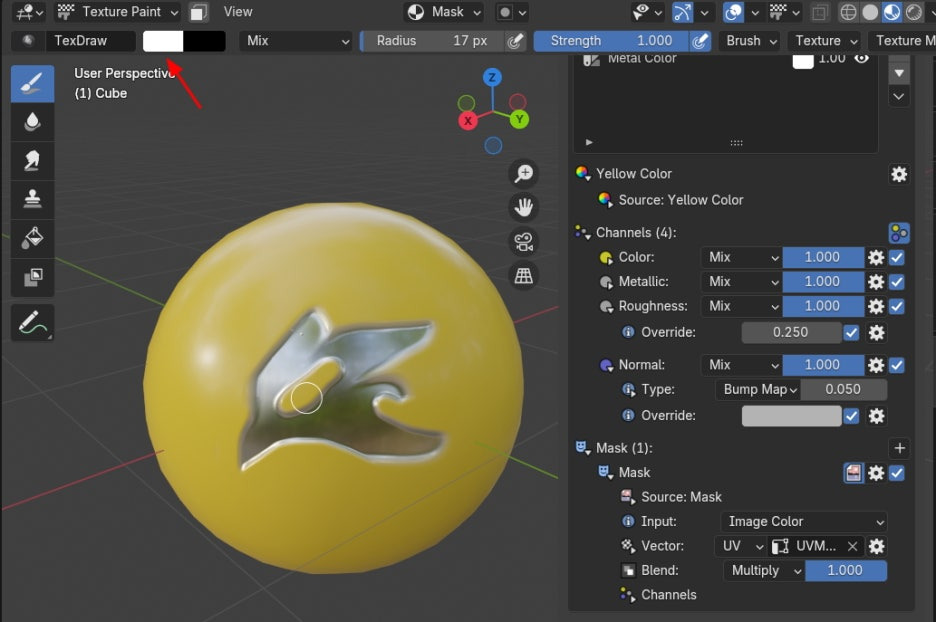
작업 모드를 Texture Paint로 전환하고, 컬러를 Black을 선택합니다.
Layers에서 Mask가 있는 레이어를 선택을 하고,(이 레이어에 작업한다! 라고 PC에 알려줌)
흰색의 레이어에 검정색의 브러시로 브러시질을 합니다. 그러면, 노란 색 부분이 마치 벗겨지는 듯한
효과를 낼수 있습니다.

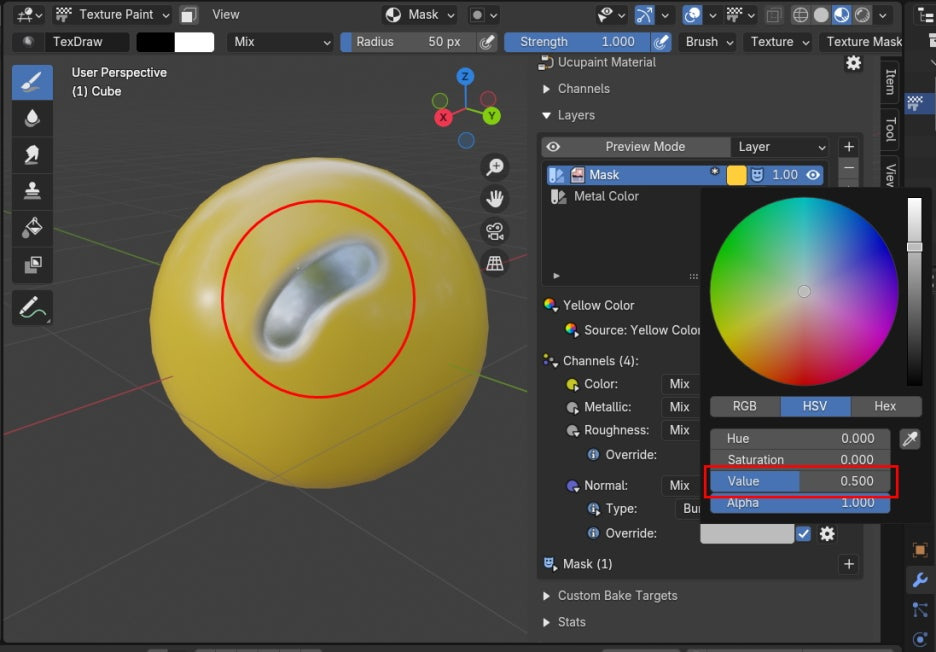
Normal 의 Override의 값이 0.3입니다. 그러면, 저 정도 두께입니다.

값을 0.5로 올리면, 두꺼워 집니다.
만약 다르게 나오거나 잘 안되면, Type의 값을 살짝 조절해보면 반응이 있을 것입니다.
0.25를 하면, 거의 같은 높이처럼 보입니다.
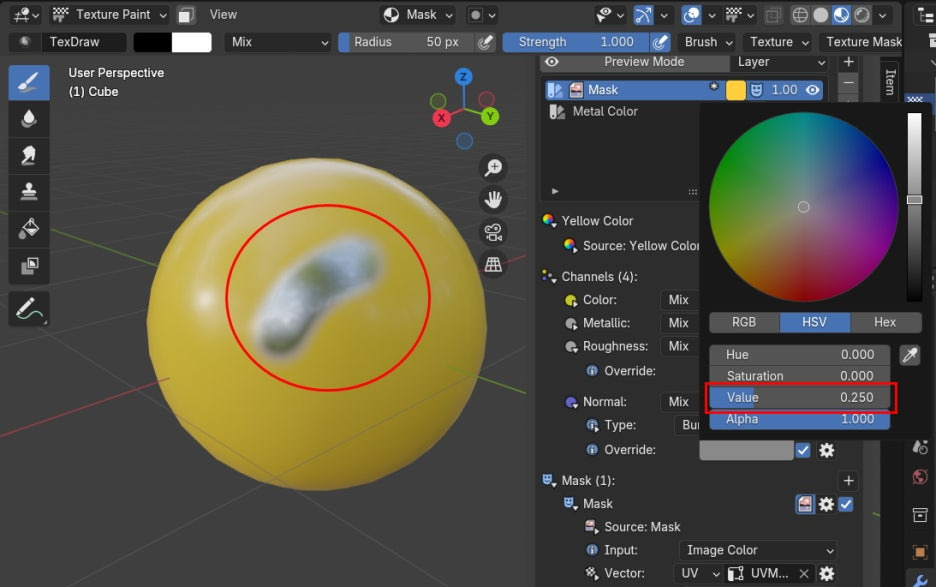
값을 더 내려면, 이제는 튀어나오게 됩니다. (잘 안되면, Type을 조절해 봅니다.)

검정색으로 칠하면 벗겨내게 되고,

흰색으로 바꾸면, 다시 덮여지게 됩니다.
🏆 국비지원! 수강료 무료!💸💸💸
👉 Blender로 나도 제페토크리에이터!수강신청 https://litt.ly/solongos
☕제페토 카페 https://cafe.naver.com/zepeto3d
'3D > Blender3D' 카테고리의 다른 글
| Blender: Stencil[2] Mask. (8) | 2024.10.16 |
|---|---|
| Blender: Stencil[1] Texture. (2) | 2024.10.15 |
| Blender:Ucupaint[3] (8) | 2024.10.11 |
| Blender: Ucupaint[2] (2) | 2024.10.10 |
| Blender: UCUPaint [1] (10) | 2024.10.09 |


