Blender 의 Curve 편집하기, 두번째 입니다. ^^ Curve 는 모델링과 애니메이션에 종종 사용되므로 Blender 사용자는 반드시 알아둬야 합니다.
Extrude
Extrude는 Edit mode 환경에서 왼쪽 Tool bar 중간에 있습니다.(Draw, Curve Pen, Extrude)

Extrude는, 두가지 모드로 수정하는데요, Normal과 XYZ이고, 기본값은 Normal입니다.
왼쪽 상단에 Normal, XYZ 보이는 버튼입니다.
+ 버튼을 클릭하고 드래그하면 Curve의 Direction방향으로 뽑습니다.
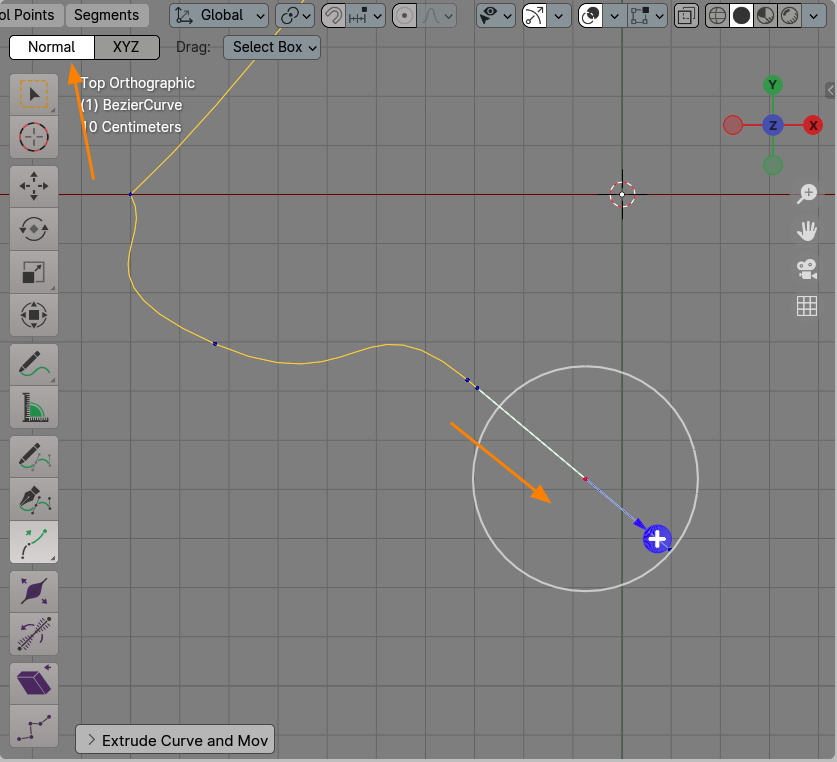
버텍스 주위를 둘러싸는 2개의 원이 있는데요, 바깥쪽 원을 클릭하면 원하는 방향으로 Extrude되고, 안쪽 원을 클릭하면 현재 선택된 Vertex의 위치를 변경할 수 있습니다.
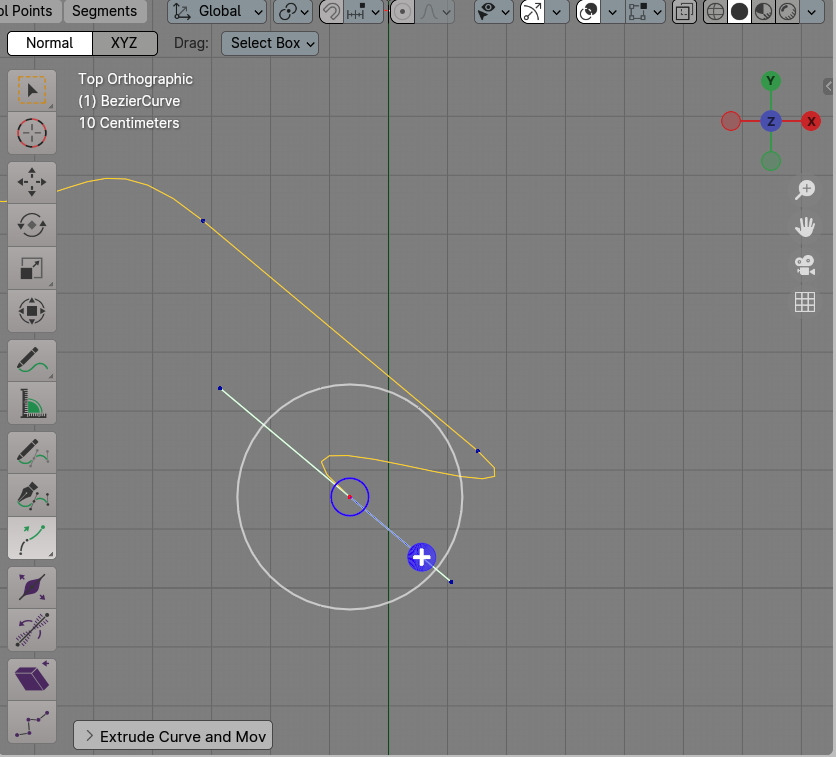
Normal을 XYZ로 변경하면, 작업기즈모가 Global XYZ으로 전환됩니다.

G키로 이동하면 Extrude되어서 이동됩니다. X 단축키로 X방향으로 움직이고 있습니다.

이렇게 Extrude되었습니다.

Split, Separate
Split는 선택한 버텍스들을 커브 분리합니다. 하나의 오브젝트에 다중 커브들이 있는 것이죠.
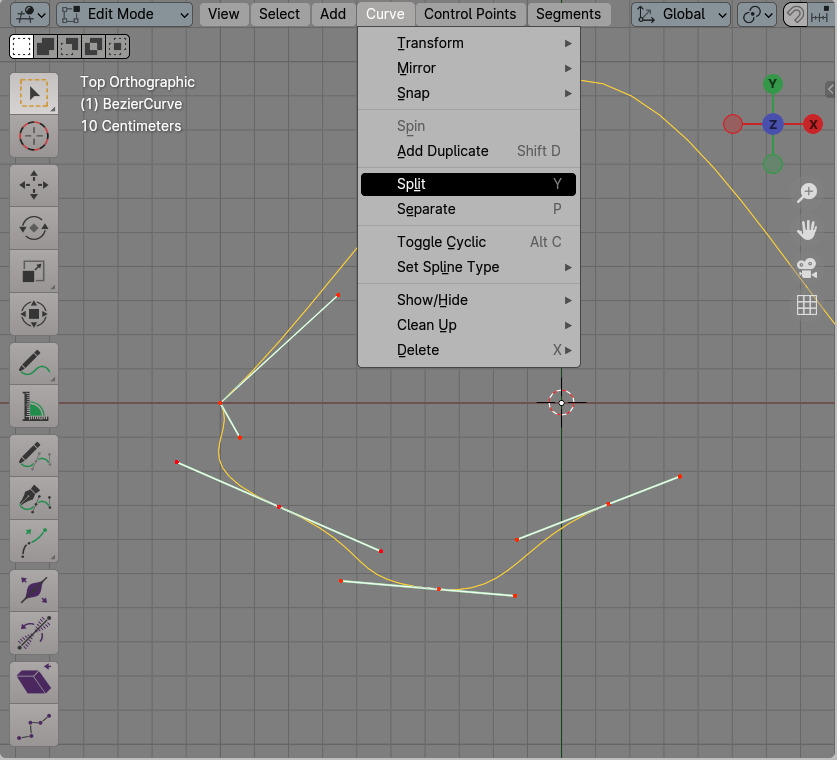
이렇게 분리됩니다.

Separate는 오브젝트까지 분리 시킵니다. 방법은 역시 Split와 같이 버텍스를 선택합니다.
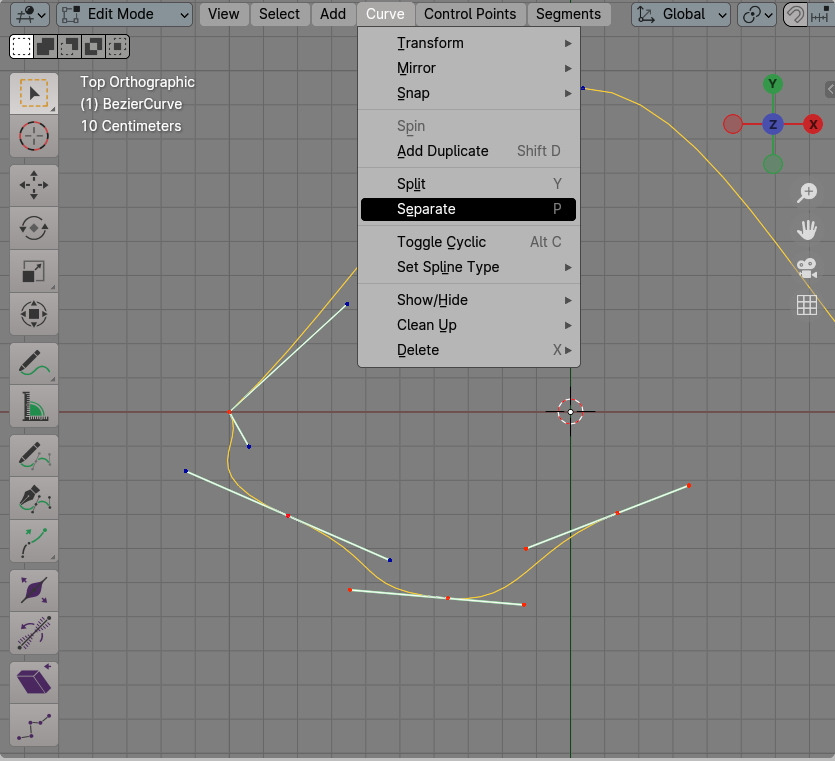
Separate를 실행하면, 이런 메세지가 나옵니다. 진짜 Separate 할꺼냐? OK?
왜냐면, Split와 같이 하나의 오브젝트가 아니고, 선택한 커브가, 오브젝트까지 분리 됩니다.
남남이 되는 거죠.

다른 오브젝트가 되었으므로, 커브 컬러도 다르게 표시됩니다.
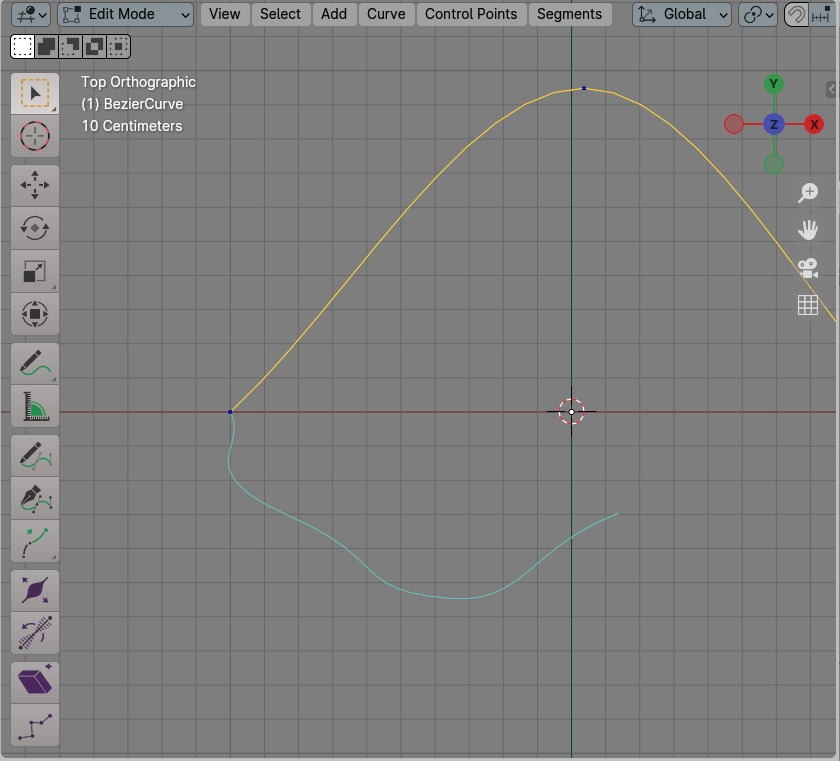
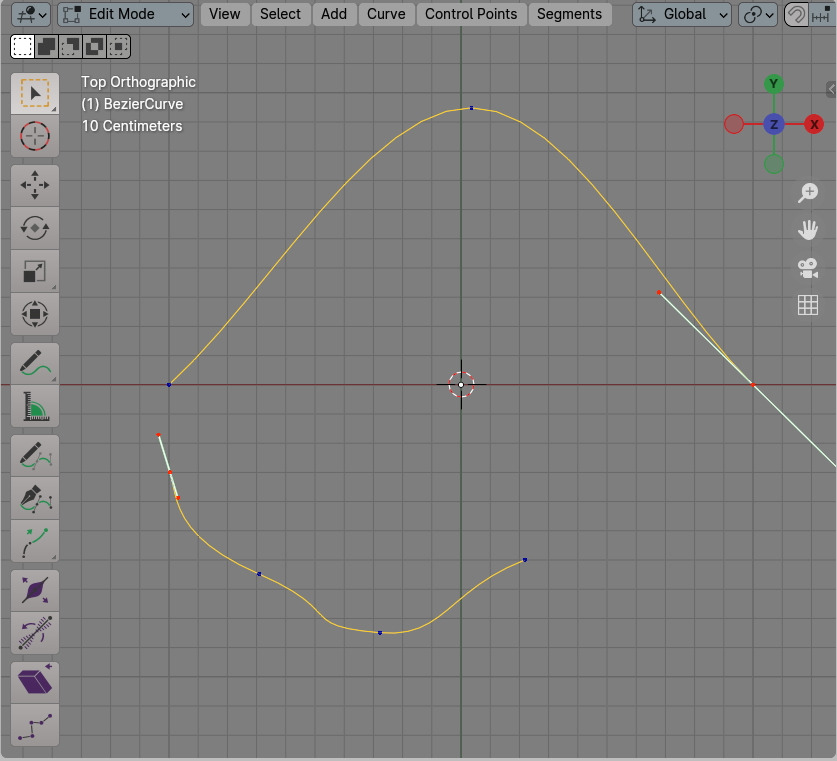
Make Segment
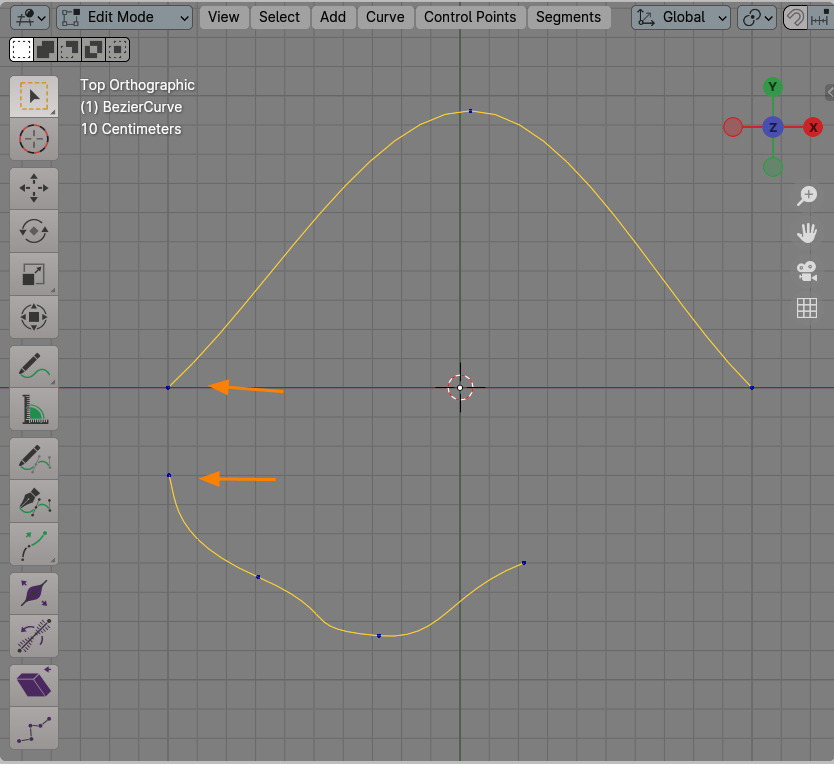
분리된 커브의 사이를 segment로 채우는 명령입니다. 사이를 채우고 싶은 버텍스 2개를 선택합니다.
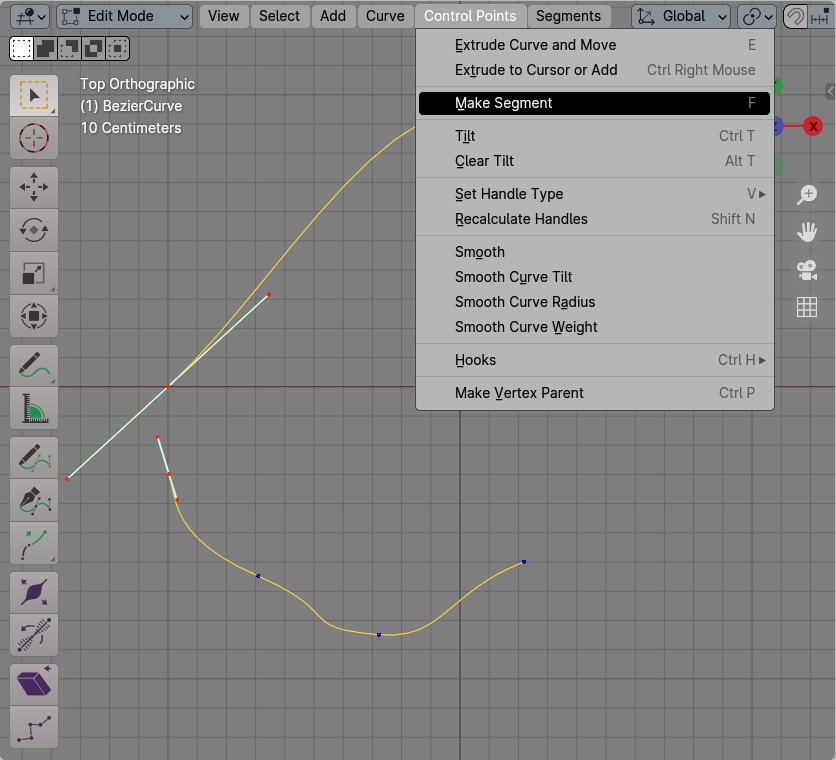
Make Segment를 실행합니다.
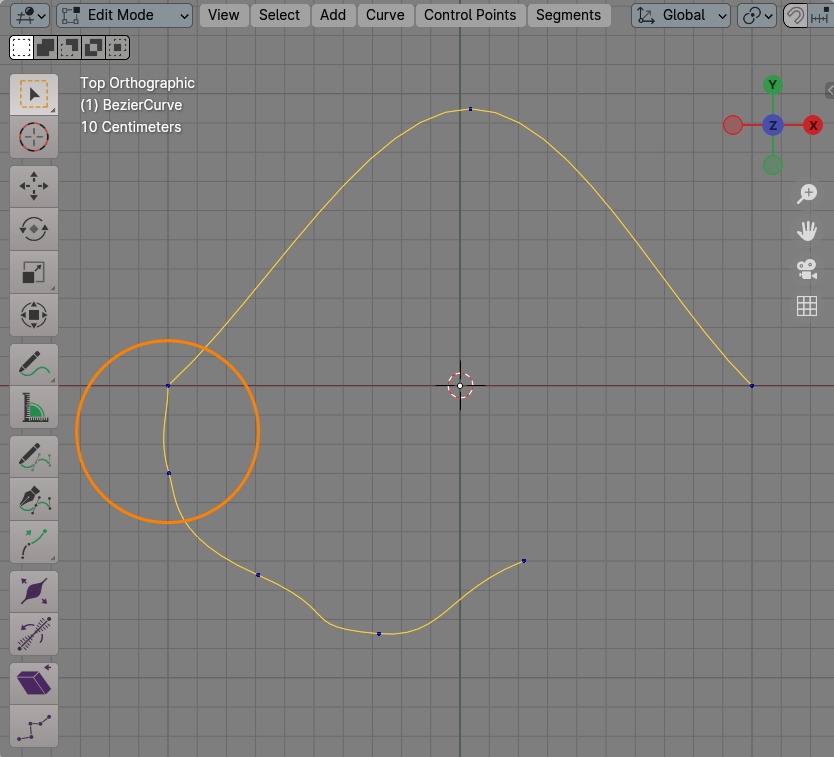
그러면 두 버텍스 사이를 채웁니다.
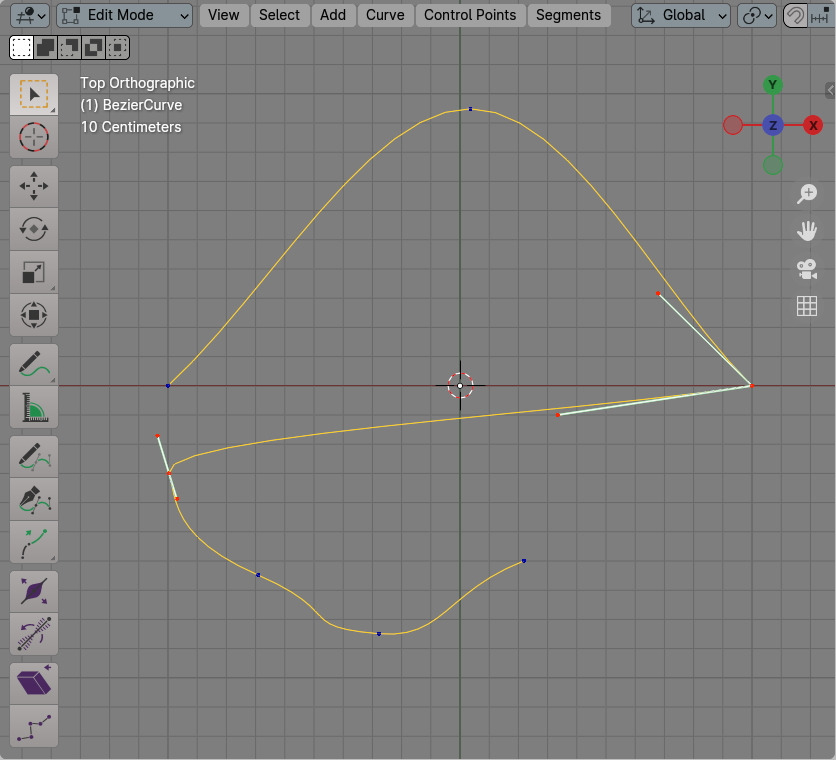
이것은 어느 버텍스를 선택해도 실행됩니다. 반대쪽 끝의 버텍스를 선택해서 실행을 해봅니다.
두 양 끝의 버텍스가 이어집니다.
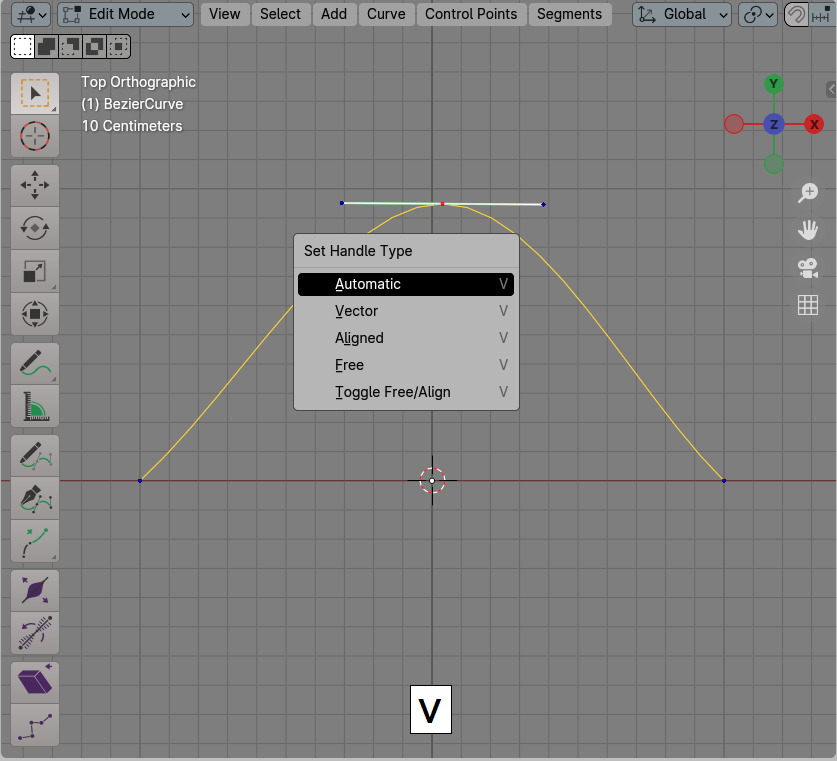
Set Handle Type
Curve의 Handle Type을 정하는 명령입니다. Set Handle Type 메뉴의 위치는 Edit Mode에서 Control Points / Set Handle Type 에 있습니다.

또는 Curve의 Vertex를 선택하고, 단축키 V를 클릭하면 Set Handle Type 메뉴를 부를 수 있습니다.
Vector: 앞뒤의 각각 이어진 Vertex를 바라보는 Handle Type을 만듭니다.
Aligned: 핸들의 중앙의 Vertex를 선택했을 경우에는 기본 값은 마지막 Vertex를 바라보게하고, 핸들은 좌우 고정 락(Lock)이 걸린 직선의 핸들을 만듭니다.
그리고 중앙이 아닌, 각 핸들의 Vertex를 선택했을 경우 반대 방향의 핸들 각도로 Align됩니다.
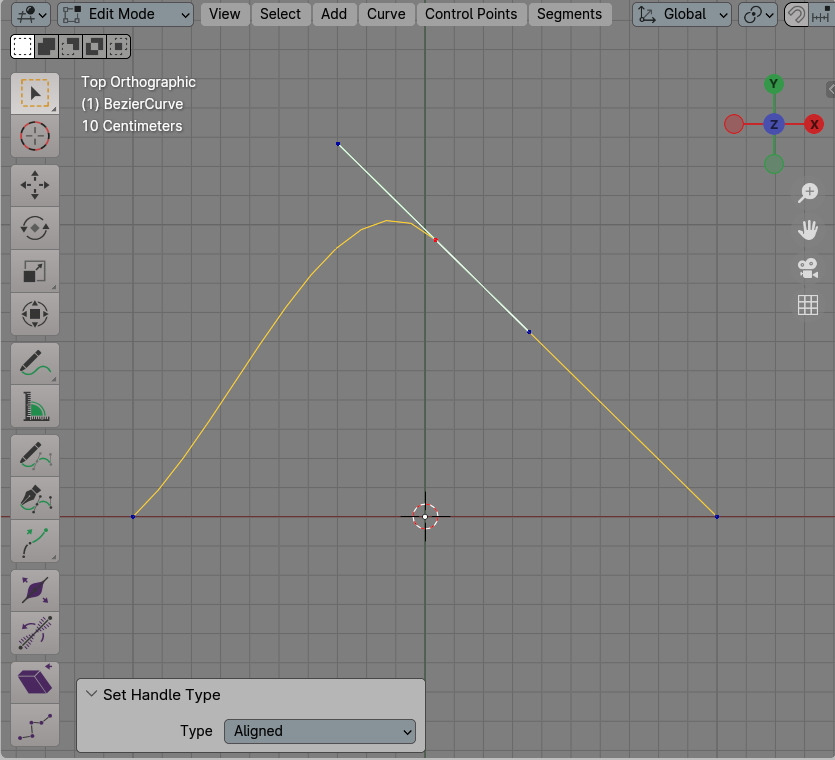
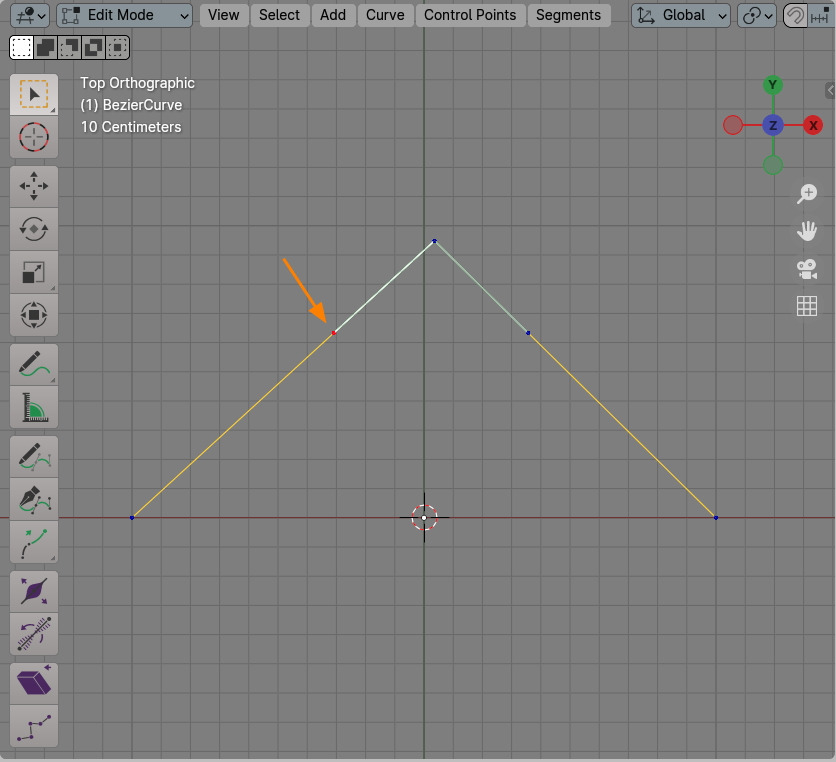
핸들의 한 점을 선택한 합니다. 그리고 Handle Type을 Aligned으로 선택합니다.
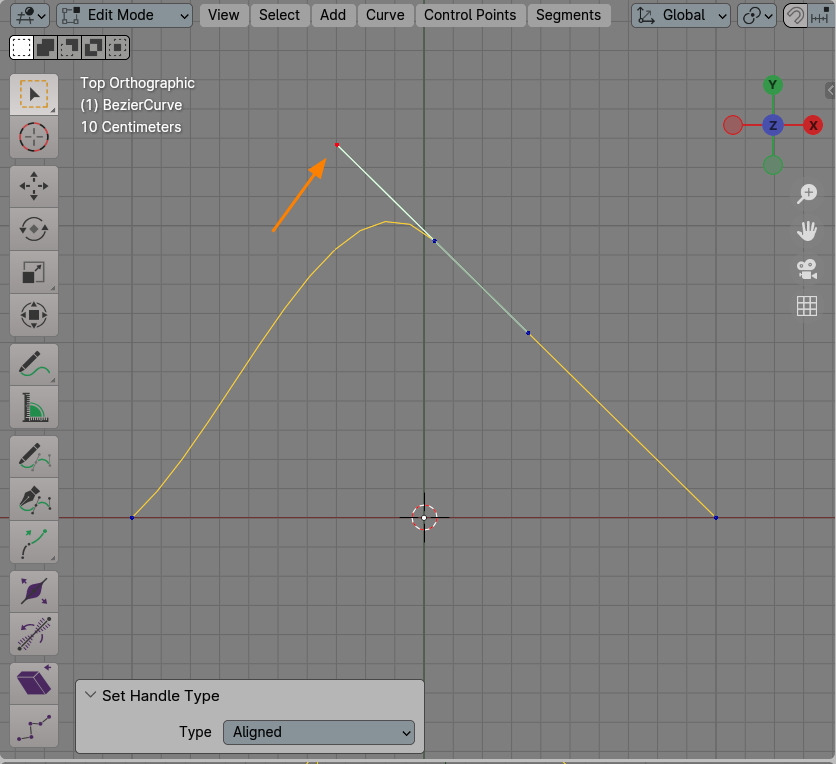
선택한 핸들의 방향이 들리며 Align의 됩니다.
반대쪽 핸들 버텍스를 선택하고, Aligned를 선택하면,
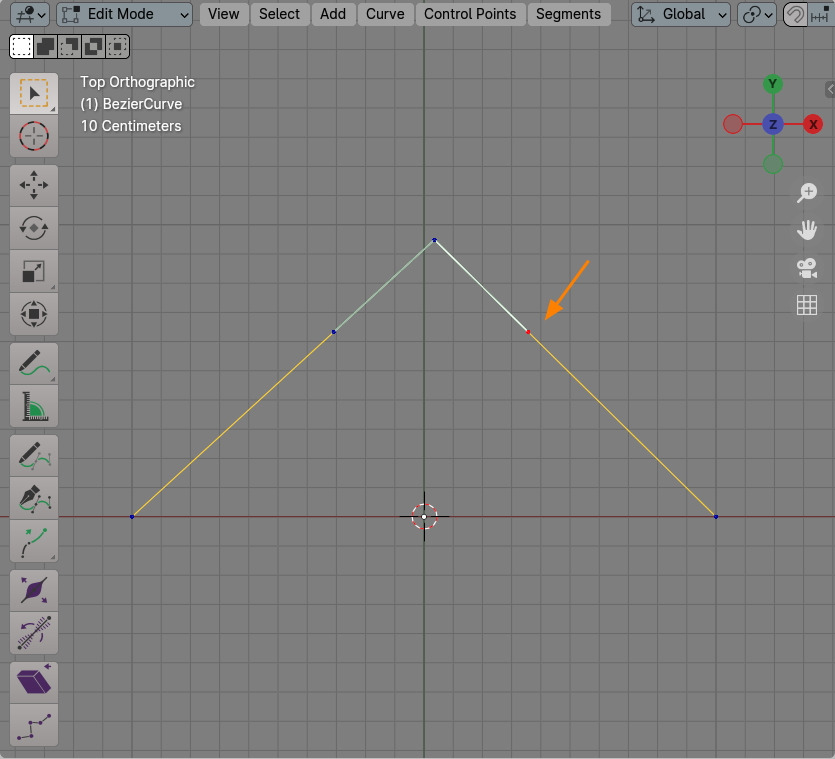
역시 선택한 핸들이 Aligned 됩니다.

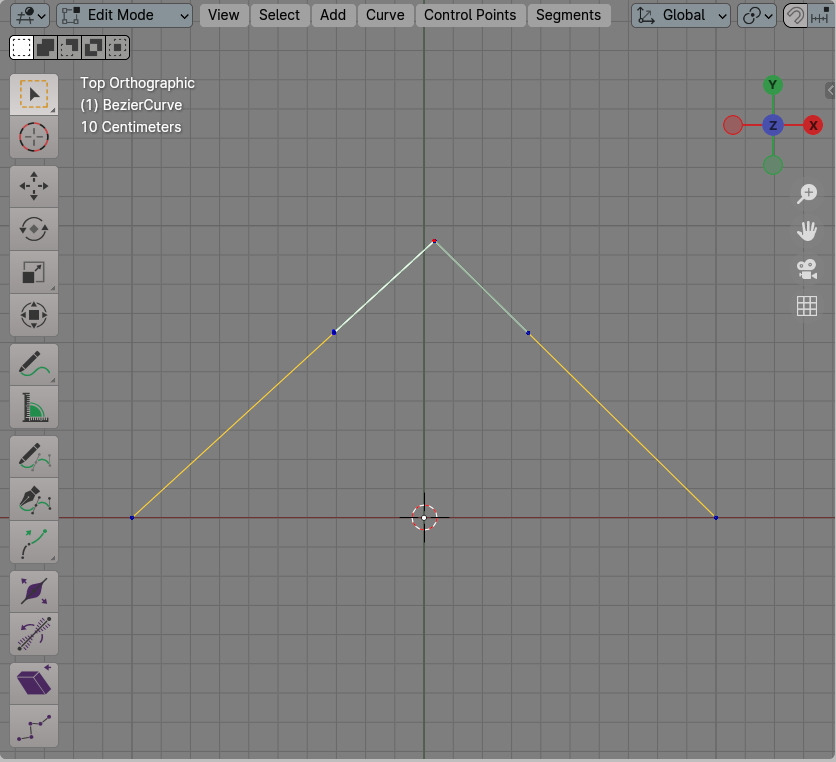
Automatic : 좌우 핸들을 고정 락(Lock)을 걸고, 직선으로 만듭니다.
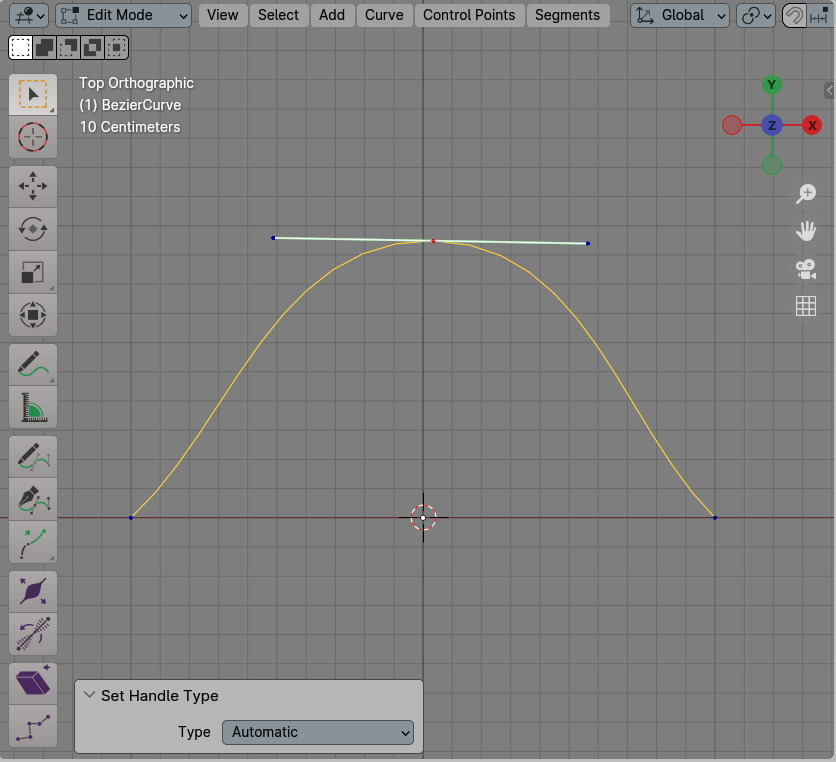
Free : 좌우 핸들의 고정락(Lock)을 풀고, 자유롭게 움직일 수 있습니다.

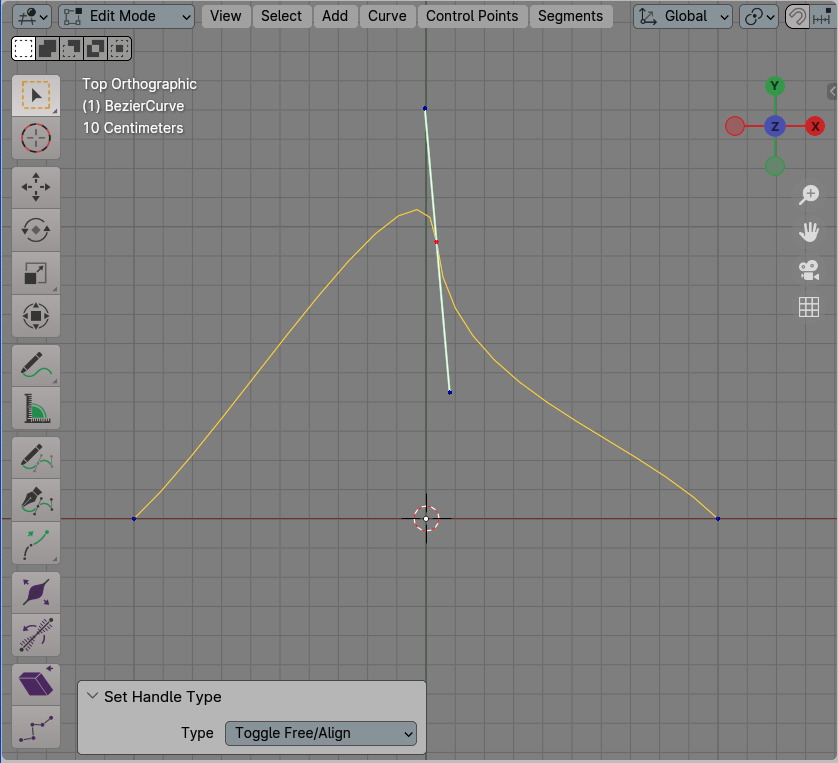
Toggle Free / Align : Free와 Align을 전환 합니다.

메쉬만 사용한 작업자에게는 Curve는 생소한 내용이지만,
응용 모델링과 애니메이션을 위해서는 반드시 Curve 조절 방법을 숙지할 것을 권유 드립니다.
🏆 국비지원! 수강료 무료!💸💸💸
📢 Blender로 나도 제페토크리에이터!수강신청 https://litt.ly/solongos
☕제페토 카페 https://cafe.naver.com/zepeto3d

'3D > Blender3D' 카테고리의 다른 글
| Blender4.x: Image Reload (2) | 2024.09.02 |
|---|---|
| Blender4.x: Edit Curve[4] (1) | 2024.08.30 |
| Blender 4.x: Edit Curve [1] (1) | 2024.08.28 |
| Blender4.x: Interactive Mirror (0) | 2024.08.27 |
| Blender 4.x Snap(스냅)을 쉽게, 'Set Snap Base' (1) | 2024.08.23 |


