Cube to Sphere
Sphere 의 Face들을 보면, 양 극 Pole 로 갈수록 Face들이 좁아지고, 끝 부분에서는 삼각형으로 모이는 것, 이것이 모델링 작업에 쓰기가 애매합니다. 그래서,

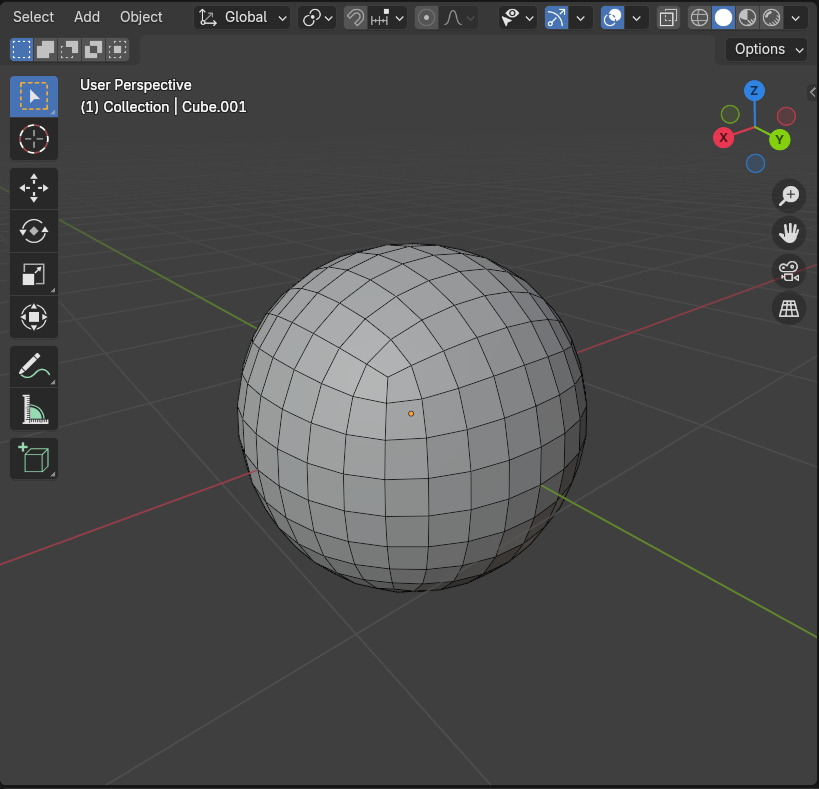
Cube에 Subdivision Surface Modifier를 적용하면 Quad Face로만 구성된, Face들이 비슷한 면적을 가진, Sphere 처럼 보이지만... 살짝 찐따 짜부러진 Sphere가 됩니다.
이것을 완전히 Sphere 가 되도록 하는 방법을 3가지를 알아 보겠습니다.

1. 'To Sphere'
Cube에 Subdivision Surface 를 적용하면, 역시나 이미지와 같이 짜부러진 Sphere가 됩니다.

Modifier를 Apply를 합니다.
그리고 Edit mode로 전환합니다.

Mesh / Transform / To Sphere를 해줍니다. 단축키 Shift + Alt + S 를 하고 마우스 드래그를 해줍니다.

그리고 드래그를 해주면, 완벽한 Sphere로 변합니다. 짜잔.

왼쪽이 To Sphere를 한 것, 오른쪽은 그냥입니다. 한눈에 차이가 납니다.

2. Bevel + Weld
이번에는 Cube에 Bevel Modifier를 적용합니다.

Bevel 모디파이어를 적용하면, 코너 부분이 깍여 진것을 확인할 수 있습니다.

Amount 를 1 값으로 올려줍니다. 그러면 에반게리온의 사도, '라미엘'의 모습이 됩니다. ^^

Segments의 값을 올려 봅니다. 그러면, 면이 쪼개어 집니다.
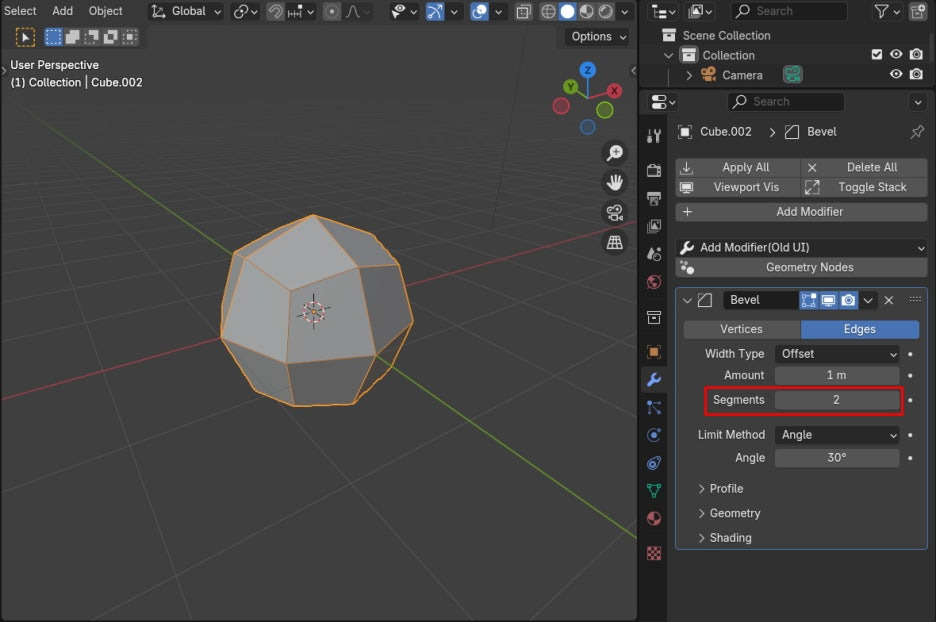
Segments 를 6까지 올리면, 각 꼭지점의 부분의 사각 면으로 둘러 쌓게 됩니다.

여기에 마우스 우클릭을 해서 Shade Smooth를 적용합니다. Flat한 Face를 부드럽게 보이도록 합니다.

그렇게 해서 보면, 그림과 같이 엣지가 두드러져 보이는 부분이 있습니다. 이 부분은 엣지 두개가 겹쳐져 있어서 엣지가 부각되어 보입니다. 이럴 경우에는,

Weld modifier를 적용하면, 이렇게 같은 자리에 중첩된 엣지는 하나도 합쳐지게(Weld) 됩니다.
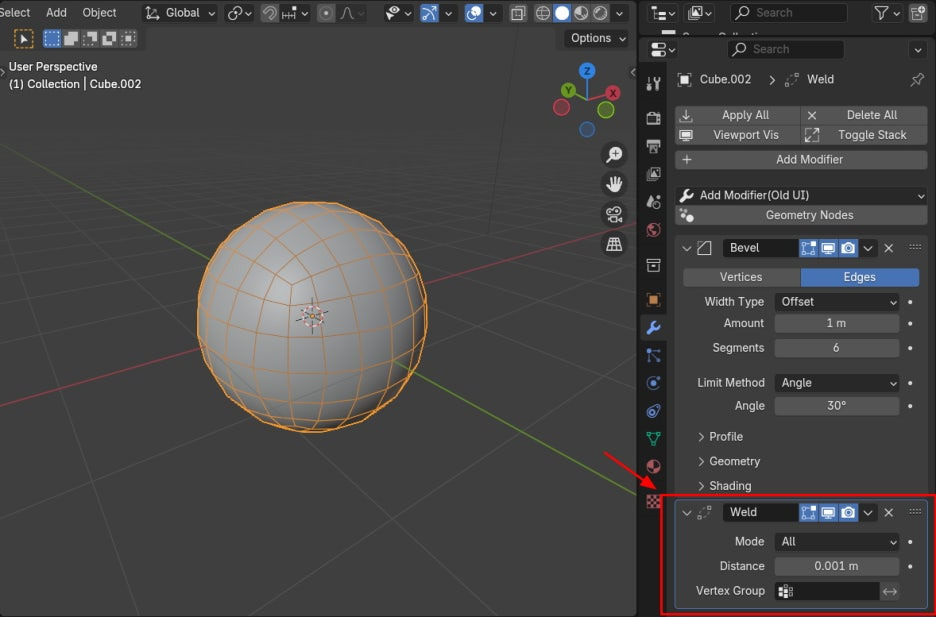
이렇게 Bevel과 Weld를 이용해서 Sphere 를 만들수 있습니다.

3. Subdivision Surface + Cast
Cube에 Subdivision Surface Modifier를 적용합니다.

Subdivision Surface Modifier 가 적용되었습니다. 역시 짜부러져 있습니다.
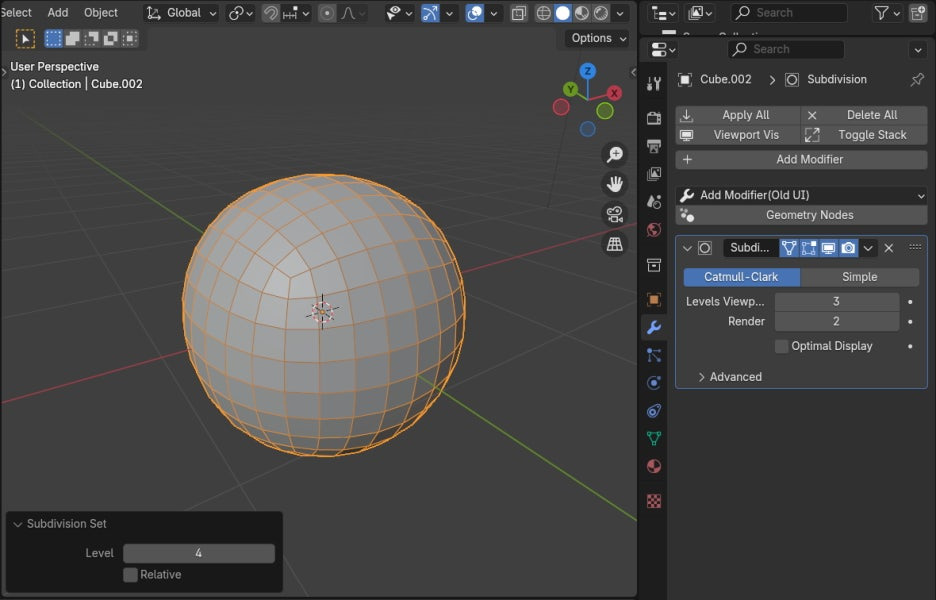
추가로 Modifier, Deform / Cast 를 적용합니다.

Blender 4버전 이상에서는 Modifier 를 이렇게 찾을 수 있습니다.

Cast 의 Factor는 기본값이 0.5 입니다. 1로 변경합니다.

왼쪽이 Cast Modifier 가 적용된 것입니다. 확실히 차이가 납니다. 끗!

🏆 국비지원! 수강료 무료!💸💸💸
👉 Blender로 나도 제페토크리에이터!수강신청 https://litt.ly/solongos
☕제페토 카페 https://cafe.naver.com/zepeto3d
'3D > Blender3D' 카테고리의 다른 글
| Blender: Ucupaint[2] (2) | 2024.10.10 |
|---|---|
| Blender: UCUPaint [1] (10) | 2024.10.09 |
| Blender: Node Wrangler[2] (4) | 2024.10.07 |
| Blender: Node Wrangler[1] (7) | 2024.10.04 |
| Blender: Data Transfer (0) | 2024.09.26 |


