Data Transfer는 Object의 데이터 정보를 전달받는 유용한 모디파이어 입니다.
머그컵의 손잡이와 컵몸체의 경계를 아주 부드럽게 붙일때 사용하는 Modifer, Data Transfer 를 알아보겠습니다.
손잡이와 머그컵 몸체(CupBody)가 준비 되어 있습니다.
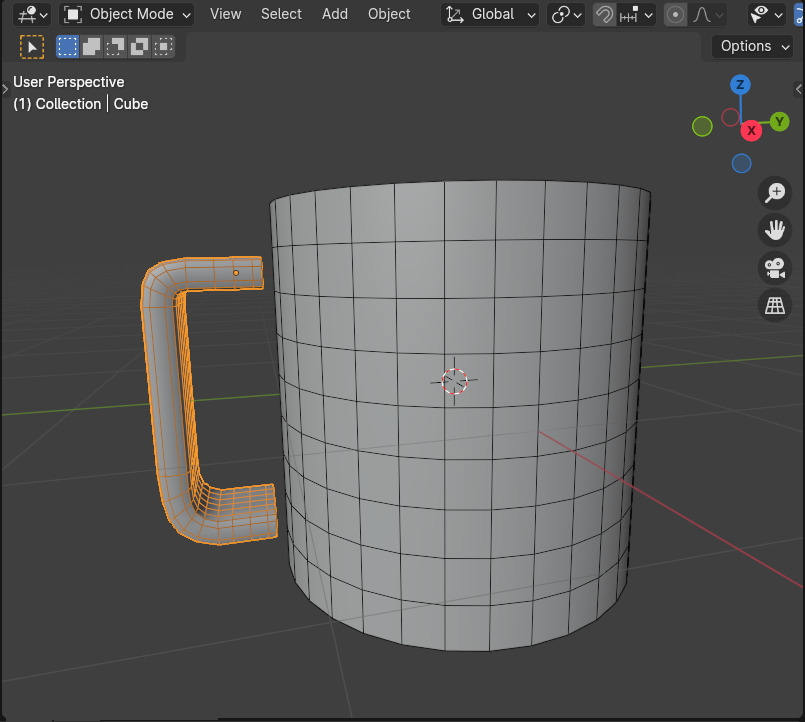
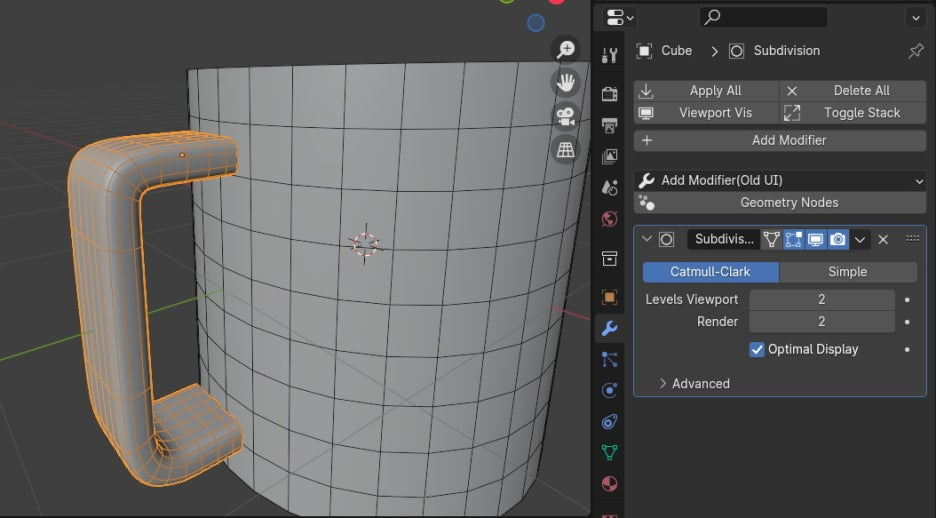
손잡이 오브젝트에는 모디파이어에 Subdivision surface 가 적용되어 있습니다.
x축 방향, Side view에서 손잡이와 머그컵 본체를 보이도록 3d 뷰포트를 설정합니다.
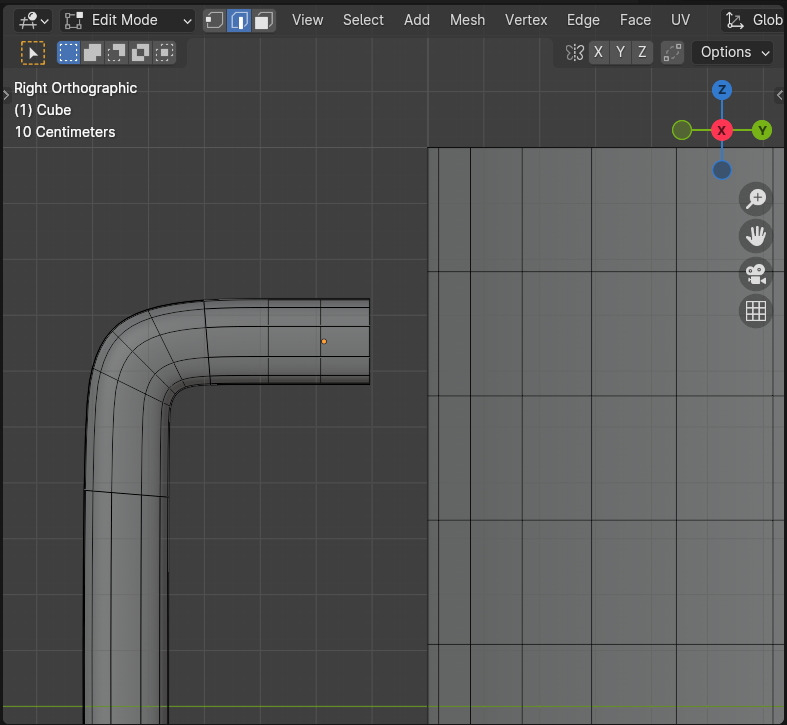
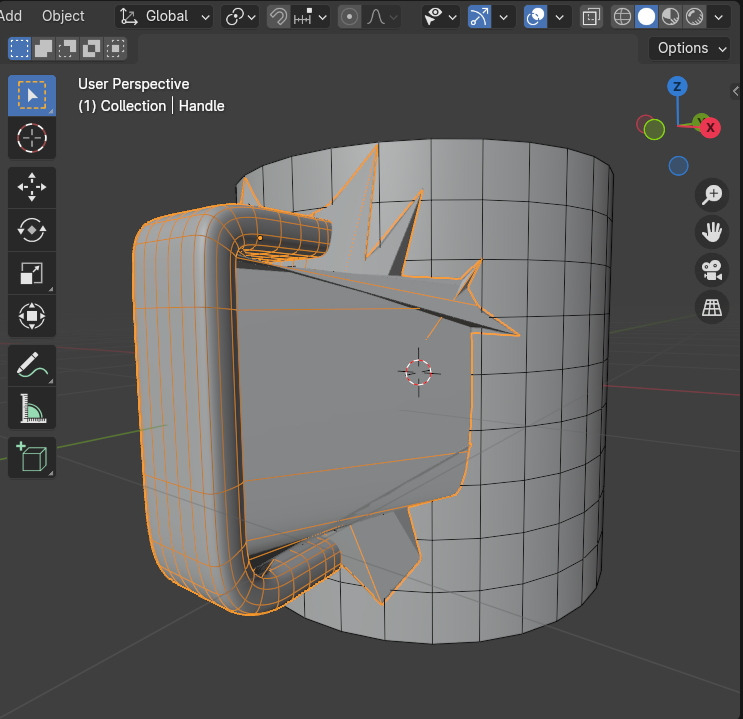
손잡이의 끝 부분은 뚫려 있고, 그 끝의 Edge를 선택해서 Extrude를 3번 합니다. (적당한 간격으로..)
손잡이 아래부분도 역시 뚫려 있고, Edge를 Extrude를 역시 3번 해줍니다.
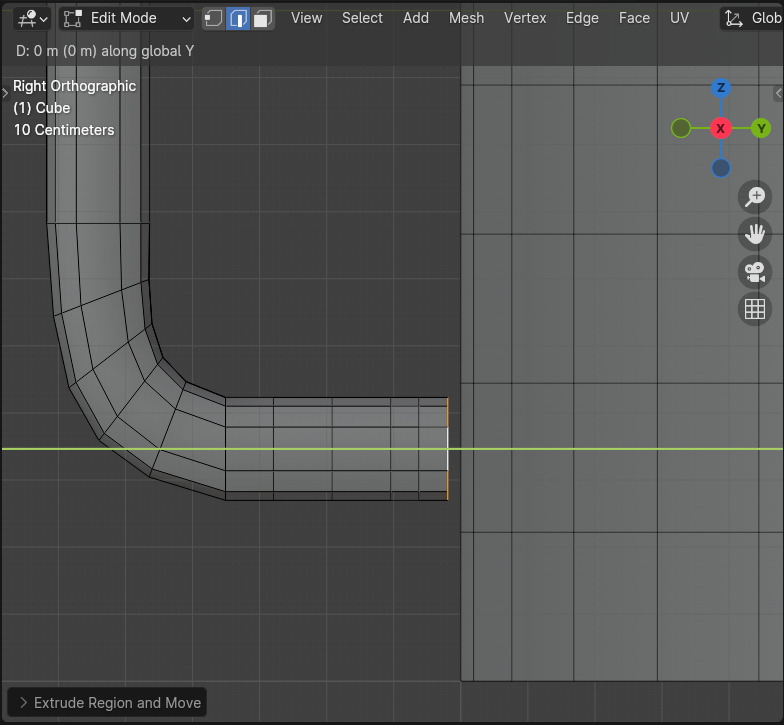
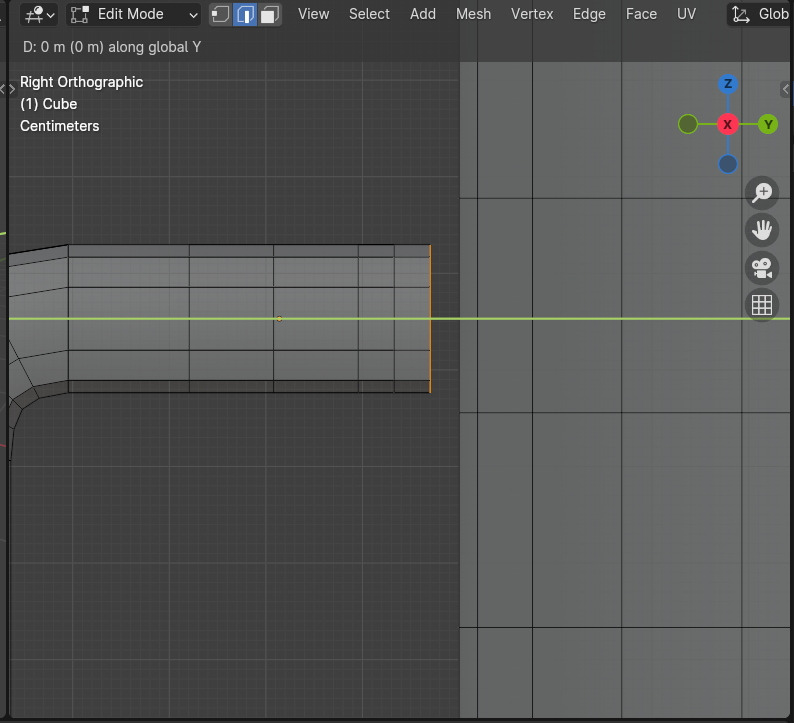
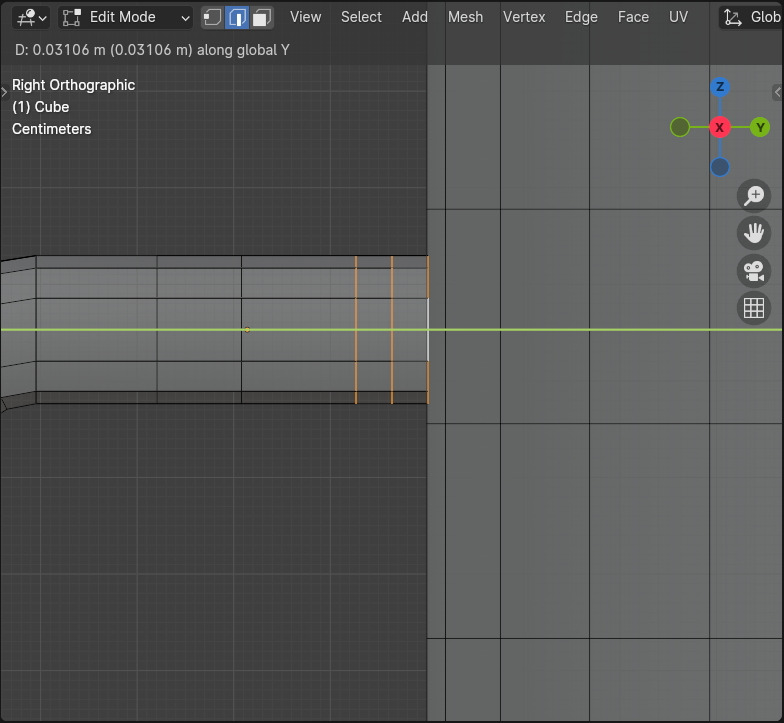
3번의 Extrude로 생성한 엣지들을 선택해서 머그컵에 바짝 붙여 줍니다.
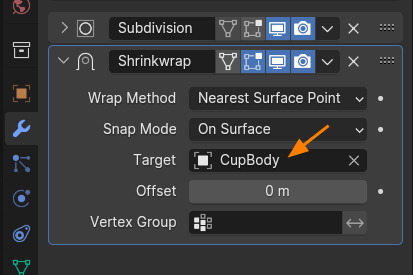
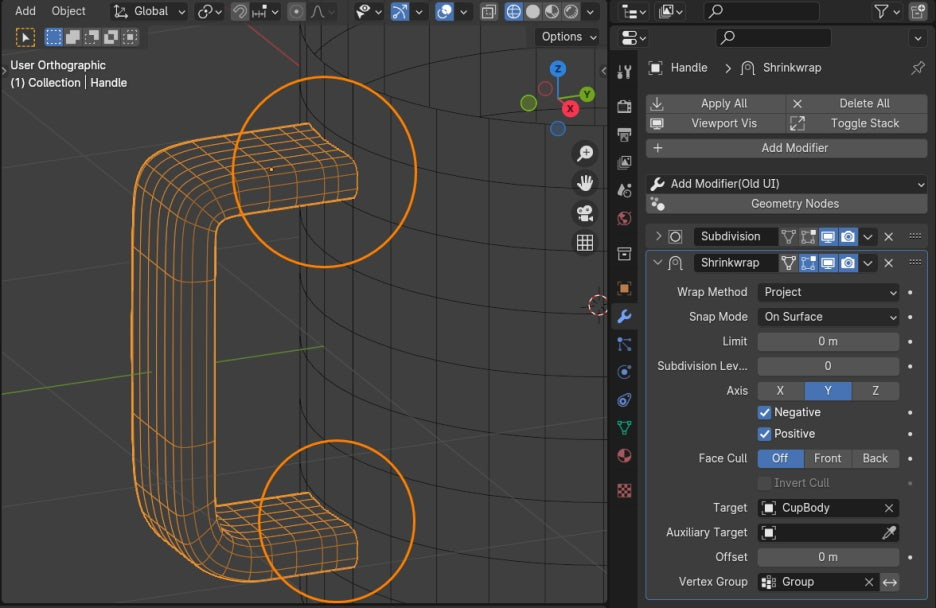
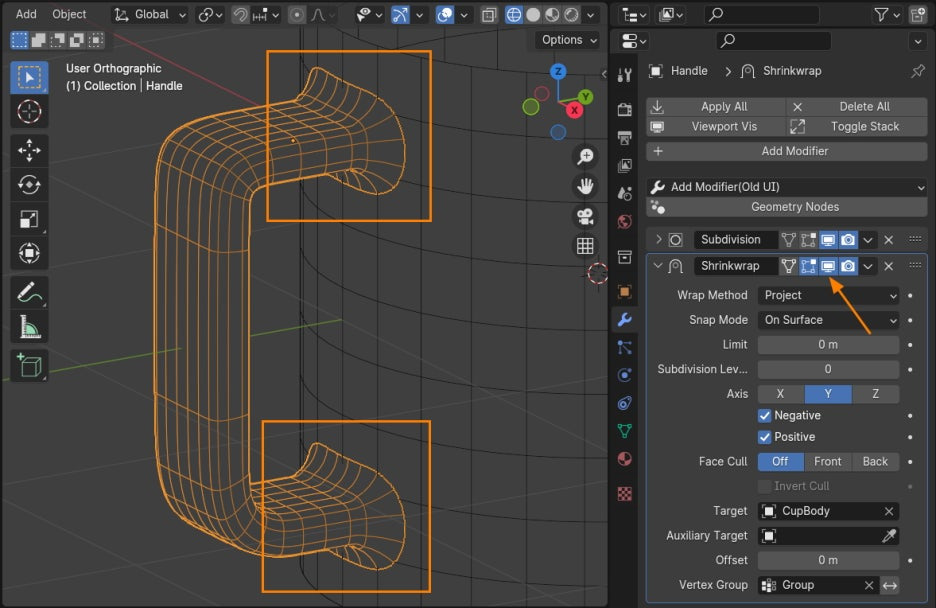
손잡이 오브젝트에 Shrinkwrap 모디파이어를 적용하고, Target을 CupBody(머그컵)를 선택합니다.
그러면, 손잡이 오브젝트가, 머그컵에 착 달라 붙게 됩니다.
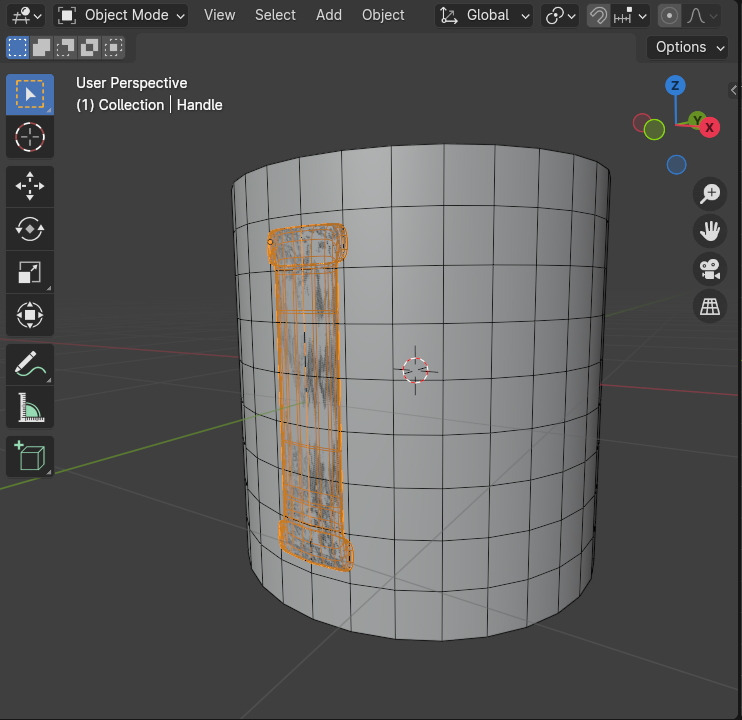
Shrinkwrap의 Wrap Method를 Project로 변경해 줍니다.
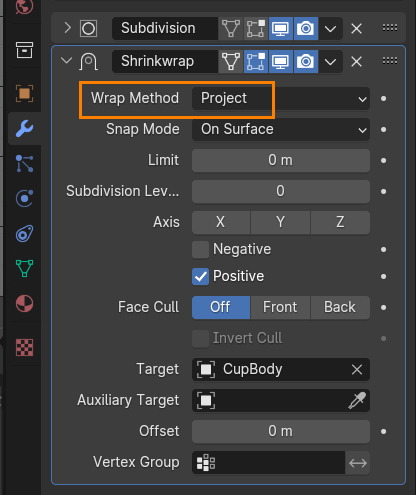
그러면, 손잡이 모습이 조금 나옵니다. 대략 이렇게 나옵니다.
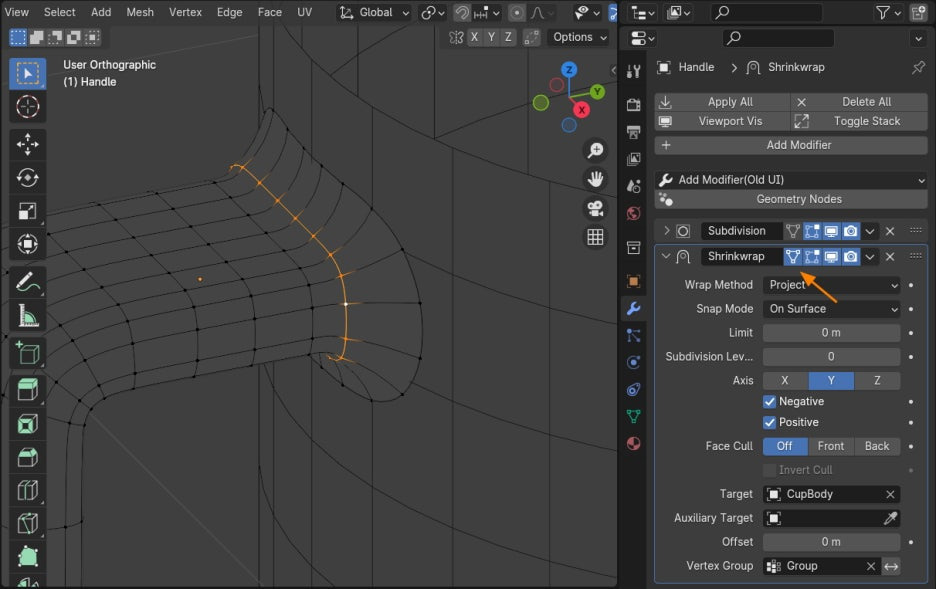
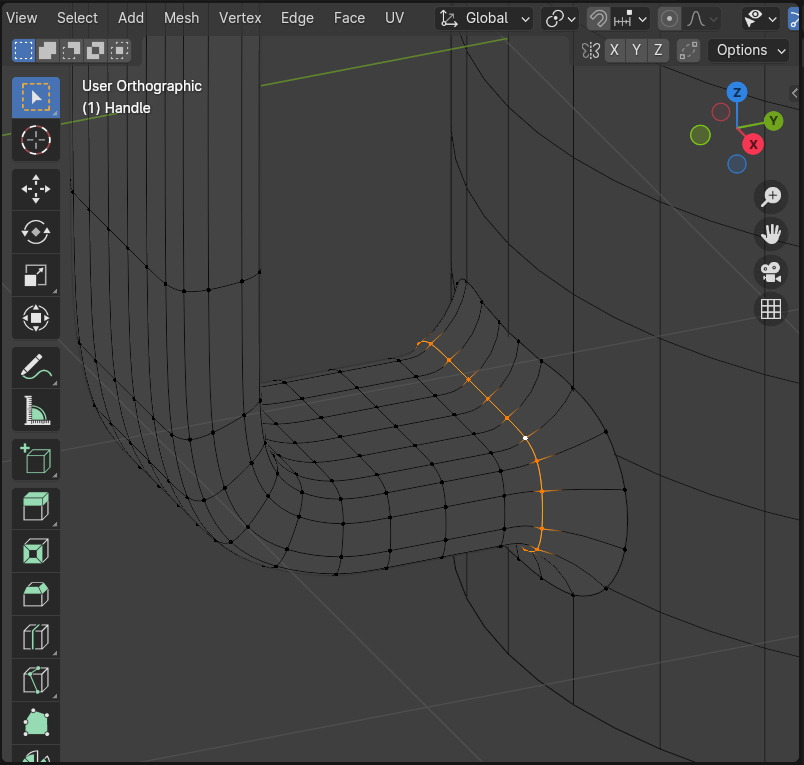
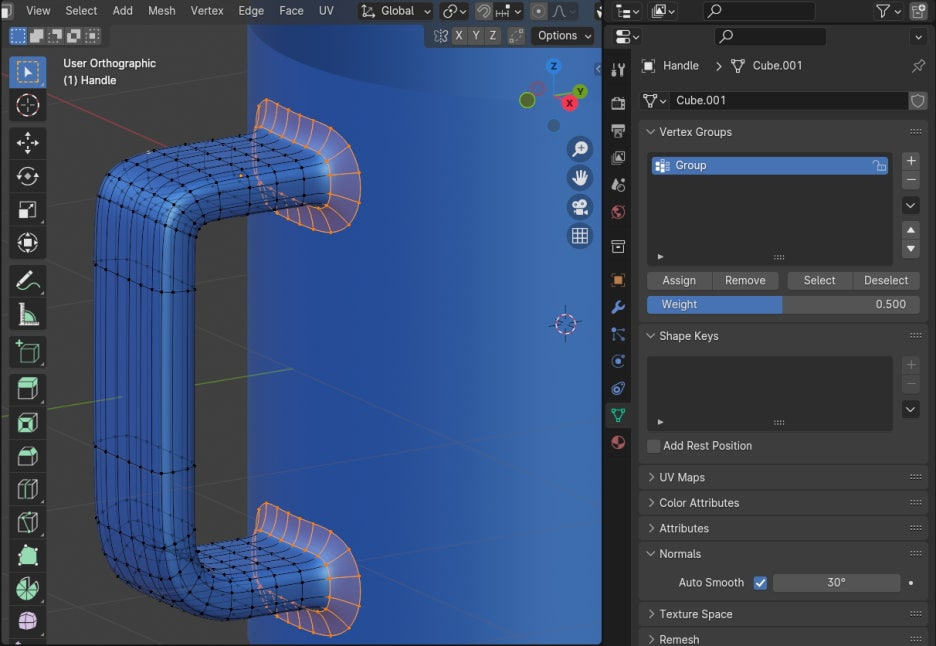
손잡이 양 끝 부분의 엣지들을 선택합니다.
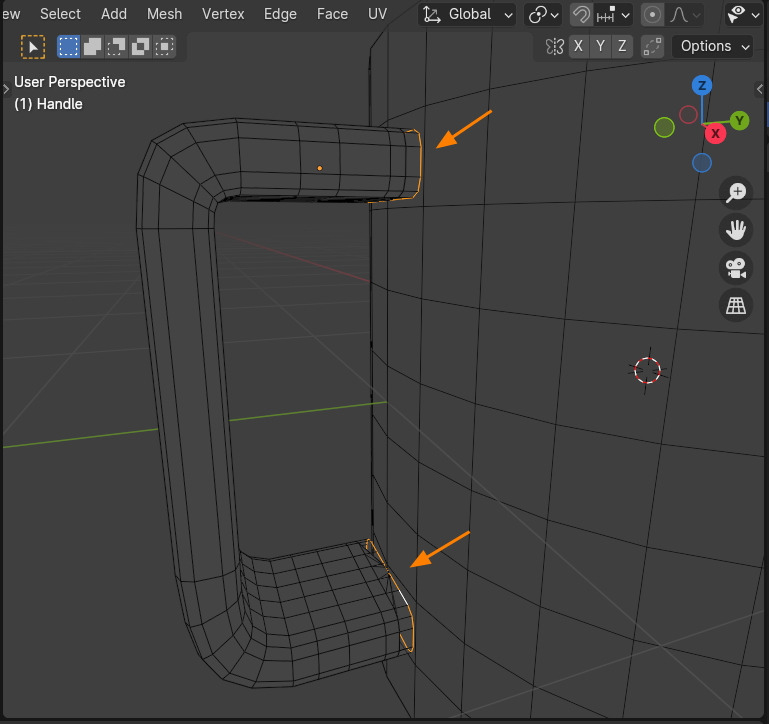
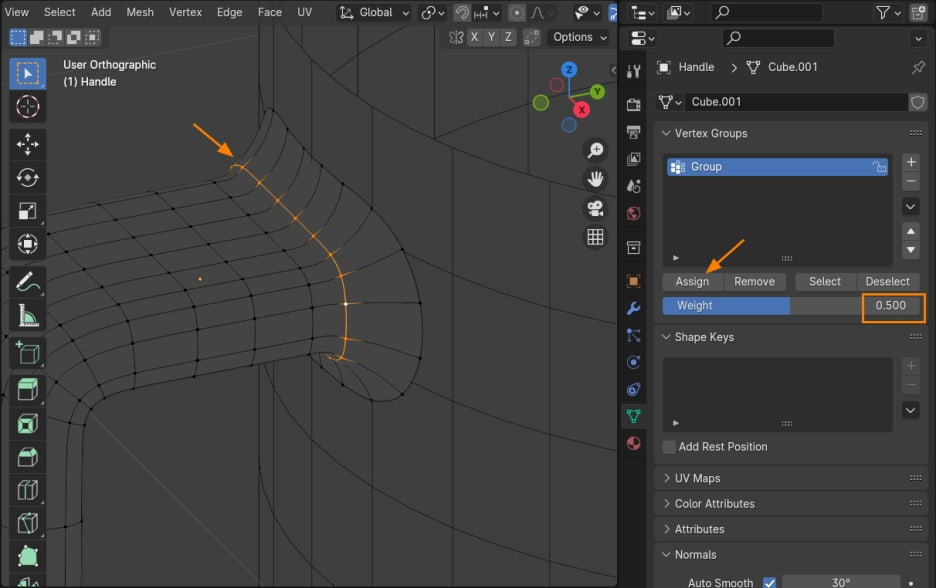
그리고, Properties에서 Data 탭에서, Vertex Groups에서 Group을 생성하고, 그 그룹에 선택한 엣지를 Assign해서 그 Group에 넣습니다.
Shrinkwrap 모디파이어에 손잡 오브젝트의 방향(현재 Y)를 확인해서, Axis 를 Y축을 선택하고,
Vertex Group에서 'Group'를 선택합니다.

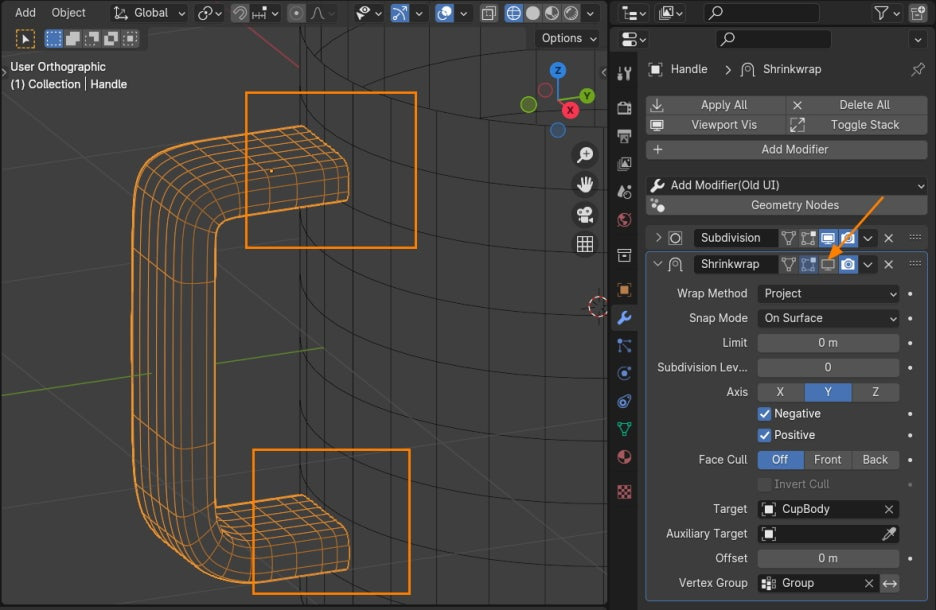
그러면, 머그컵에 착! 달라붙은 손잡이 끝 부분이 되었습니다.
모디파이어의 '모니터' 모양의 아이콘, 이름은 'Realtime' 입니다. 이것을 off 시킵니다.
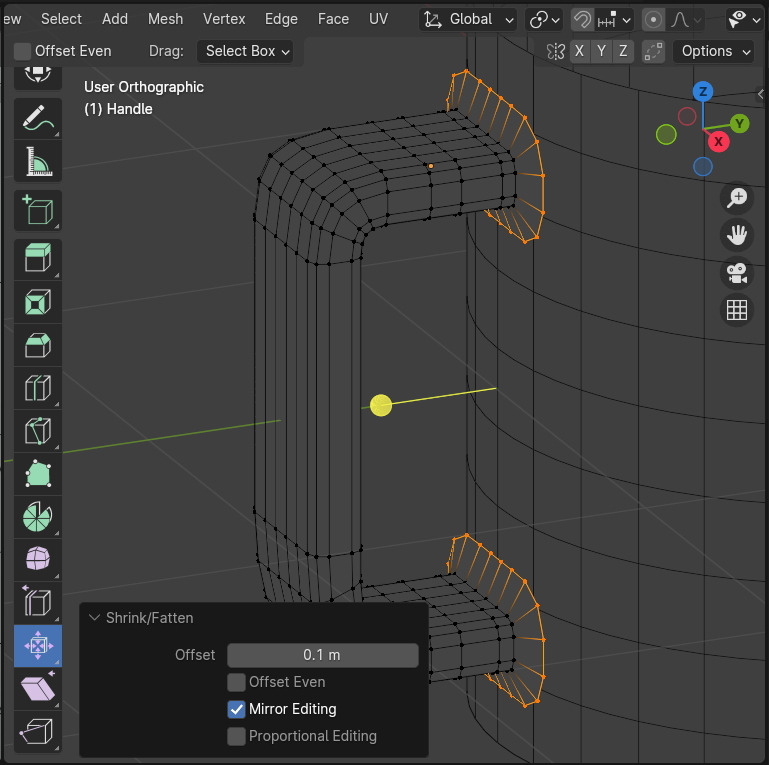
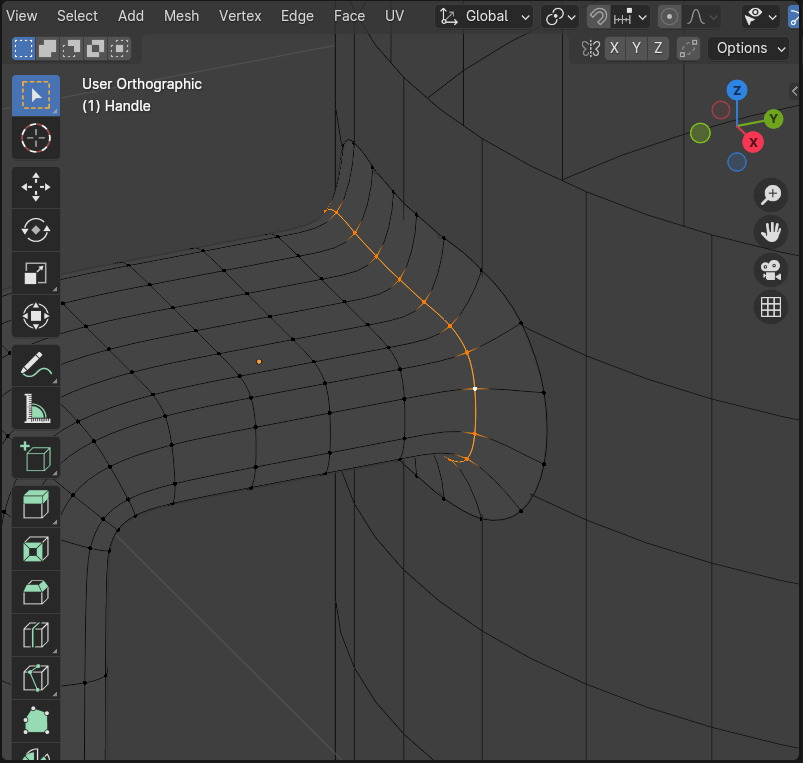
이제 Edit mode로 전환하고, 끝 부분의 엣지를 선택하고, (Group부분이죠?)

Toolbar 에서 Shrink / Fatten을 선택하시거나, 또는 단축키 Alt + S로 선택한 엣지를 확장 시켜 줍니다.
다시 오브젝트 모드로 전환합니다.
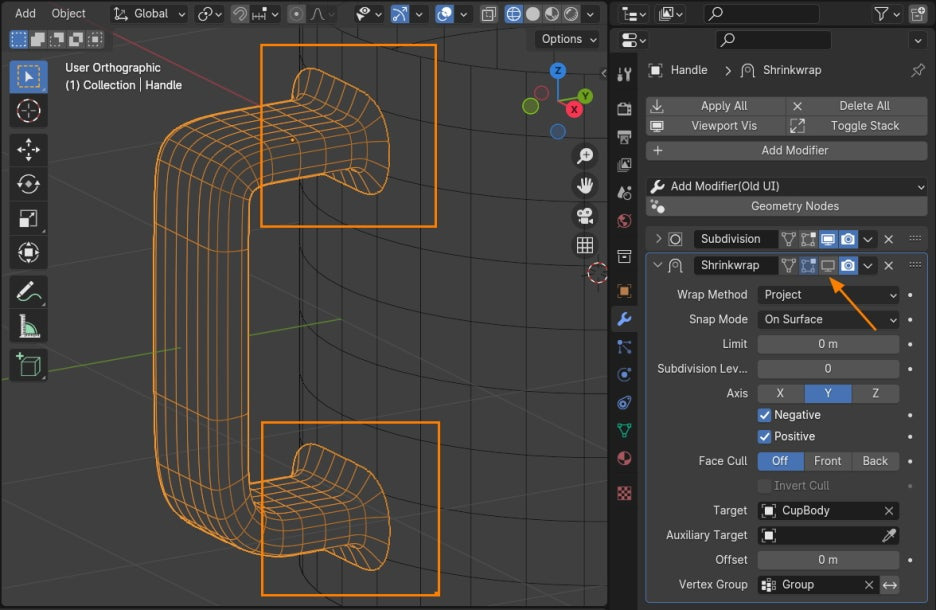
그리고, 모니터 모양의 아이콘,'Realtime'을 on 하면, 확장시킨 손잡이의 'Group' 부분이 머그컵 본체에 착 달라 붙습니다.
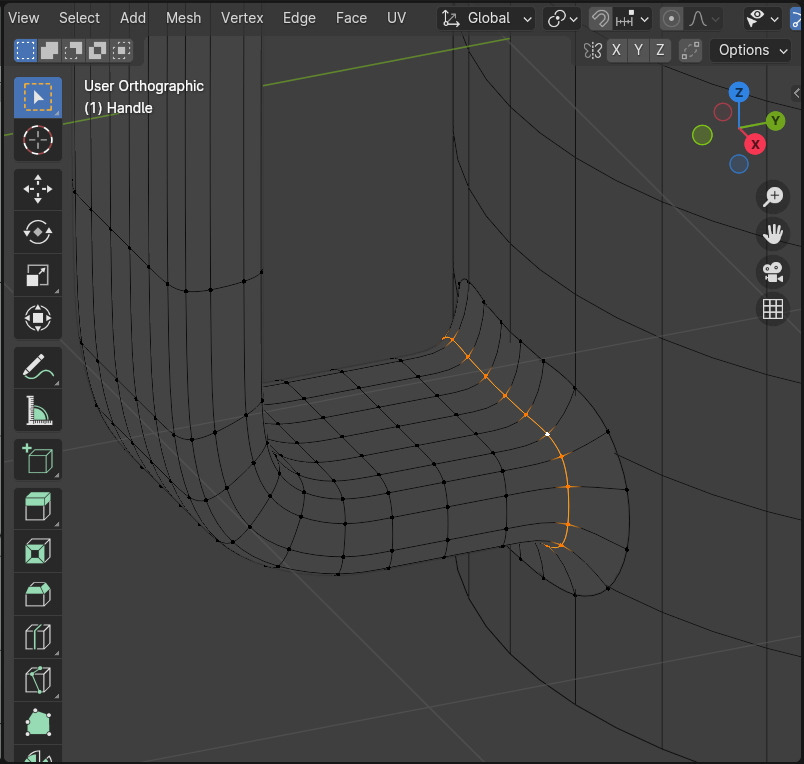
손잡이 끝에서 두번째 엣지들을 선택합니다. 그리고, 모디파이어에서 역삼각형 모양의 아이콘, On Cage를 활성화 시켜줍니다.
선택한 엣지를 Vertext Group 에서 Group 으로 Weight를 0.5 값으로 해서 Assign을 해줍니다. Group 소속이 되는 것이죠.
두번째 엣지들은 Weight 가 0.5 이어서 머그컵으로 좀더 가까이 착 접근합니다.
아래쪽도 역시 두번째 엣지를 선택해서 위와 같은 방법으로 해줍니다. Weight 0.5 으로..
Weight 가 0.5 이어서, 머그 컵으로 좀더 착 가까이 접근 합니다.
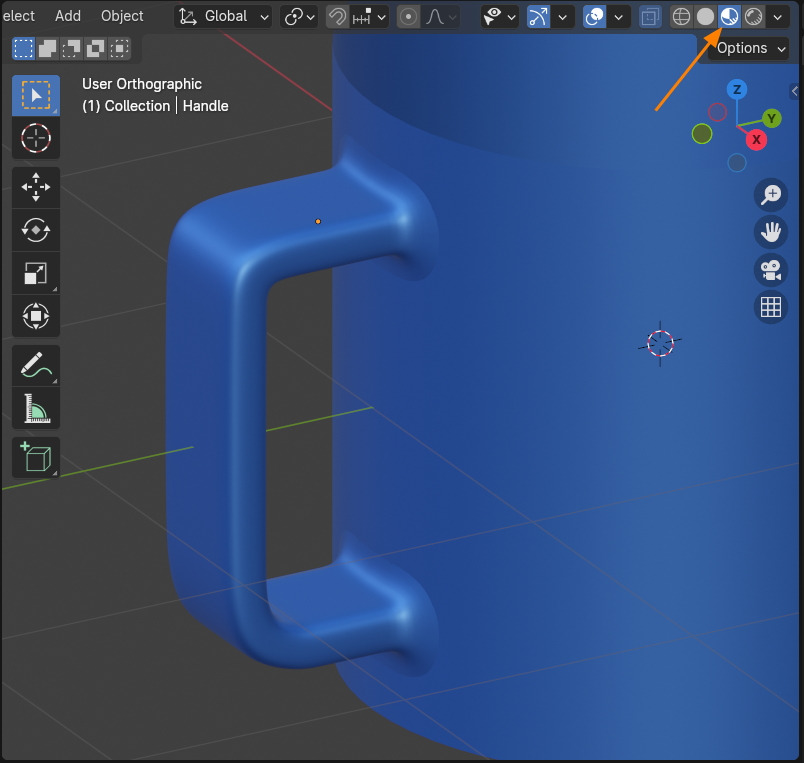
Material Preview로 전환해서 보면 손잡이와 머그컵이 착 달라 붙었지만, 아직 경계가 보입니다.
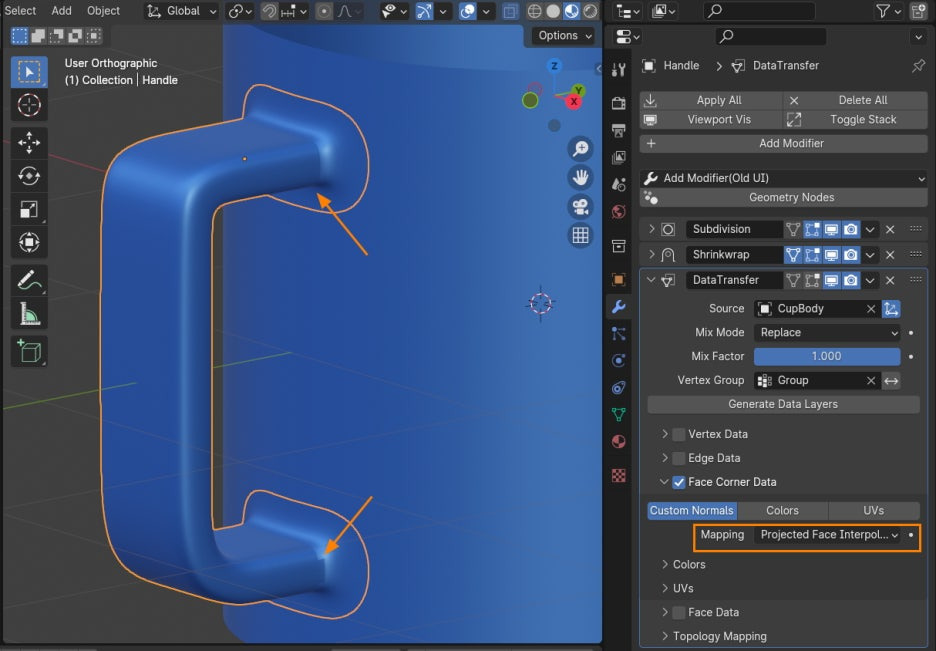
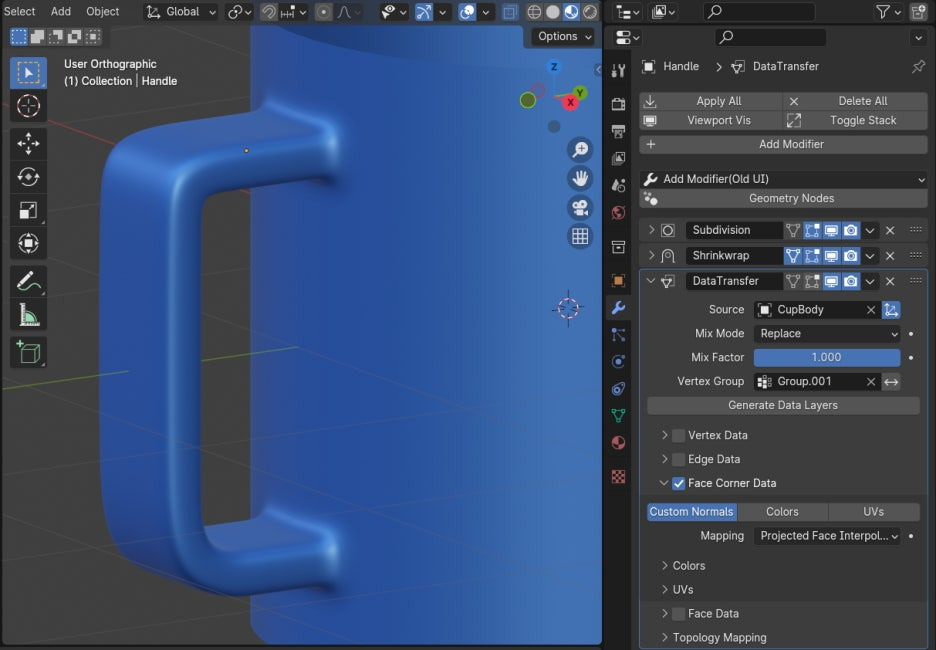
모디파이어 DataTransfer 를 적용시키고, 옵션들을 다음과 같이 설정해 줍니다.
Source로 CupBody를 선택하고, Vertex Group 를 Group을 선택하고, 그리고
코너 부분은, Face Corner Data 를 on 시키고, Custom Normal을 on 합니다.
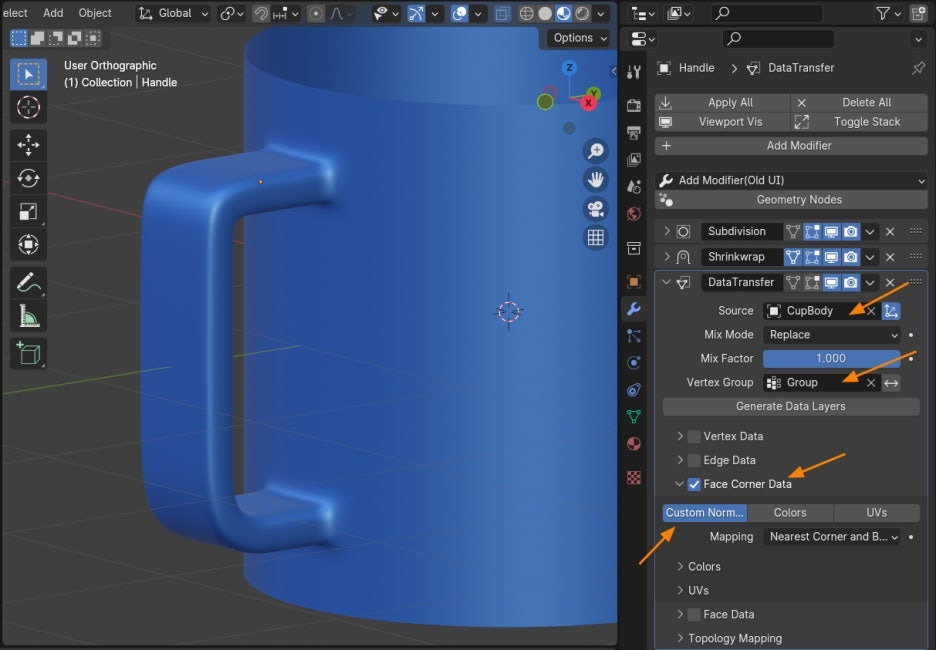
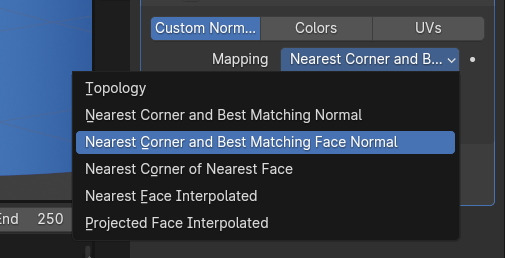
그리고 Mapping에 Nearest Corner and Best Matching Face Normal 을 선택합니다.
이렇게 세팅하면, 손잡이 안쪽 부분에 면에 변화가 일어 납니다. ( 이렇게 되는게 정상입니다. )
에디트 모드로 전환해서 다시 Vertext Group으로 들어갑니다.
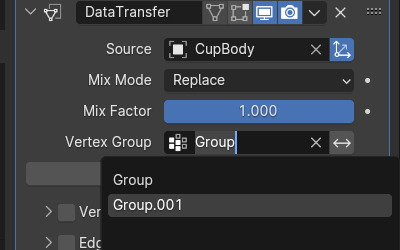
다시 끝의 Edges를 선택해서, Vertext Group에 새로운 Group을 생성해서(Group.001) 선택한 엣지들을 Assign 해줍니다.
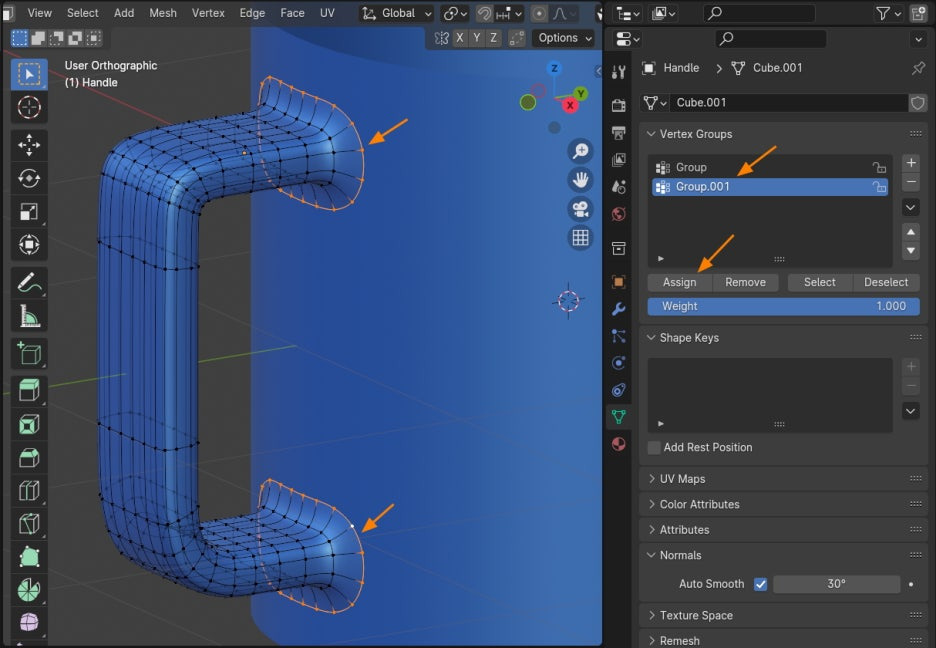
DataTransfer 에서 Vertext Group 에서 새로 만든 Group.001 을 선택합니다.
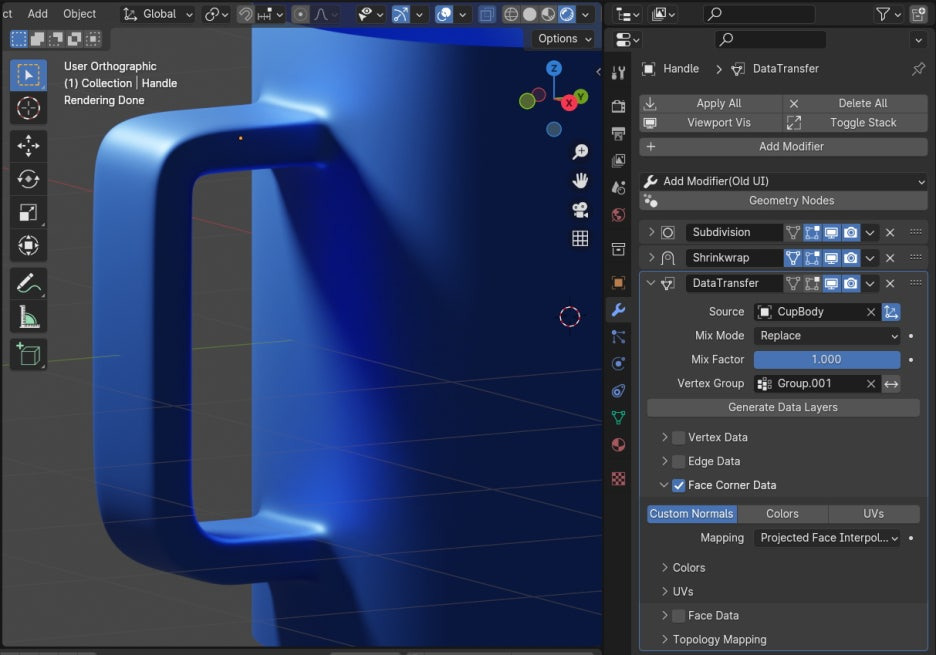
그러면 경계 부분과 손잡이 부분의 경계 면이 자연스럽게 연결되어 표현되었습니다.
렌더 프리뷰로 그림자를 보이도록 하면, 훨씬 더 효과를 확인 할 수 있습니다.
🏆 국비지원! 수강료 무료!💸💸💸
👉 Blender로 나도 제페토크리에이터!수강신청 https://litt.ly/solongos
☕제페토 카페 https://cafe.naver.com/zepeto3d

'3D > Blender3D' 카테고리의 다른 글
| Blender: Node Wrangler[2] (4) | 2024.10.07 |
|---|---|
| Blender: Node Wrangler[1] (7) | 2024.10.04 |
| Unity:[Particle] Emission (0) | 2024.09.24 |
| Blender4.x: Snap, Align Objects (1) | 2024.09.06 |
| Blender4.x: Align Objects[2] (3) | 2024.09.05 |


