Blender 의 Sculpt mode에서 Brush에 alpha 소스를 사용할 수 있습니다.
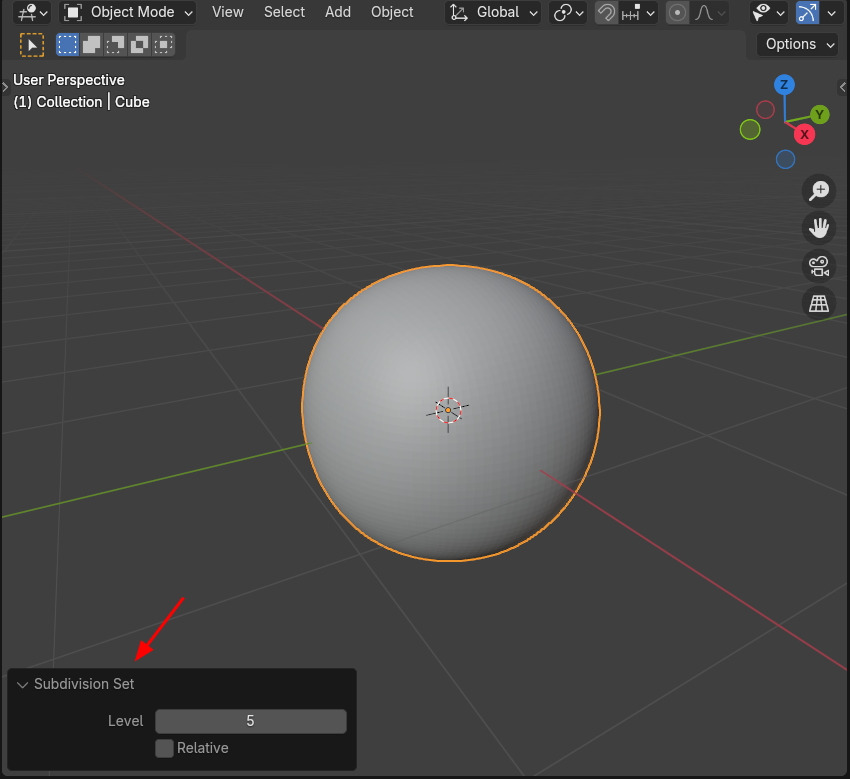
우선, Sculpt 하려면 Mesh구조가 촘촘해야 합니다. 일단, Subdivision Surface으로 면을 나눠줍니다.
4-5 단계 해줍니다.
이 상태에서도 Sculpt mode로 전환해서 Draw 브러시로 그려보면... 면들이 저렇게 보입니다. 보시다시피, 상당히 거칩니다.
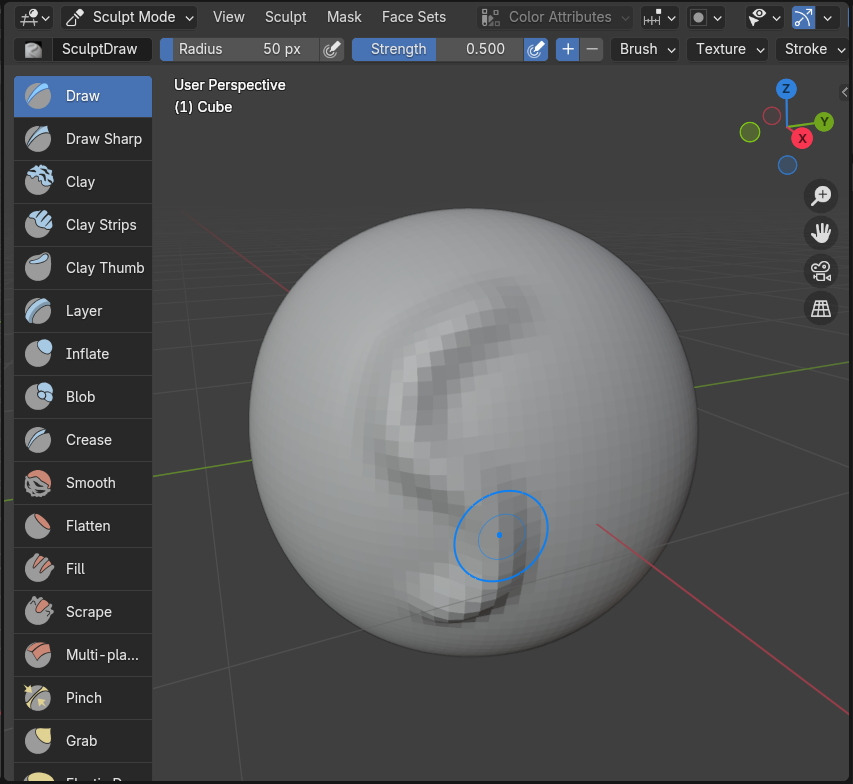
Sculpt 모드에서는 Subdivision Surface를 적용하면 안됩니다.
Sculpt mode에서 단축키 Ctrl + 3을 하면, Subdivion이 아닌, Multiresolusion이 적용됩니다.
여기서, Subdivision / Subdivide를 해줘야 합니다.

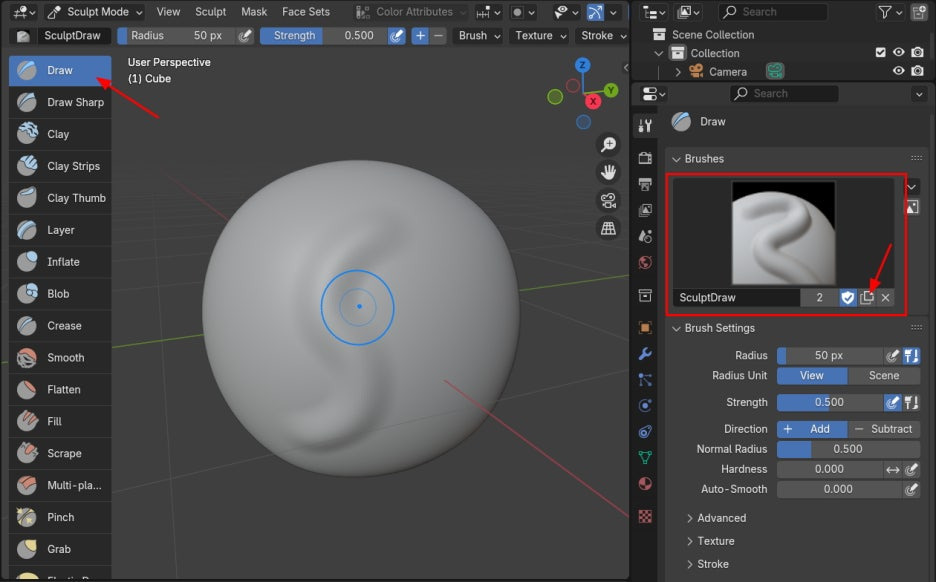
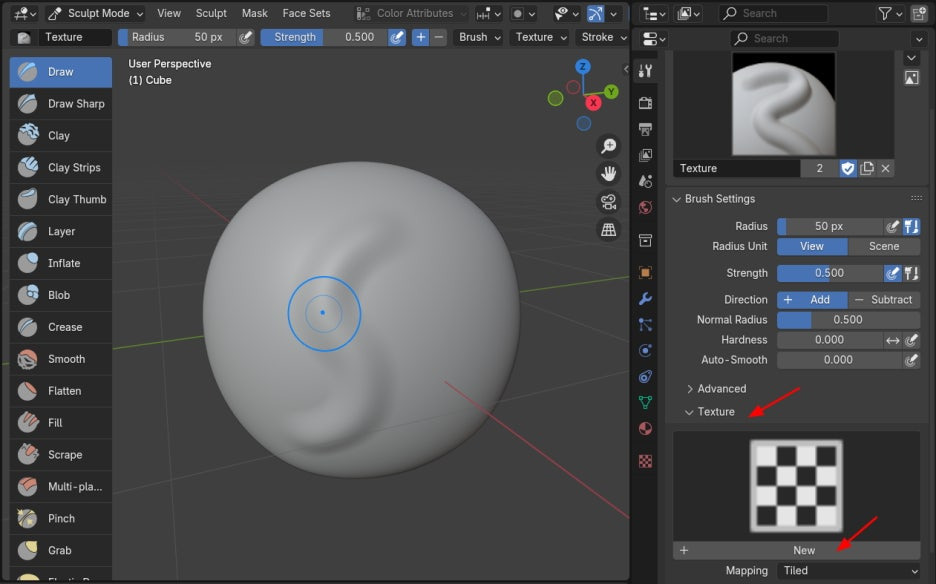
여기서 Draw 브러시를 선택하고, Properties 에서 Tool , Brushes가 SculptDraw임을 확인하고, 복사를 해줍니다.
그러면, SculptBrush.001이라고 복사가 하나 되고, 이 이름을 Texture라고 바꿔줍니다.
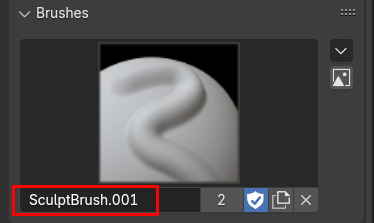
2개의 Brush가 보입니다. Texture 에다가 알파소스를 적용할 것입니다.

Brush Settings에서, Texture 에서 New 버튼을 클릭합니다.
Properties 창을 두개로 나눠서, 왼쪽은 Tool properties, 오른쪽은 Texture properties 입니다.
왼쪽에서 Texture 를 새로 만들면, 오른쪽의 Texutre Properties에서 Image Texture 노드 창이 열리고, 이미지 파일을 Open 할수 있습니다.
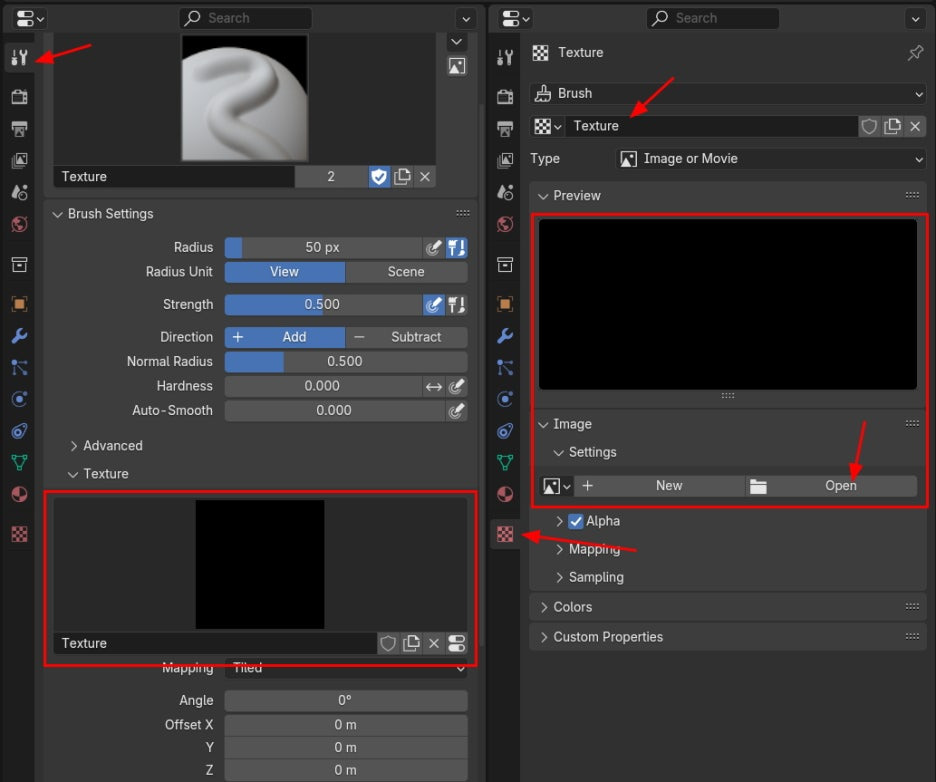
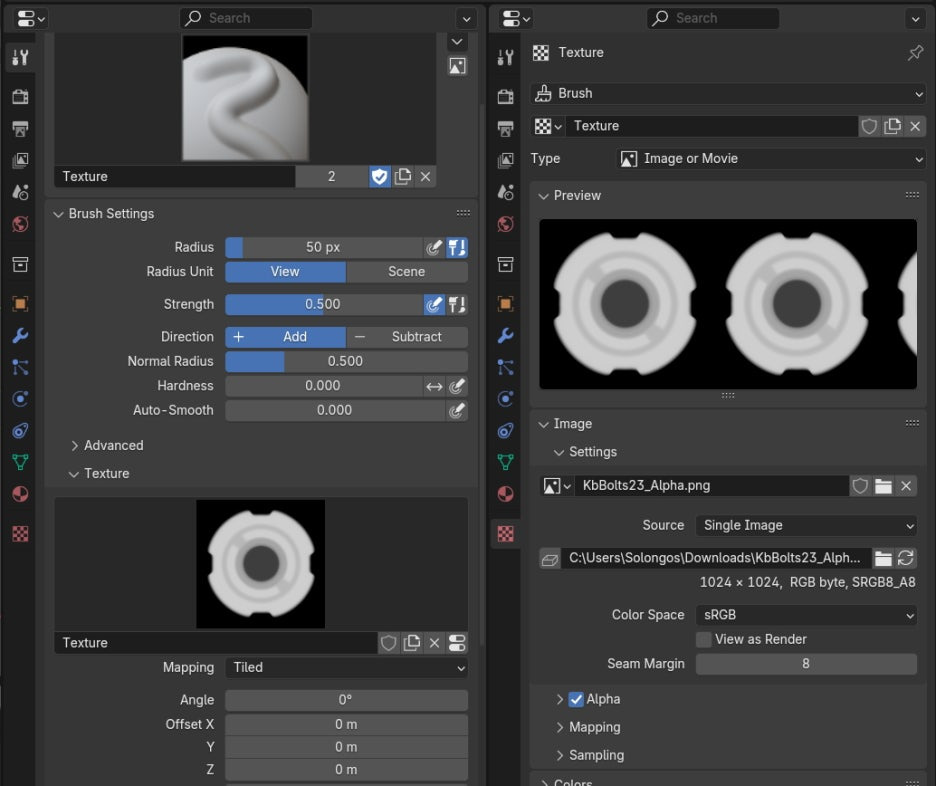
알파 이미지 소스를 부른 상태입니다.
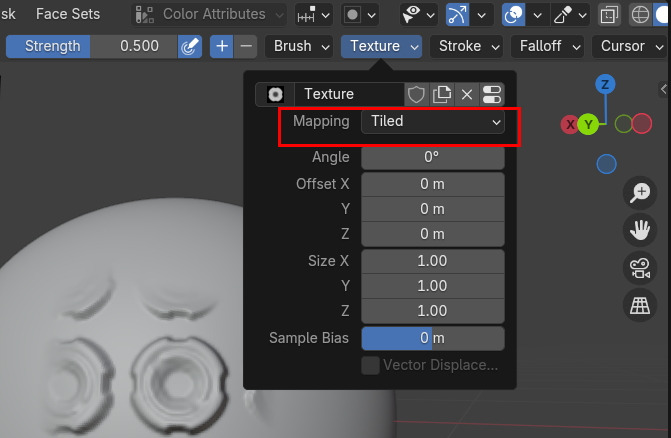
그리고 Draw 브러시로 테스트 해봅니다. 이렇게 알파소스가 타일 처럼 나옵니다.
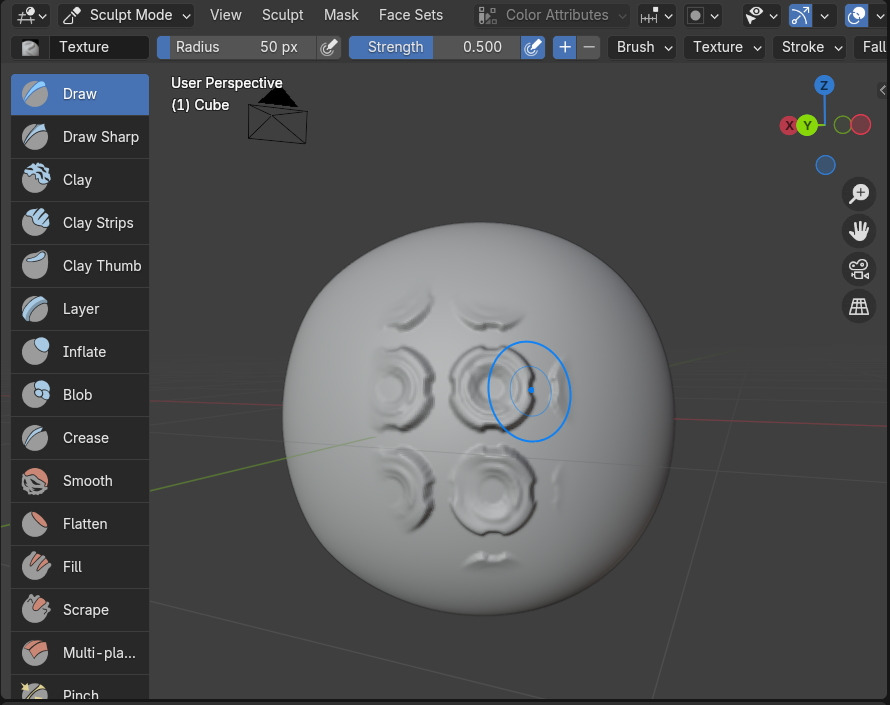
그 이유는 Mapping 의 기본값이 Tiled이라서 그렇습니다.
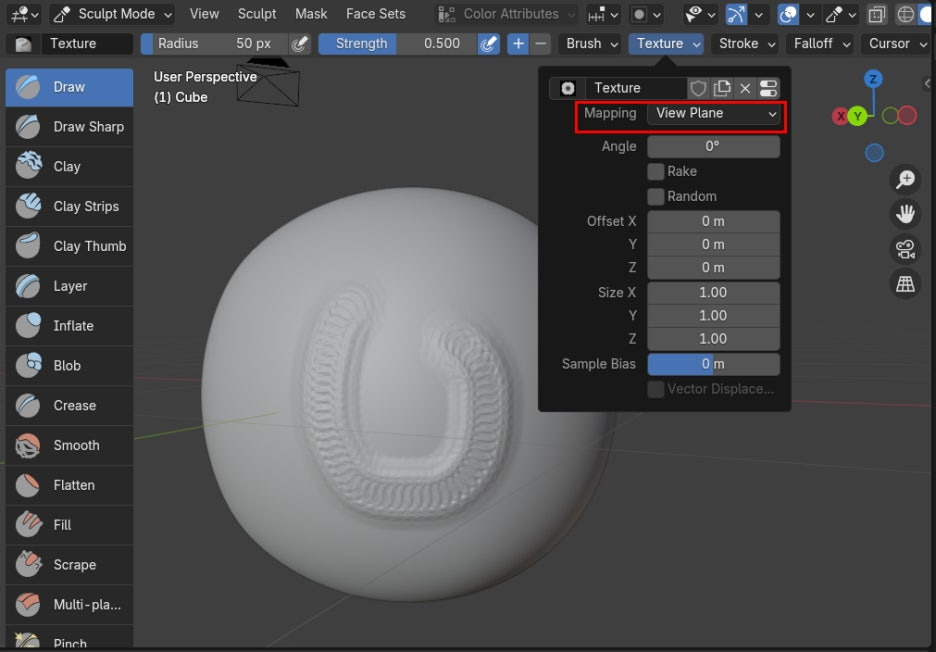
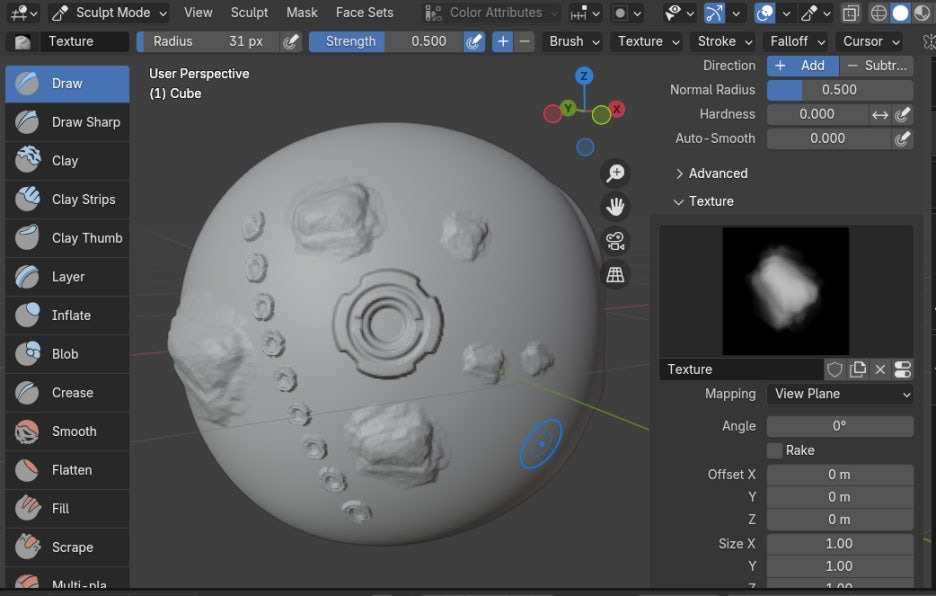
Mapping을 View Plane을 선택하면, 브러시가 가는 데로 조각됩니다.
Random은 랜덤하게 조각됩니다.

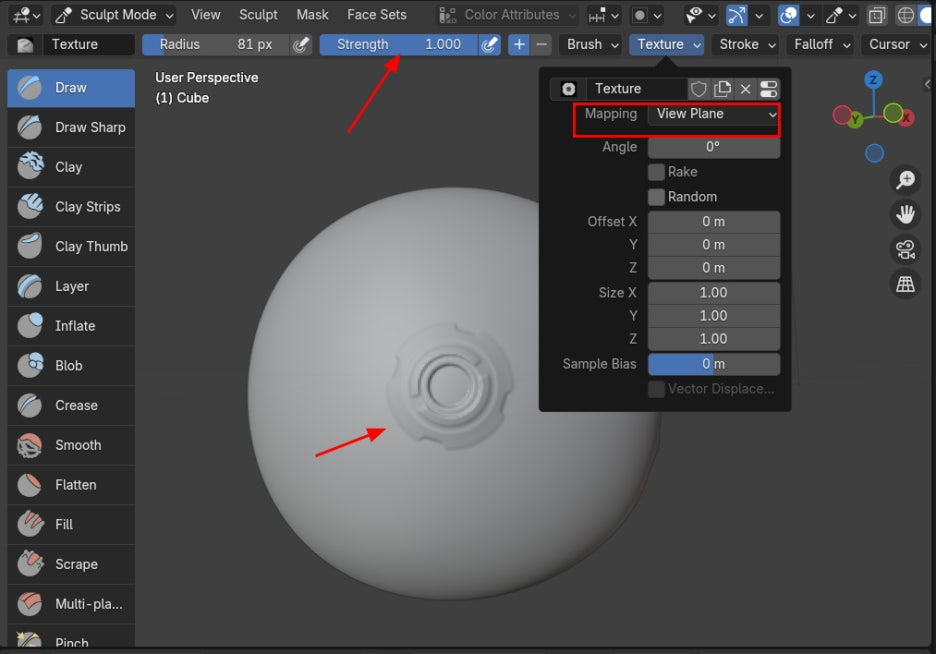
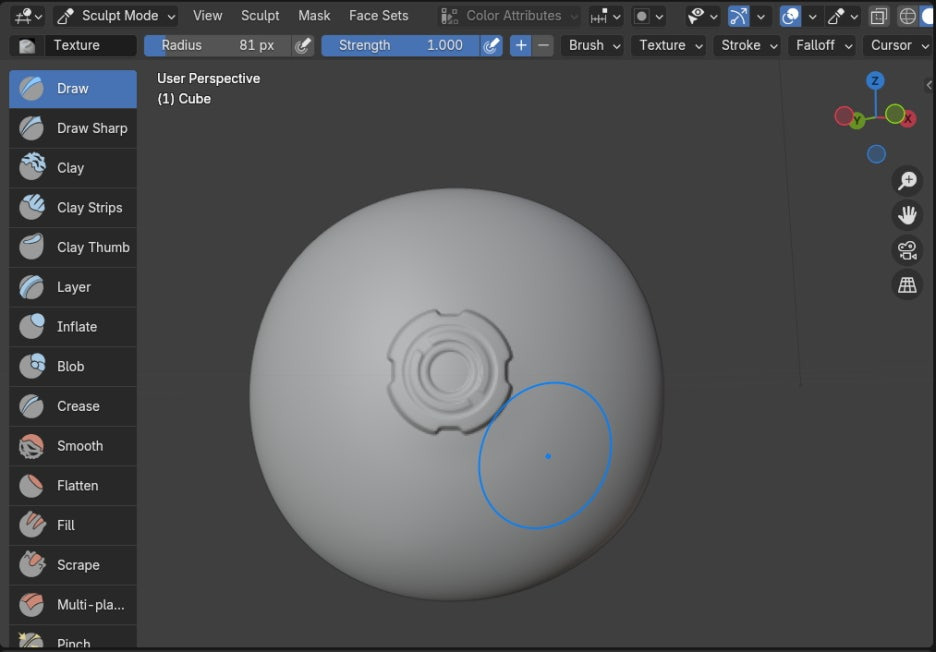
우선, 브러시를 한번 클릭하면, 브러시 알파의 모양이 나타납니다. 현재, 외곽이 Smooth 한 상태입니다.
외곽까지 또렷하게 조각되게 하려면, Falloff를 Custom / Constant를 선택합니다.
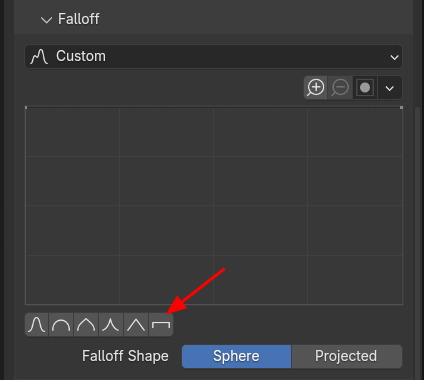
외곽이 또렸하게 조각됩니다.
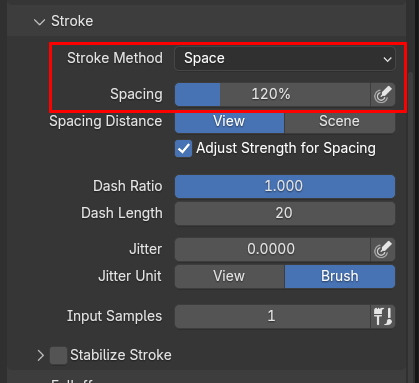
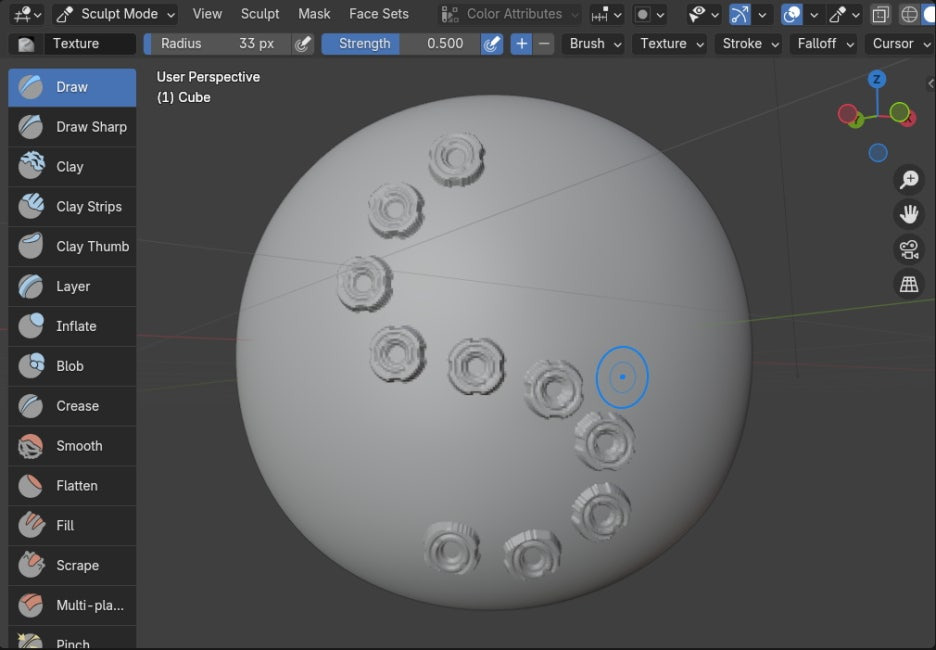
Stroke을 Space에, Spacing 을 120% 로 합니다. 즉, 브러시 하나 크기가 100% 이니, 그것보다 20% 정도 더 크게 텀을 두면서 조각 브러시로 표현하겠다는 것입니다.
브러시가 지나간 곳에 볼투 조각이 배열됩니다.
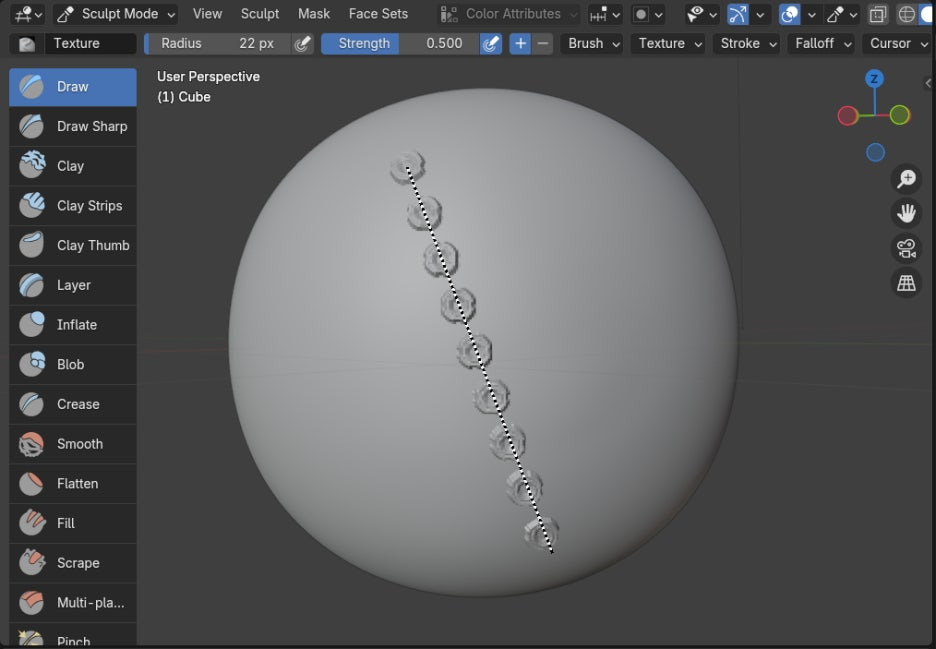
Stroke을 Line으로 선택하고 Draw를 했습니다.
그 옆에 Anchored 입니다. 드래그 하면서 크기를 정해줍니다.

다른 알파소스, 바위를 선택해서 Draw 한 결과입니다.
🏆 국비지원! 수강료 무료!💸💸💸
👉 Blender로 나도 제페토크리에이터!수강신청 https://litt.ly/solongos
☕제페토 카페 https://cafe.naver.com/zepeto3d
#블렌더 #블렌더툴 #blender #blender3d #블렌더강의 #zepeto #제페토 #국비지원 #부업 #부수익 #3d강의
'3D > Blender3D' 카테고리의 다른 글
| Blender: Making an Alpha Brush(Object) (7) | 2024.10.28 |
|---|---|
| Blender: Making a Brush [VDM] (4) | 2024.10.25 |
| Blender: Brush Settings, Blend (8) | 2024.10.22 |
| Blender에서 펜 타블렛 필압 활성화 (3) | 2024.10.21 |
| Blender: Brush alpha (5) | 2024.10.18 |


