블렌더에서 VDM 애드온을 이용한 브러시 만들기 입니다.
Preferences에서 Addon VDM Brush Baker를 설치 합니다.

작업 모드를 Sculpt Mode로 전환해서
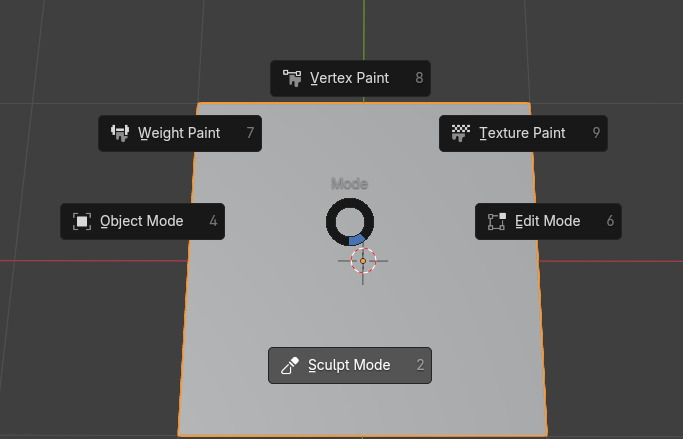
Side bar 에서 Tool 탭, 그리고, Tool의 아래를 보면, VDM Brush Bake라는 부분이 보입니다.

Brush는 정사각형 Plan에서 만듭니다. 그리고, 정원의 영역으로 Brush Texture 모양이 되도록, 정원 안에 만들어 넣습니다. 마스크를 만듭니다. (원형의 마스크는 Shift + A )

마스크를 뒤집습니다. (Ctrl + i )

Draw Sharp브러시를 선택합니다. Strength는 0.5 입니다.

Alt + E, Stroke Method에서 Line을 선택합니다.

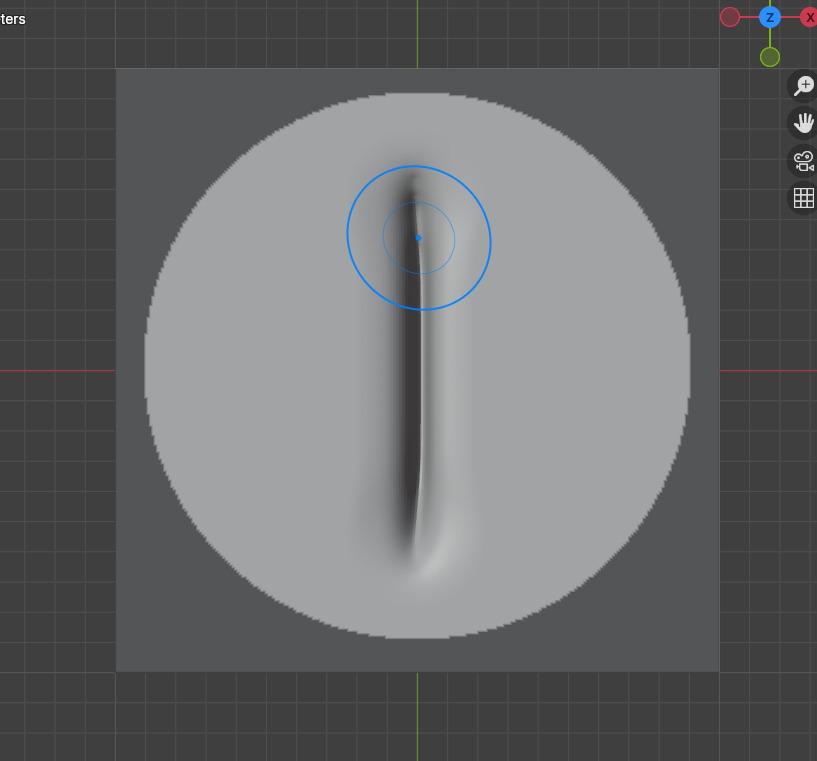
중앙의 세로로 Line을 긋습니다. Snap은 Alt키 입니다.

안쪽으로 들어가는 Draw Brush입니다.

몇번 더 중복되게 해줘서 깊게 해줍니다. 브러시 크기도 조금 더 키워주면 좋겠습니다.

같은 동작을 더 해줘서 좀더 깊게 만듭니다.

브러시 사이즈도 적당히 크게 조절해서, 들어가는 부분이 너무 좁지 않게 만들어 줍니다.
다음은 기본 Draw Brush를 선택하고, Strength를 1로 해줍니다.

이제 Stitch의 튀어 나오는 실의 표현을 할 것입니다.
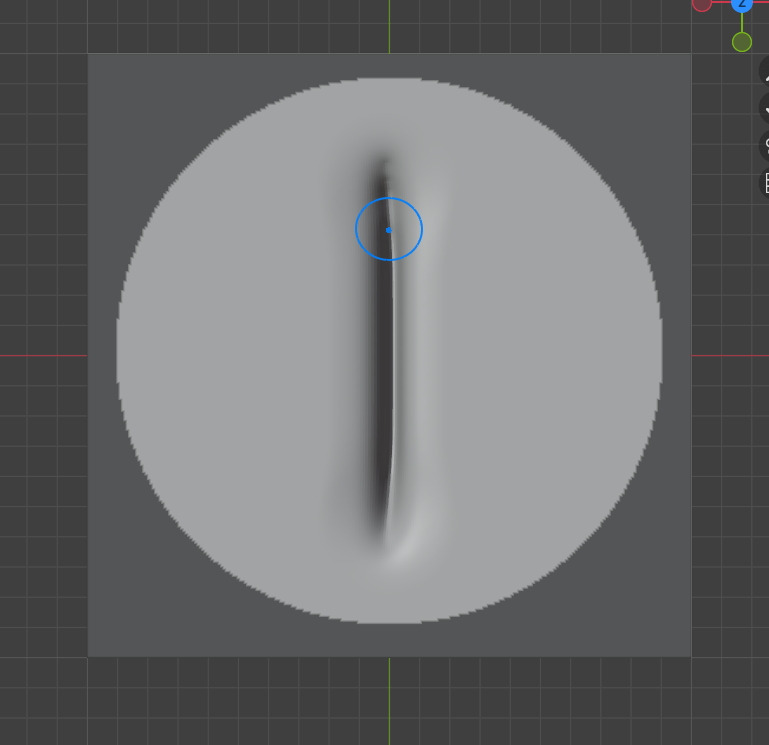
튀어나오도록 Draw 브러시로 Line을 그어 줍니다. 몇번 반복해줍니다.

조금 두드러 졌습니다.

다음은 Inflate brush를 선택하고,

주위의 실에 밀려나 붕긋하게 나오는 천의 표면 모습을 표현해 줍니다. 적당히 마감해줍니다.

이제 Brush Baking을 해줍니다.
VDM Brush의 Name, 이름을 주고, Render and Create VDM Brush 버튼을 클릭해서 Bake해줍니다.

완성되면, 아래에, 메세지가 완료되었다고 표시되고, Name에 붉게 표시가 나타납니다. 이렇게 되면 생성이 되었습니다.

Brushe에 들어가면, 만들어진 Brush가 보입니다.

그리고, 다른, 새롭게 준비된 Plan에 테스틀 해주면, 앵커 스타일로 그려집니다.

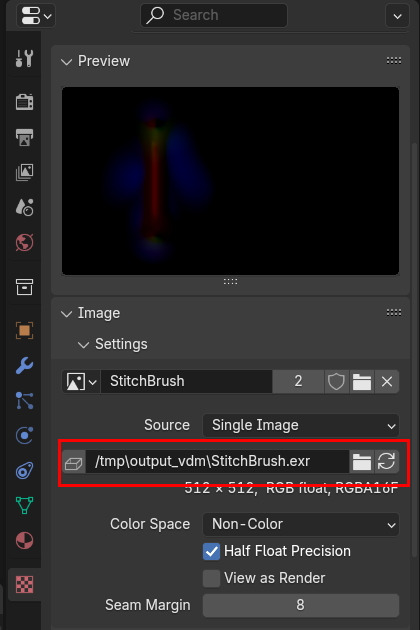
Texture 란으로 가면, 이미지소스가 만들어 졌음을 확인할 수 있구요,

Properties의 Texture에서 소스에 대한 위치 경로가 표시되어 있습니다.
VDM 생성을 하면, Brush의 Stroke Method가 Anchored가 되어 있습니다.

이것을 Space로 바꾸면 브러시로 드래그를 하면 브러시를 따라서, 그려집니다. 현재, 소스간의 space가 100% 입니다

브러시의 움직임이 곡선일 경우에, 소스가 곡선의 방향을 따르지 않고, 원래의 소스의 방향을 유지하고 있습니다.

곡선의 방향을 따라, 소스 의 방향을 따라가게 하려면, Rake를 활성화 해줍니다. 그러면 곡선의 방향에 맞춰 소스의 각도도 비슷하게 맞춰줍니다.

곡선을 그릴때, 브러시를 꽉잡아주는, Zbrush에서 Lazy Smooth 같은 옵션이 Stabilize Stroke를 활성화 해줍니다. (Factor는 0.5 정도)

🏆 국비지원! 수강료 무료!💸💸💸
👉 Blender로 나도 제페토크리에이터!수강신청 https://litt.ly/solongos
☕제페토 카페 https://cafe.naver.com/zepeto3d
#블렌더 #블렌더툴 #blender #blender3d #블렌더강의 #zepeto #제페토 #국비지원 #부업 #부수익 #3d강의
'3D > Blender3D' 카테고리의 다른 글
| Blender: Brush Append (6) | 2024.10.29 |
|---|---|
| Blender: Making an Alpha Brush(Object) (7) | 2024.10.28 |
| Blender: Sculpt Brush, Alpha (5) | 2024.10.23 |
| Blender: Brush Settings, Blend (8) | 2024.10.22 |
| Blender에서 펜 타블렛 필압 활성화 (3) | 2024.10.21 |


