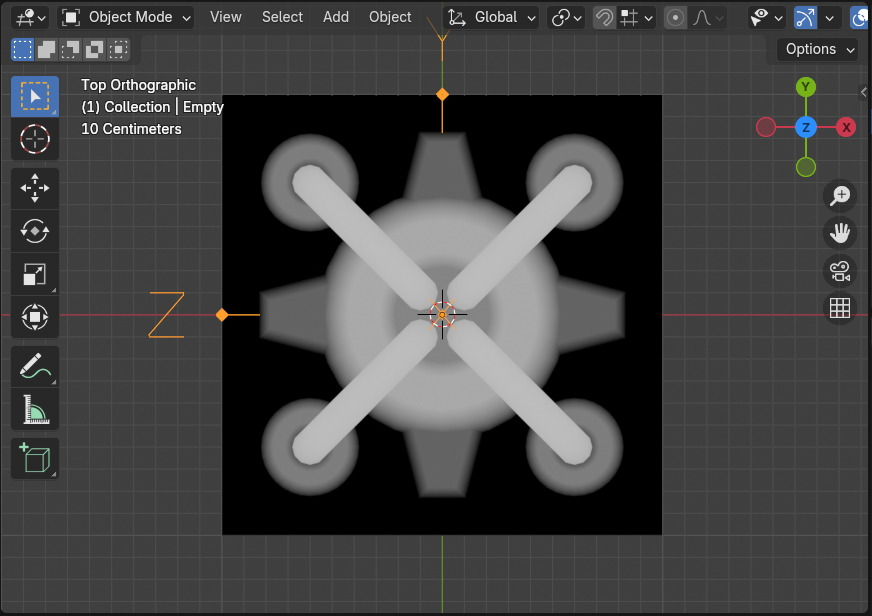
Sculpting 이 아닌, 기계적인, 메카닉 같은 여러 메쉬로 구성된 오브젝트를 알파 브러시로 만들수 있습니다.
아래 그림과 같은 다중 오브젝트로 구성된 구조물일 경우에는 하나의 오브젝트로, Join부터 해줍니다.(Ctrl+J)

Shade Editor에서 다음과 같이 Gradient Texture를 생성 시키고, Ctrl + T를 해서 텍스쳐 코디네이터와 매핑 노드를 생성합니다.

프리뷰 모드를 매터리얼 프리뷰 상태로 전환합니다.

Gradient Texture를 Material Output으로 연결합니다.

그러면 아래 그림 처럼 그라디언트가 나타납니다.

퍼스펙티브하게 보면 아래와 같이 보입니다.

Texture Coordinate에서 Generated에서 Obect 에서 Vector로 연결합니다.

그러면, 딱 반이 어둡게 처리됩니다.

퍼스펙티브상태에서 이렇게 보입니다.

Add Object에서 Empty , Plain Axes또는 Arrows를 생성합니다. Arrows는 X,Y,Z 가 보이므로 이것을 사용해 보겠습니다.

생성한 Empty Object를 Texture Coordinate의 Object에 연결합니다.

이제 회전을 해보겠습니다.

Y축으로 -90 회전해줍니다.

Top view 에서 이렇게 보입니다. 마치 Z depth map을 보는 듯 합니다.

이제 Empty 오브젝트의 상하 (현재는 X축)의 Scale을 줄여 봅니다.

그러면 오브젝트의 최 상단이 좀더 밝아 집니다. Scale이나 Location에 따라서 Gradient가 달라집니다.
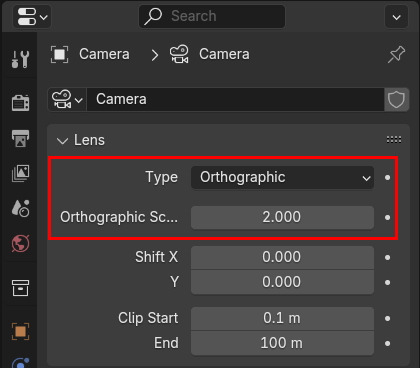
이제 이 것을 렌더링합니다. 카메라를 오브젝트 탑뷰로 배치하고, 가로세로 해상도를 정 사각형으로 합니다.

그리고 Camera를 Perspective에서 Orthographic으로 바꿔주고,


적당한 거리로 배치합니다.

3D viewport에서 저렇게 보입니다.

그리고 Output을 BW, 흑백으로 맞춰주고,

렌더링 합니다.

그리고, Texture에 불러 오고,

Draw브러시를 하나 복사를 하고, 그 복사한 Draw 브러시에 Texture에 불러오고,
Mapping 을 Stencil로 바꿔줍니다.

그리고, Strok Method 를 Anchored로 바꿔줍니다.
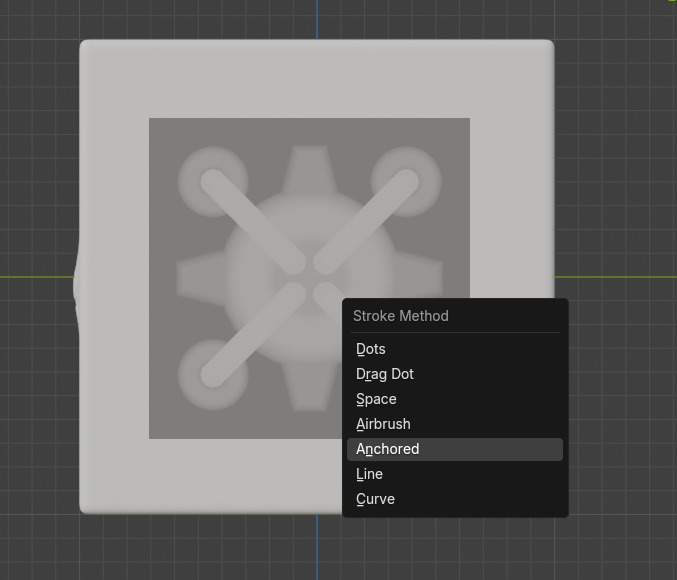
적당히 위치를 잡고, 브러시 작업을 하면, 브러시 모양으로 조각됩니다.


이 브러시의 이름을 바꿔줍니다. MechBrush로 바꿔줍니다.

이제 Tool 목록에 만든 브러시에 보입니다.

🏆 국비지원! 수강료 무료!💸💸💸
👉 Blender로 나도 제페토크리에이터!수강신청 https://litt.ly/solongos
☕제페토 카페 https://cafe.naver.com/zepeto3d
#블렌더 #블렌더툴 #blender #blender3d #블렌더강의 #zepeto #제페토 #국비지원 #부업 #부수익 #3d강의
'3D > Blender3D' 카테고리의 다른 글
| Blender: Create Asset - Mesh (4) | 2024.10.30 |
|---|---|
| Blender: Brush Append (6) | 2024.10.29 |
| Blender: Making a Brush [VDM] (4) | 2024.10.25 |
| Blender: Sculpt Brush, Alpha (5) | 2024.10.23 |
| Blender: Brush Settings, Blend (8) | 2024.10.22 |


