만든 Asset을 새로운 파일에 불러 세팅을 하거나, 다른 유저에게 세팅할수 있도록 하기 위해서는 다음과 같이 해야 합니다.
테스트를 위해 4개의 메쉬 오브젝트 들을 준비되어 있습니다

아웃라이너에서 Display mode를 Scenes로 전환합니다. (메쉬 선택을 쉽게 하기 위함)

Objects에 메쉬들이 보입니다. 모두 선택을 하고, Mark as Asset을 합니다.

그러면 이름 왼쪽에 Asset 아이콘이 표시 됩니다.

Asset Browser에서 Library를 Current File로 전환합니다.

그러면 막 생성한 따끈한 Assets이 보입니다.

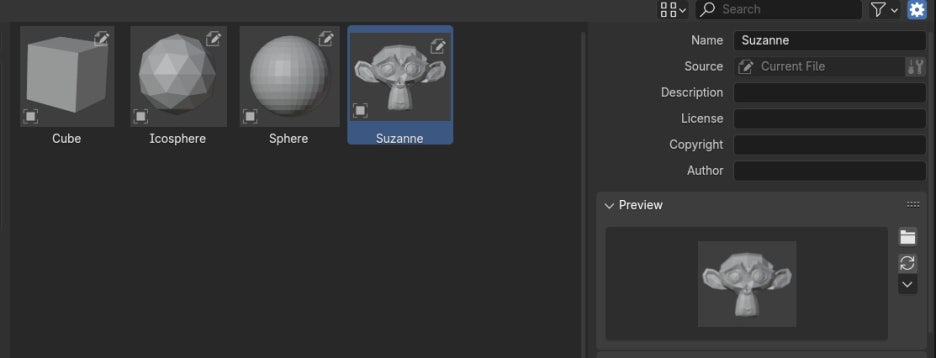
그리고, 각 Asset의 설정을 각각 해줍니다. 이름 변경이라던가, 아이콘 변경이라던가.
일단, 이 blender 파일을 우선 저장합니다. (파일을 저장해야, Asset 의 Catalog도 저장가능해 집니다.)
Asset 폴더를 만들고, 그 안에 파일을 저장 합니다.

(아이콘 썸네일 이 따로 있다면, 이 폴더 안에 별도 폴더를 만들어서 그 안에 이미지를 저장해 줍니다.)

그리고 Catalog를 생성하고,

Catalog의 이름을 설정합니다.

그리고, 각 카탈로그에 Asset들을 정 위치해 줍니다.
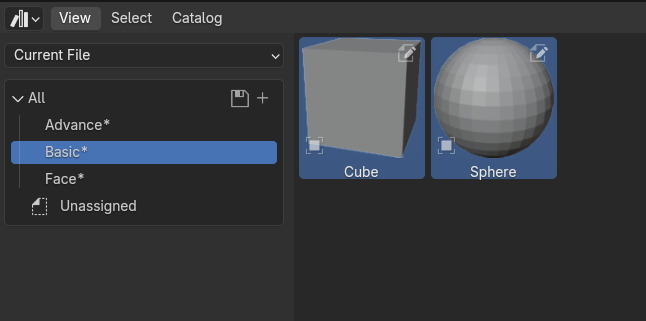
Catalog 아래로 catalog를 더 생성해서, 더 분류 해줄수 있습니다.


그리고 저장해 줍니다. 그러면 이름 옆의 별표는 사라집니다.

이렇게 저장하면, 블렌더 파일이 있는 곳에 txt파일이 생성됩니다.

이 Asset 의 정보가 txt 파일로 저장됩니다. 이 파일이 있어야, 새 파일에서 라이브러리를 불렀을 때, 설정한 이름과 카탈로그으로 세팅이 됩니다. (빨간 박스에 각 카탈로그와 이름이 보입니다.)

이렇게 저장이 되었으면
새로운 파일을 열어서, Preference에서 File Paths , Asset Libraries 에 추가해줍니다.
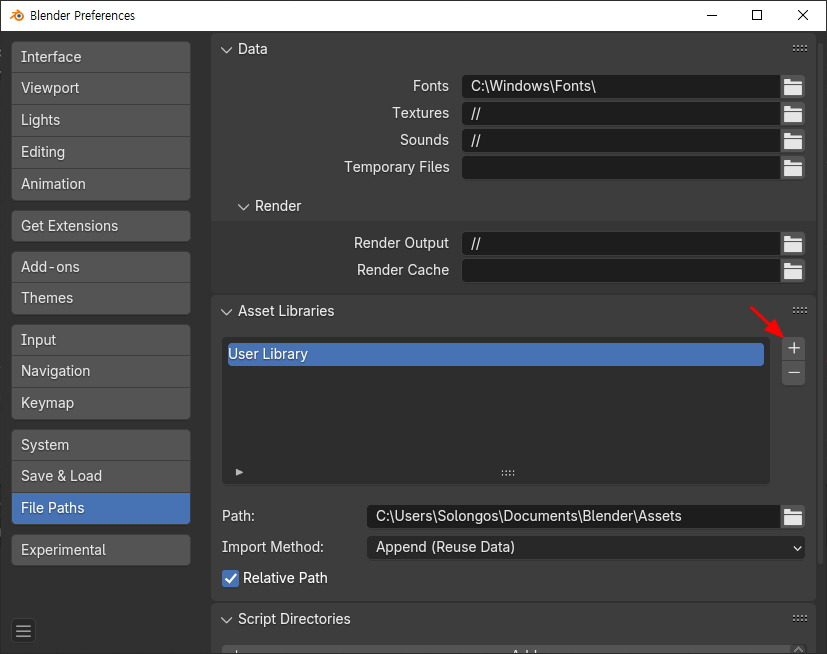
Asset을 저장한 폴더를 찾고, (thumb은 아이콘 이미지가 저장된 폴더 입니다.) 클릭합니다.

그러면, 그 폴더 이름으로 Library로 들어 옵니다.

그리고Asset Browser에서, Library목록을 보면,

폴더 이름의 Library가 보이고, 그것을 선택하면,

Asset 파일에 설정된 Assets Catalog로 되어 있음을 확인 할 수 있습니다.

🏆 국비지원! 수강료 무료!💸💸💸
👉 Blender로 나도 제페토크리에이터!수강신청 https://litt.ly/solongos
☕제페토 카페 https://cafe.naver.com/zepeto3d
#블렌더 #블렌더툴 #blender #blender3d #블렌더강의 #zepeto #제페토 #국비지원 #부업 #부수익 #3d강의
'3D > Blender3D' 카테고리의 다른 글
| Blender: Backup files (10) | 2024.11.05 |
|---|---|
| Blender 4.2: Eevee, Bloom 효과 (13) | 2024.11.04 |
| Blender: Create Asset - Shade (6) | 2024.10.31 |
| Blender: Create Asset - Mesh (4) | 2024.10.30 |
| Blender: Brush Append (6) | 2024.10.29 |


