Fillet Curve 노드에 대해 알아보겠습니다.
(Fillet 는, Bevel, Champer 와 비슷한 결과를 만들어 주는 명령)
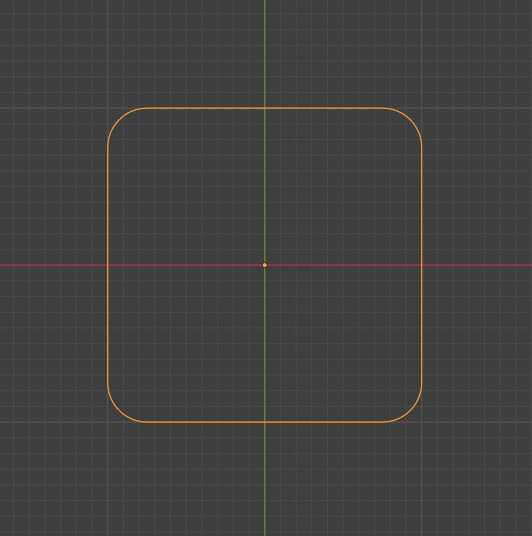
현재 Curve의 상태는 이러합니다. Mesh Plane에 Mesh to Curve 노드가 메쉬를 커브로 바꿔줍니다.

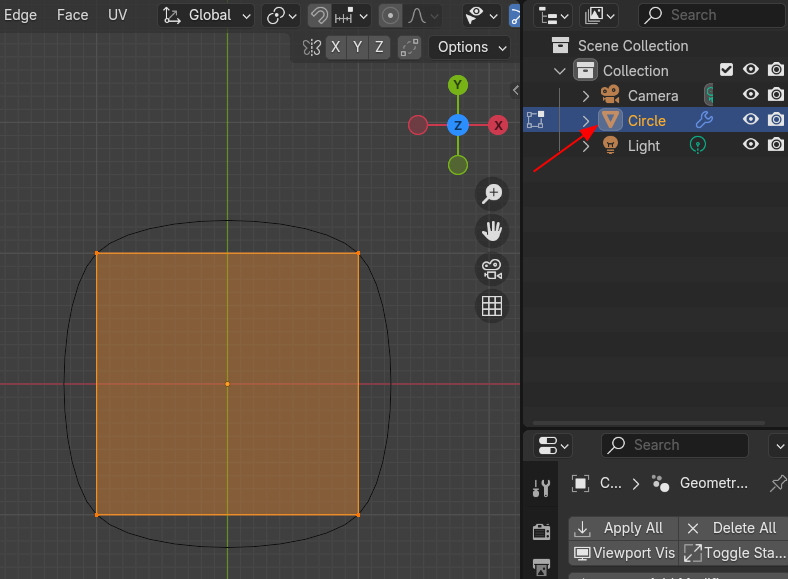
Edit mode에서 Mesh Plane 을 생성을 했으며,

오브젝트는 Mesh Circle입니다.
Mesh to Curve로 메쉬를 커브로 만들고, Curve의 Spline타입을 Catmull Rom을 선택했습니다.
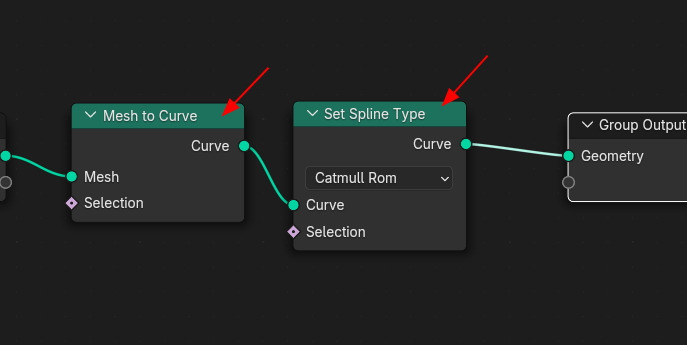
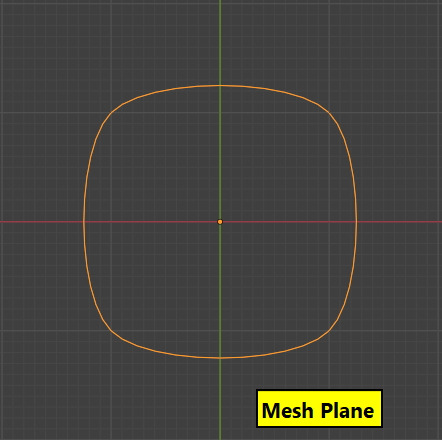
그 결과, Mesh Plane이 Catmull Rom 타입이 적용된 Curve의 결과가 되었습니다.
안은 채워지지 않은 , Curve상태입니다.
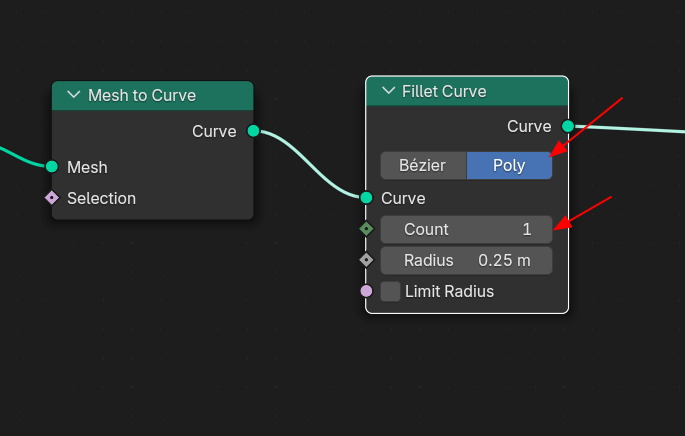
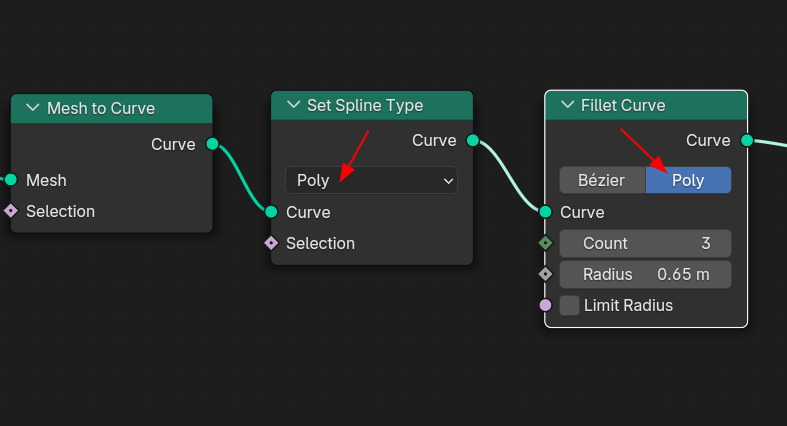
여기에 모따기, Fillet Curve를 연결합니다. (우선 Set Spline Type을 정지 시킵니다.)
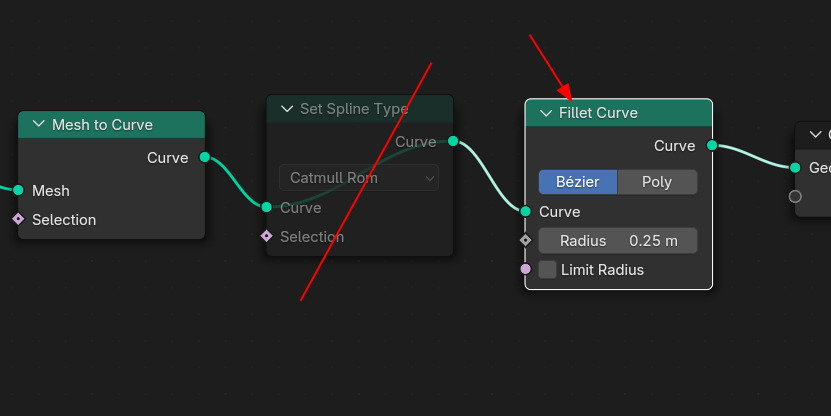
기본값은 Radius 0.25 로 모따기된 결과입니다.
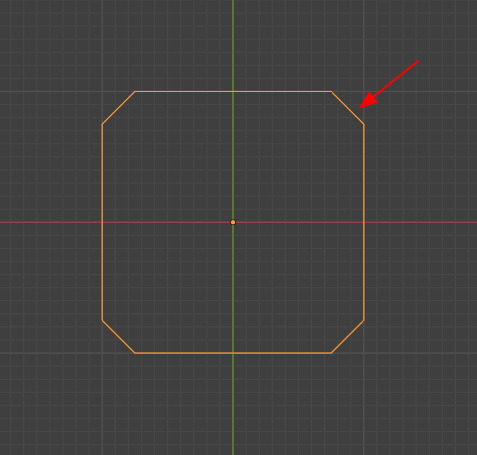
Set Spline이 정지된(없는) 상태에서 Fillet Curve타입을 Poly로 선택하고, Cout를 1 , Radius를 0.25m로 하면,
Count가 1번만 있는 반지름 0.25m의 반경의 모따기의 결과가 나옵니다.

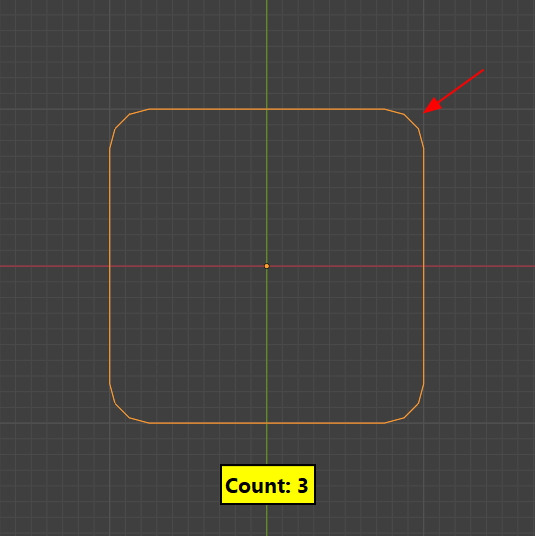
Count 를 3으로 올리면, 3단계의 Poly가 적용된 Fillet상태를 보여줍니다. 메쉬의 결과물입니다.
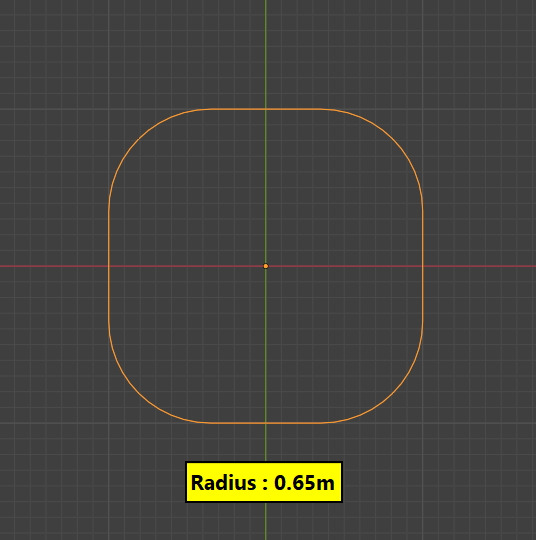
여기에 다시 Set Spline Type을 활성화 시키고, Bezier타입을 선택하고, Fillet Curve도 Bezier를 선택하면
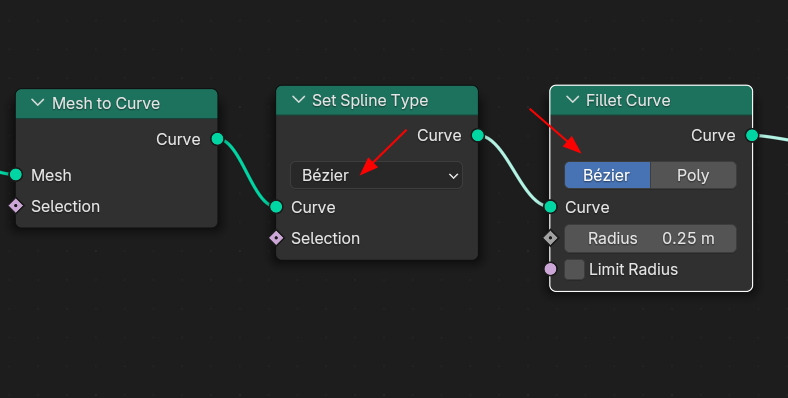
Count가 필요없이(커브 이므로) 부드러운 라운딩된 Fillet의 결과물이 나옵니다.
Radius를 더 크게 하면, 큰 Fillet의 결과를 확인할 수 있습니다.
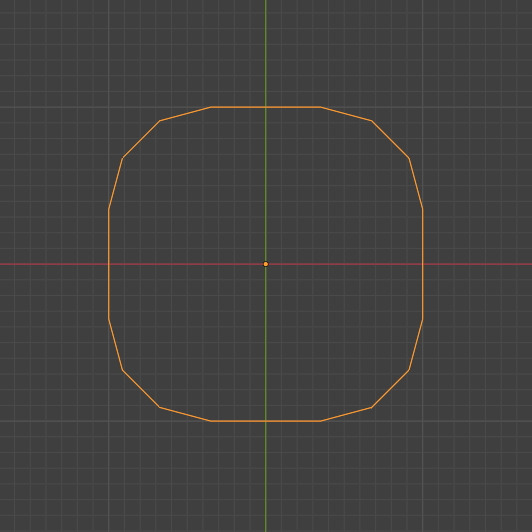
다시 Set Spline Type을 Poly로 하고, Fillet Curve타입을 Poly로 하면,
이렇게 Poly 상태의 결과를 확인할 수 있습니다. 이렇게 Set Spline Type과 Fillet Curve의 타입을 맞춰야만
예측하는 결과를 만들수 있습니다.
🏆 국비지원! 수강료 무료!💸💸💸
👉 Blender로 나도 제페토크리에이터!수강신청 https://litt.ly/solongos
☕제페토 카페 https://cafe.naver.com/zepeto3d
#블렌더 #블렌더툴 #blender #blender3d #블렌더강의 #zepeto #제페토 #국비지원 #부업 #부수익 #3d강의
'3D > Blender3D' 카테고리의 다른 글
| Blender: Curve Control 3 [6] (2) | 2025.02.24 |
|---|---|
| Blender: Curve Control 3 [5] (2) | 2025.02.21 |
| Blender: Curve Control 3 [3] (0) | 2025.02.19 |
| Blender: Curve Control 3 [2] (1) | 2025.02.18 |
| Blender: Curve Control 3 [1] (0) | 2025.02.17 |


