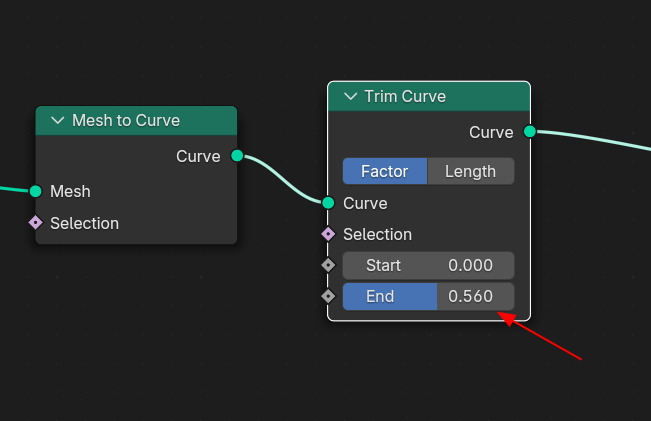
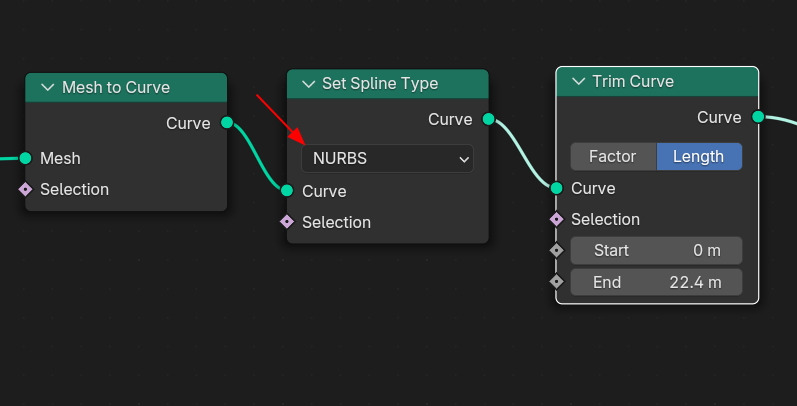
Trim Curve 노드에 대해서 알아보겠습니다.
(Trim은 다듬다 라는 뜻으로 예문으로 '손톱을 다듬다.(trim one's nails)' )
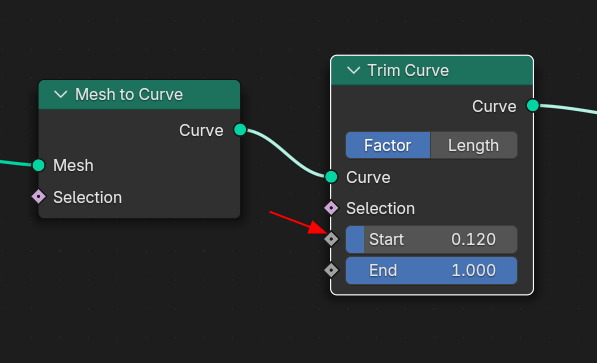
Trim Curve 노드를 연결합니다. ( 다듬을 부분이 Start와 End에서 할 수 있습니다. )

Start를 조절해 보면,
Curve의 움직임으로 어디가 Start와 End를 확인할 수 있고, Curve의 시작과 끝 점도 확인할 수 있습니다.

End 도 역시나...
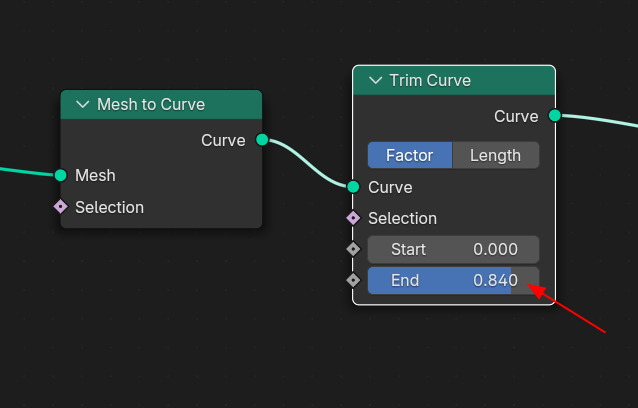
이 방향입니다. (방향을 바꾸려면, Curve, Normal의 방향을 바꿔야 합니다.)
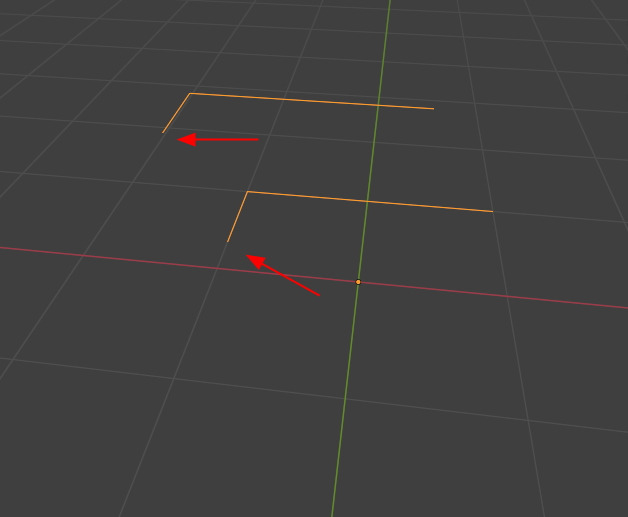
이렇게, 시작점의 위치와, Curve에서 Start와 End 방향을 확인 했습니다.

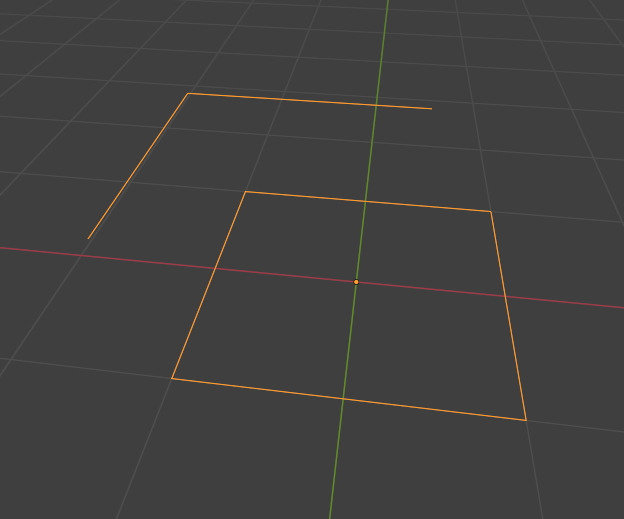
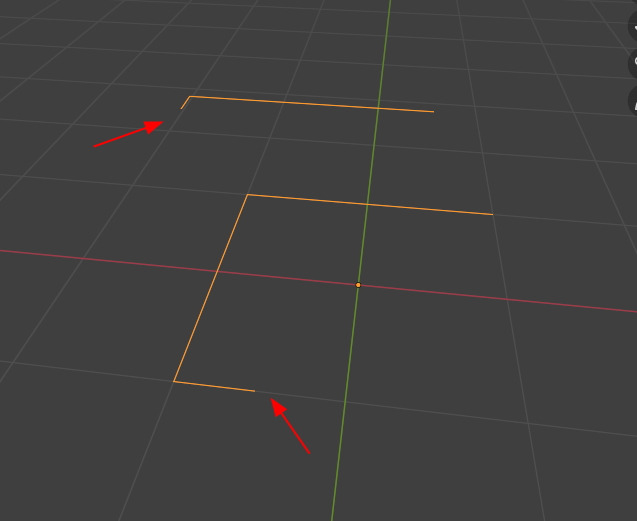
Curve의 부분을 복제해서 분리해 냅니다. (Edit mode)
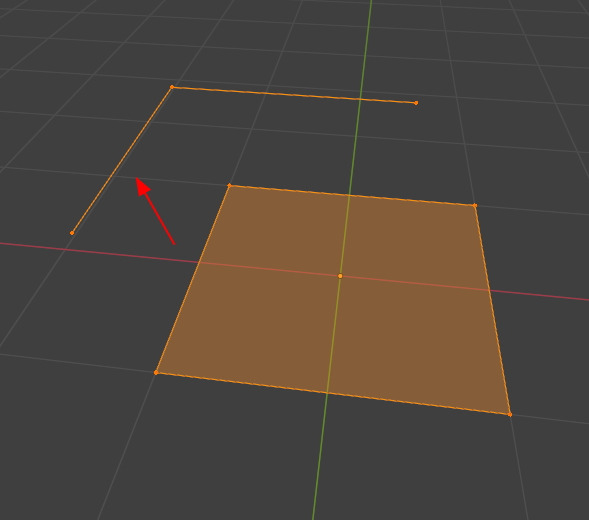
하나의 오브젝트에 한개 이상의 Curve를 가지고 있는 상태가 되었습니다.
Trim Curve의 Type이 Factor상태에서 End값을 조절하면,
각각의 Curve가 0과 1로 맞춰서, 동일한 속도로 Trim 됩니다. (짧던, 길던, 같이 시간에 도착함)
Trim Curve 타이비을 Length 를 선택하고, End값을 조절하면,
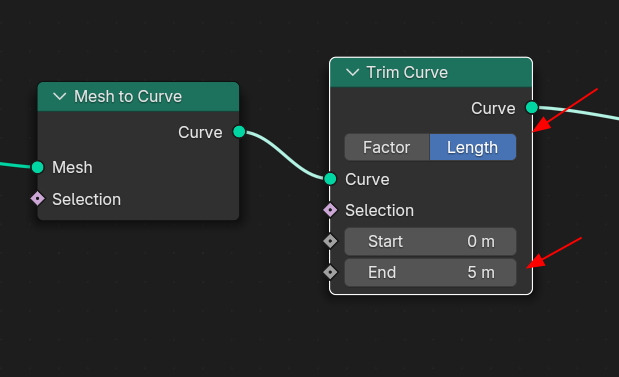
복제를 한 Curve는 변동이 없는데, 원본 Curve가 Trim 이 먼저일어나고 있습니다.
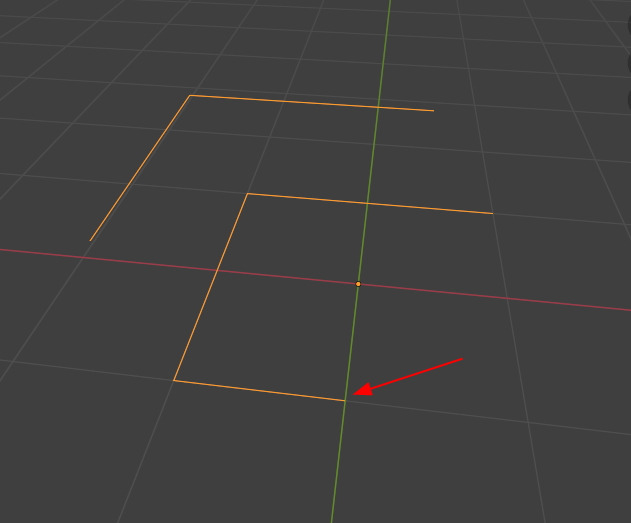
복제한 Curve는 원본에서 복제한 부분이 Trim 이 시작되자 같이 Trim이 되기 시작합니다.
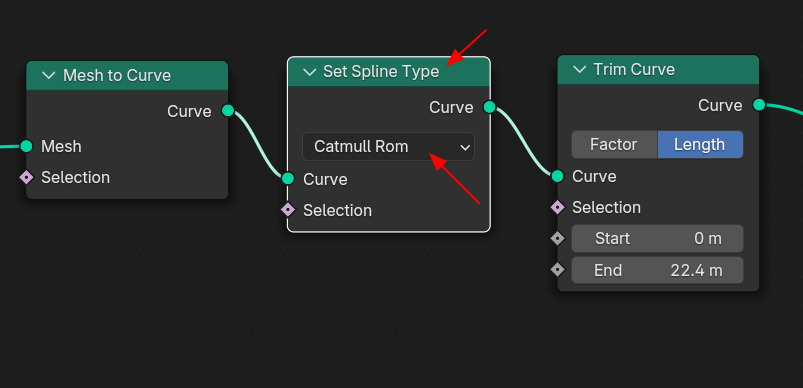
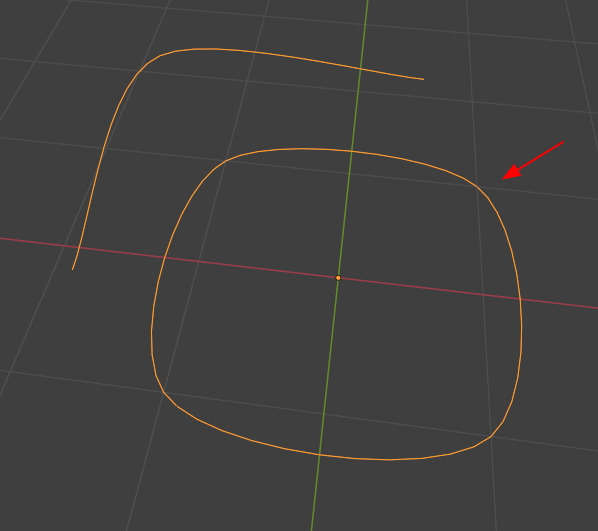
Trim Curve 앞에 Set Spline Type을 추가하고, Cutmull Rom을 선택하면,
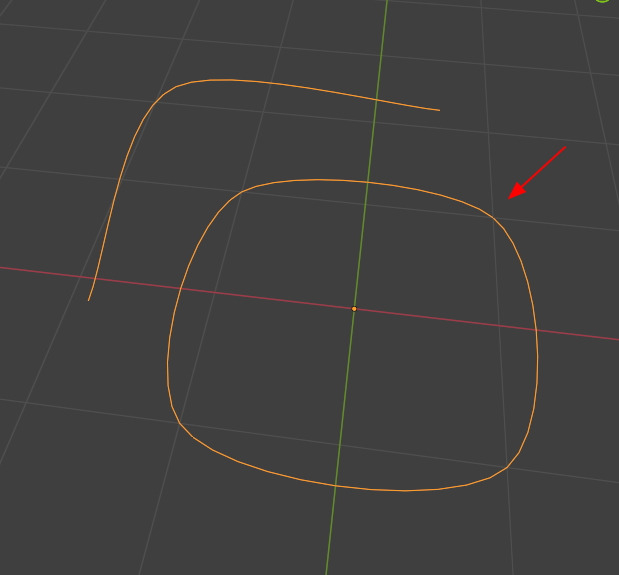
시작 점이 그림과 같이 뾰족해 집니다.

Trim curve를 잠깐 정지 시키면,
전체가 둥글둥글하게 표현됩니다.
Cutmull Rom이 아닌 다른 타입은 문제가 없습니다. Nurbs는...
잘 적용되고 있습니다.

Set Spline Type에서 Catmull Rom 을 사용하며, Trim Curve도 사용하고 싶을 때에는
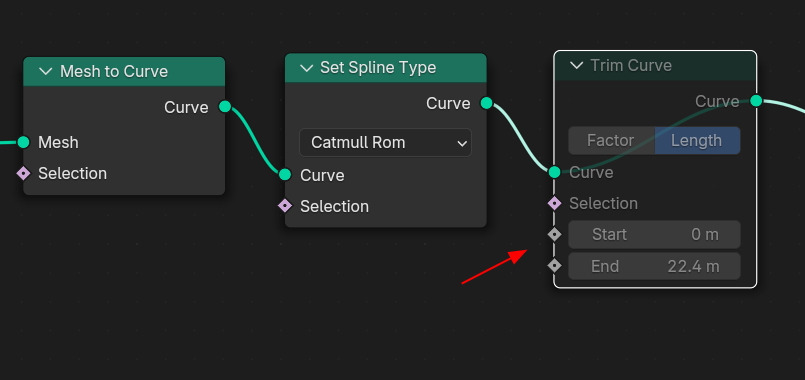
Resample Curve노드를 사용해서 Evaluated 타입으로 선택하면,
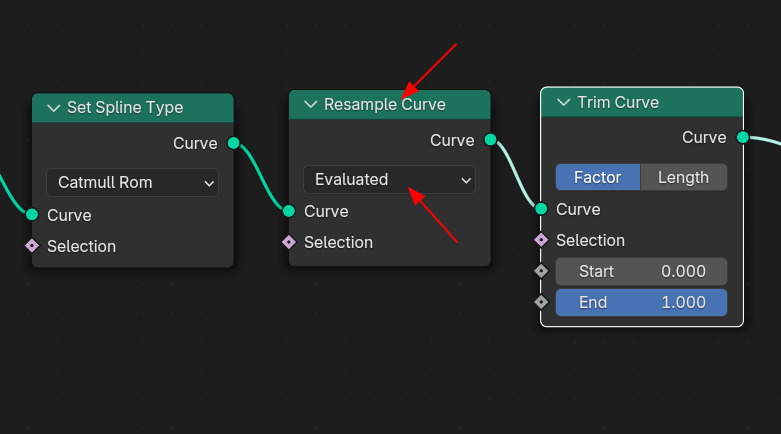
뾰족하지 않고 부드럽게 표현됩니다.
🏆 국비지원! 수강료 무료!💸💸💸
👉 Blender로 나도 제페토크리에이터!수강신청 https://litt.ly/solongos
☕제페토 카페 https://cafe.naver.com/zepeto3d
#블렌더 #블렌더툴 #blender #blender3d #블렌더강의 #zepeto #제페토 #국비지원 #부업 #부수익 #3d강의
'3D > Blender3D' 카테고리의 다른 글
| Blender: Curve Control 3 [6] (2) | 2025.02.24 |
|---|---|
| Blender: Curve Control 3 [4] (2) | 2025.02.20 |
| Blender: Curve Control 3 [3] (0) | 2025.02.19 |
| Blender: Curve Control 3 [2] (1) | 2025.02.18 |
| Blender: Curve Control 3 [1] (0) | 2025.02.17 |


