Blender에 강력한 도구 Proportional Editing 입니다.
데포머를 이용하는 듯한 놀라운 도구 인데요. 사용하기도 간편합니다.
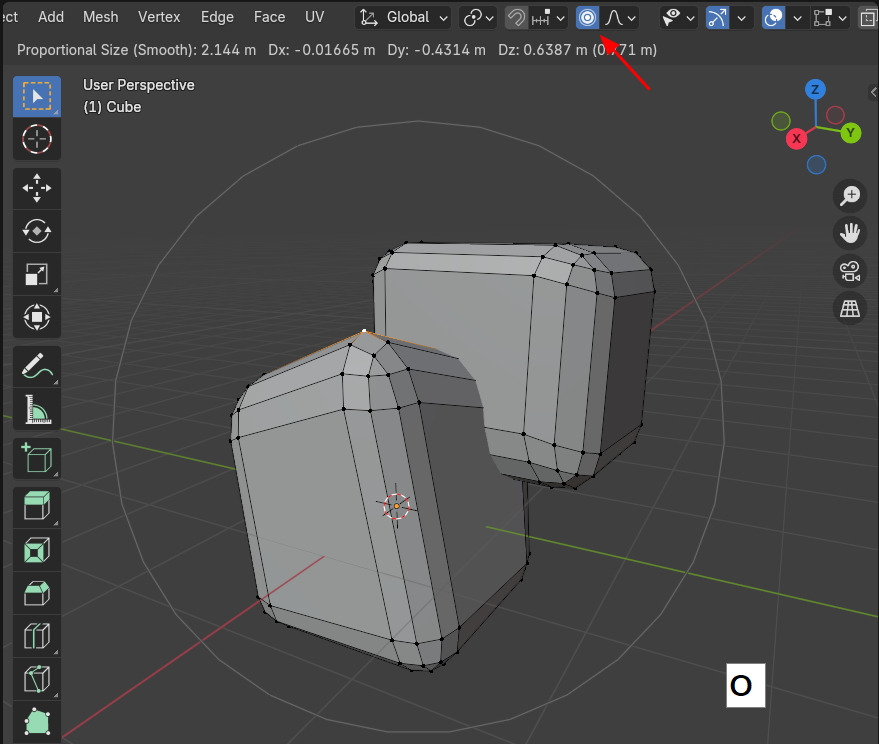
3D Veiwport 의 상단의 메뉴 아이콘 중에 '원' 모양의 아이콘 입니다.
그림과 같이, '이어져 있지 않는' 2개의 메쉬 덩어리를 가진 하나의 오브젝트 입니다.
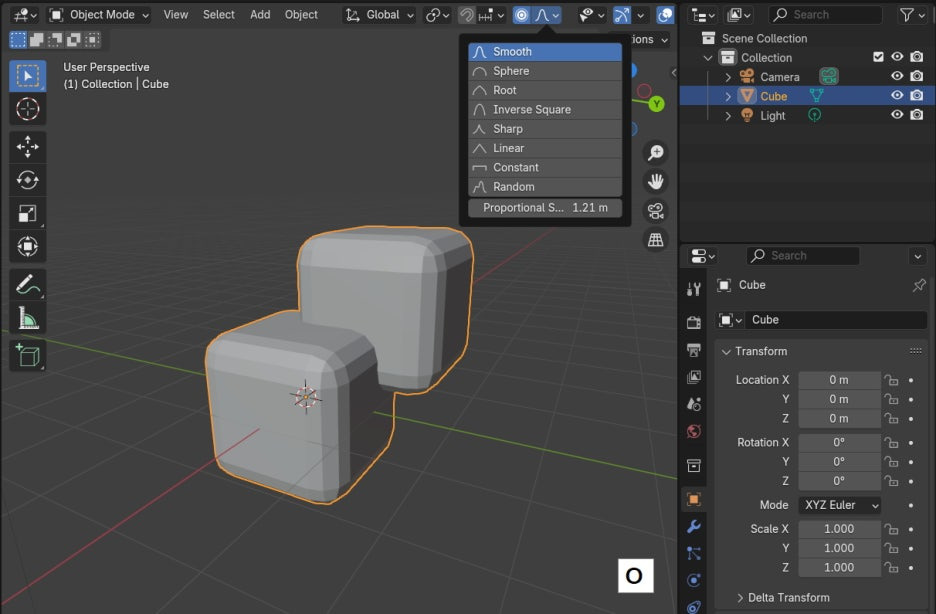
에디트 모드에서 버텍스 하나를 선택하고, G키로 움직여 봅니다. 당연히 하나만 움직입니다.
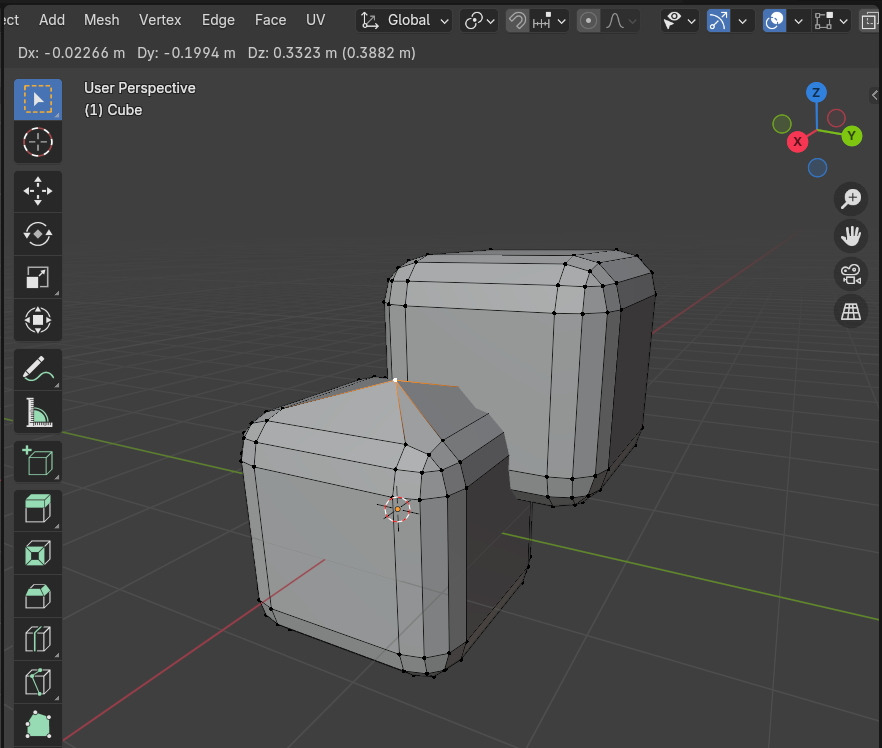
이번에는 Proportional Editing을 활성화(단축키 O) 시키고, G키로 움직여 봅니다.
그러면, 선태한 버텍스를 중심으로 회색원이 나타나고, 그 원의 영역안에 요소(element)들이 영향을 받아서 움직입니다. 움직이는 영향력은 선택한 버텍스에 가까울수록 많이 영향 받고, 바깥쪽, 회색 원에 가까울 수록 영향력이 줄어 듭니다.
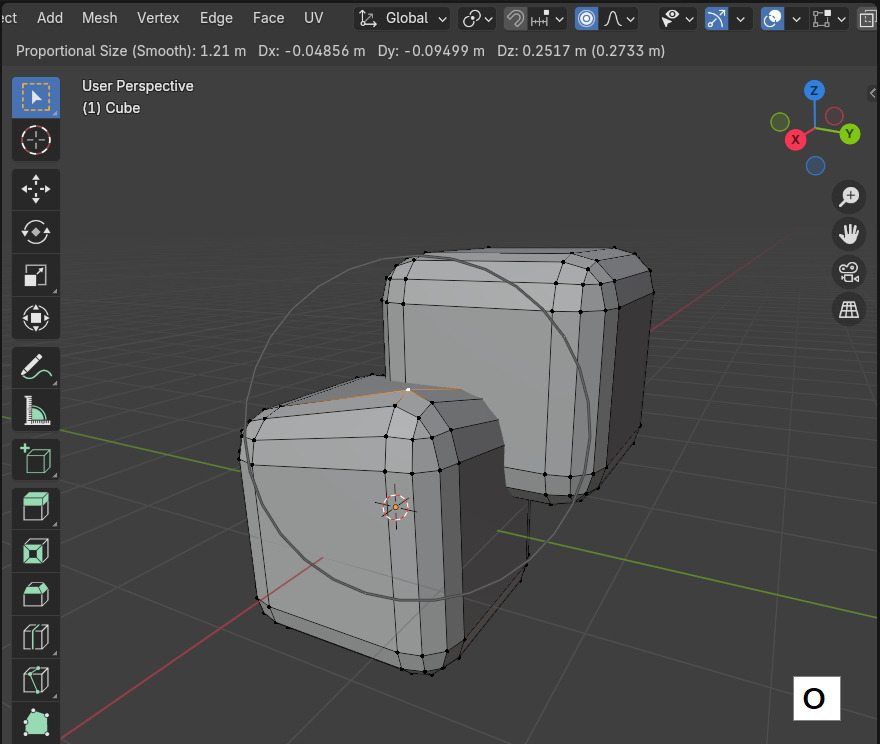
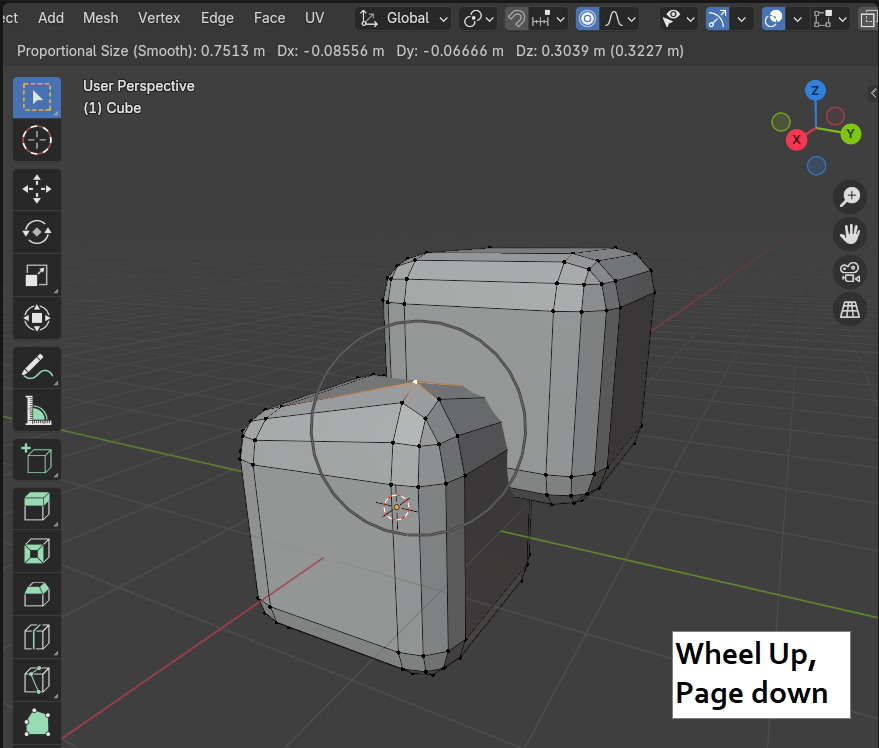
이 영향력을 표시하는 회색원의 크기를 조절할 수 있습니다.
회색원이 보이는 상태에서 마우스 휠을 위로 돌리거나 (wheel up) 또는 키보드 Page down 키를 클릭하면 회색원의 크기가 줄어들고, 영향력도 줄어듭니다.
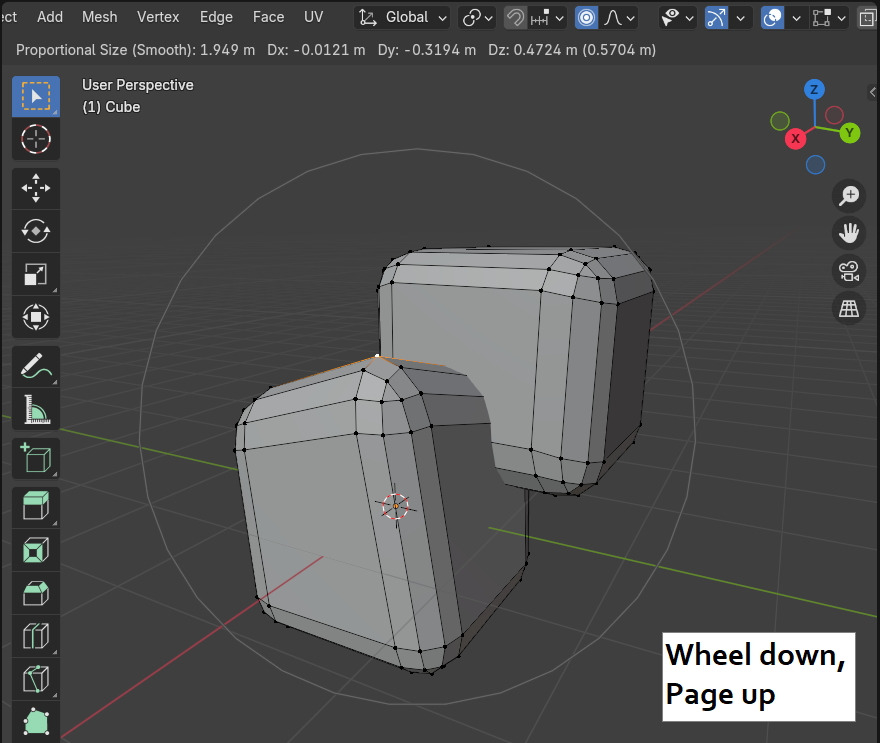
반대로, 휠을 아래로 돌리거나( Wheel down), Page up 키를 클릭하면, 회색원의 크기가 커집니다. 영향력이 넓어지는 결과를 얻게 됩니다.
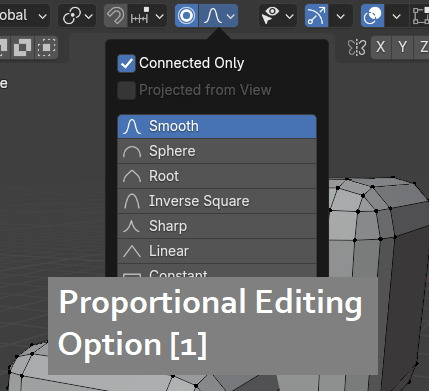
Edge 로 연결된 메쉬에만 영향력 주기 (Connected Only 옵션 활성화)
현재 보이는 오브젝트 하나의 내부, 2개의 메쉬요소들은 edge로 이어져 있지 않습니다.
Proportional Editing(단축키 O) 의 기본 모드는 가까이 있는 모든 요소에 영향을 줍니다.
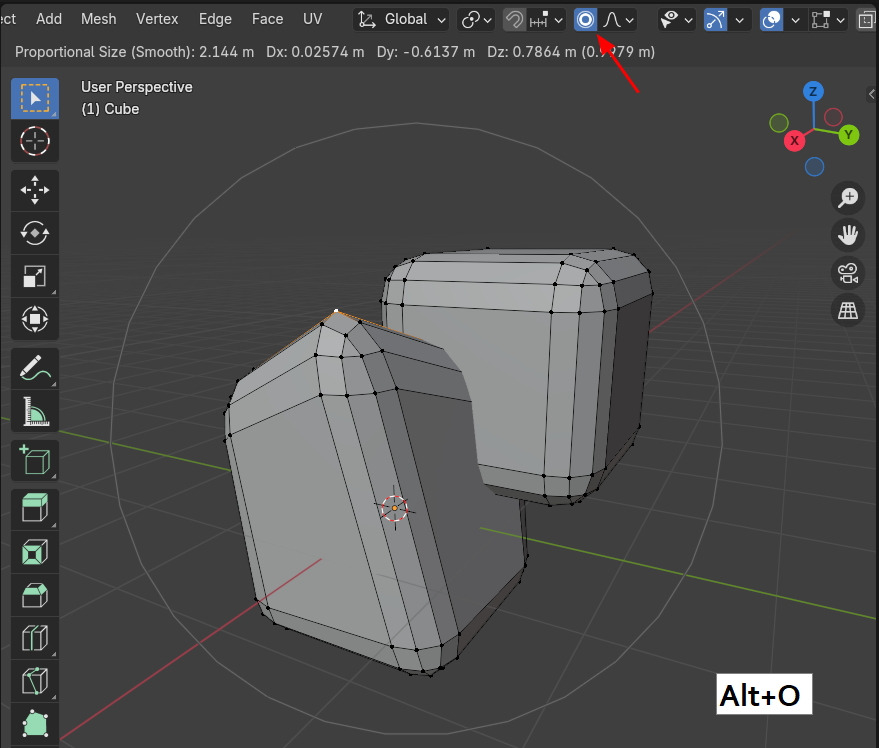
그러나 연결된 메쉬에만 영향력을 주고 싶을 때에는 Proportional Editing을 실행할 때, Alt + O 로 실행하면, 아이콘의 모양이 바뀌고, 연결되지 않은 요소들은 영향을 받지 않습니다.
( 옵션 Connected Only가 on 상태입니다. 활성화 되면 아이콘도 중앙이 빈 원 모양이 됩니다.)
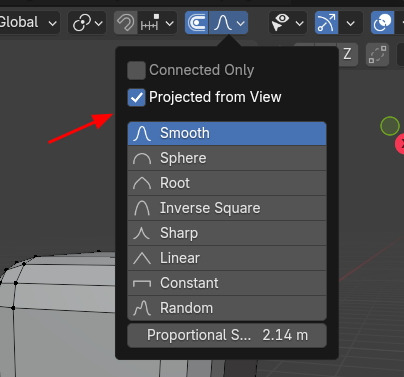
Projected from View 에서 조절하기
Proportional Editing 안의 옵션에 Projection from View 가 있습니다.
(선택하면 아이콘도 그림과 같이 바뀝니다.)
프로젝트 빔으로 쏘듯이 프로젝트 방향의 모든 요소들이 영향을 받습니다. 확인해 보겠습니다.
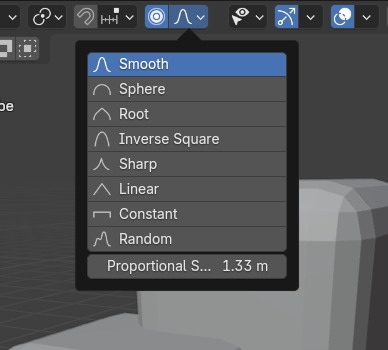
Proportional Editing 의 기본 모드는 회색 원 의 크기가 구형(Sphere) 모양의 영향영역(노란색원) 입니다.
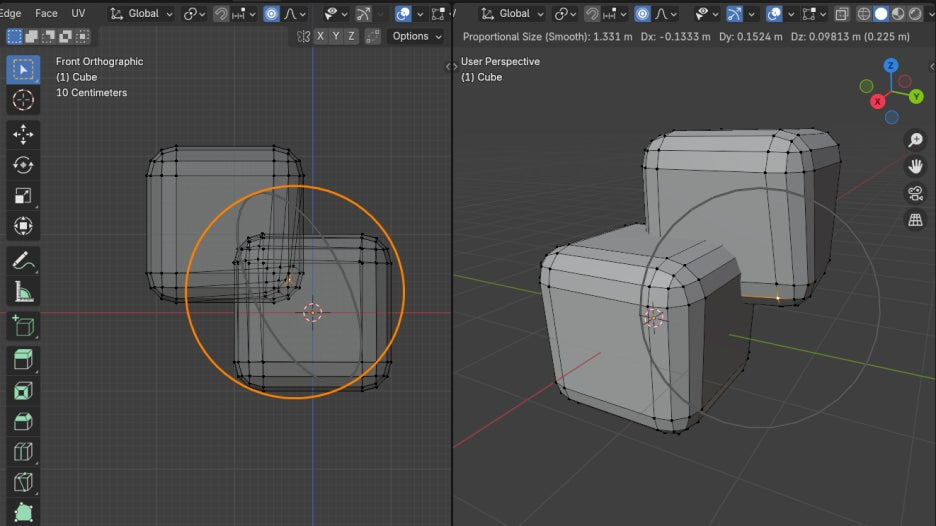
Projection from View 가 on 되면, 회색원기둥과 같이 멀리 있는 뒷 부분의 영역에도 영향을 미칩니다.

라티스 데포머로 작업하는 듯하며, 바로바로 쉽게 사용할 수 있는 도구입니다. 짱입니다. ^^

🏆 국비지원! 수강료 무료!💸💸💸
📢 Blender로 나도 제페토크리에이터!수강신청 https://litt.ly/solongos
☕제페토 카페 https://cafe.naver.com/zepeto3d
'3D > Blender3D' 카테고리의 다른 글
| Blender 4.x Snap(스냅)을 쉽게, 'Set Snap Base' (0) | 2024.08.23 |
|---|---|
| Proportional Editing option[2] (0) | 2024.08.21 |
| Blender 4.x: Clean up, Material[3] (0) | 2024.08.19 |
| Blender 4.x: Clean up, Material [2] (0) | 2024.08.16 |
| Blender 4.x: Clean up, Material[1] (0) | 2024.08.15 |


